Put a Bird on It

Happy New Year! Yay for 2016! Here in Pasadena the Rose Parade has marched down Colorado Blvd. and the Rose Bowl game has been played. Time for our little city to calm down and start getting ready to return to our regular routine.

I managed to eek out a little more fabric and sewing fun during our holiday break. On New Year’s Eve we took a family outing to see some friends on the other side of town. On the way back my husband wrangled our overtired kids so I could make a stop at The Fabric Store! I’ve been eyeing their merino jerseys for a while, but it isn’t easy to make it cross town with two small children. I was so glad to finally stop by and I wasn’t disappointed. IMG_5139.jpg

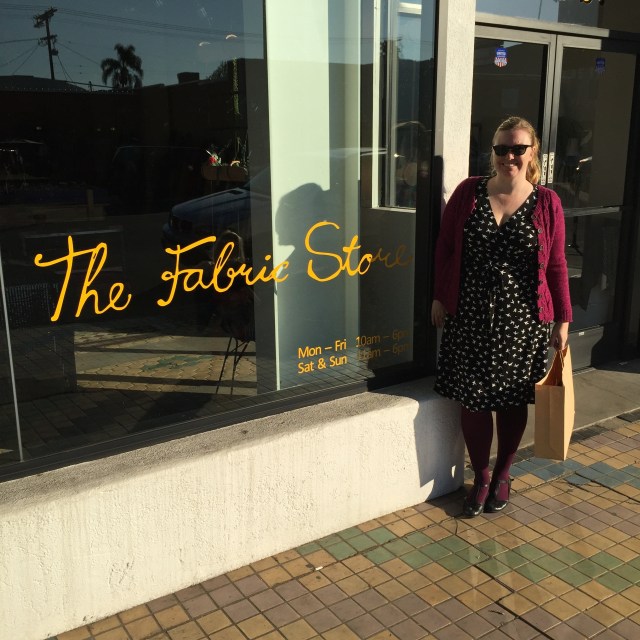
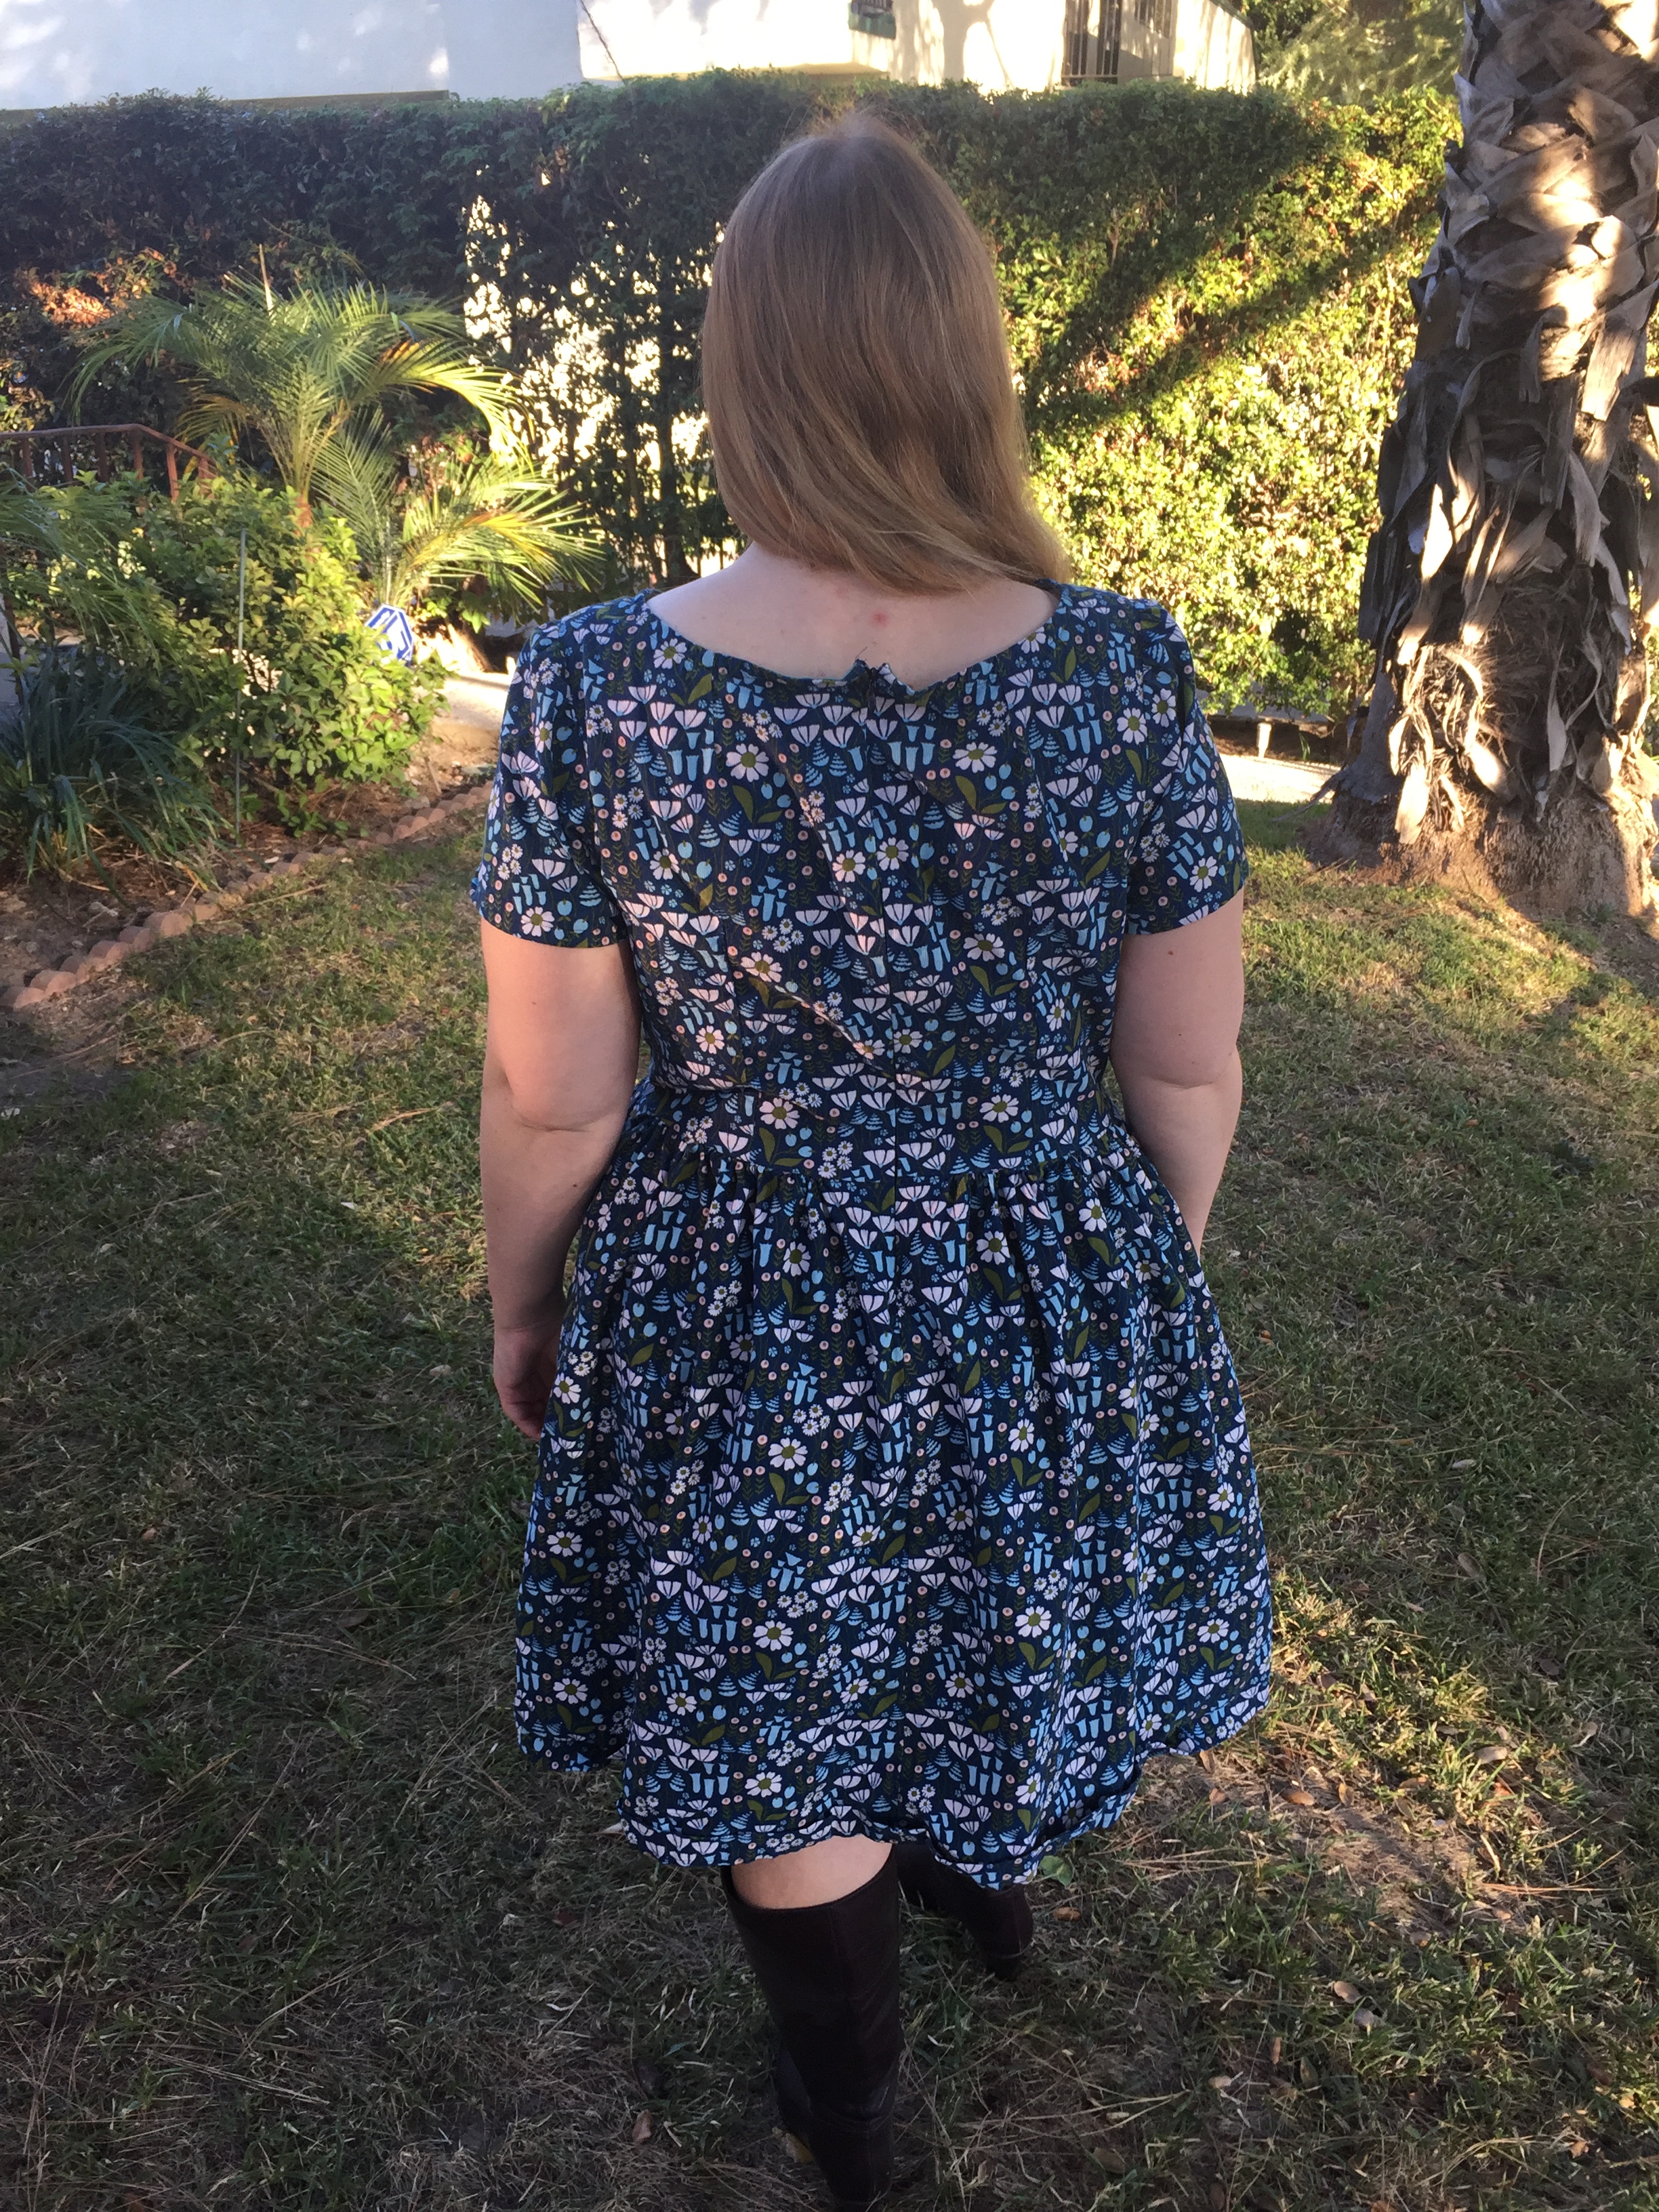
I bought two lengths of jersey to make wrap dresses. One is emerald green and the other is sort of a soft mauve color. Wool might seem a little silly in our climate, but I wear wool nearly every single day. It is so breathable! Plus both fabrics are fairly lightweight with a nice drape. And wrap dresses are so great for work wear and flattering as well.

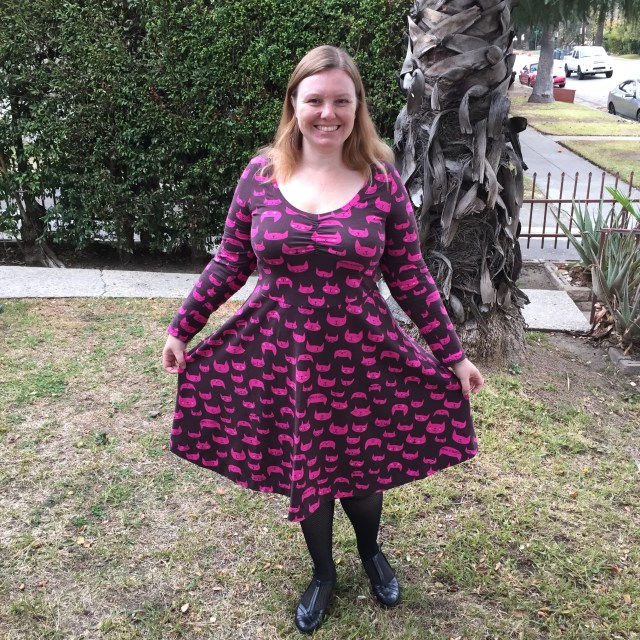
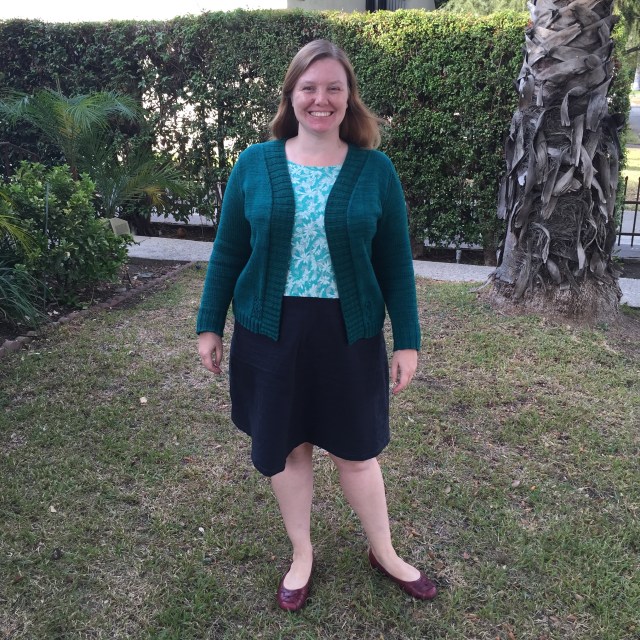
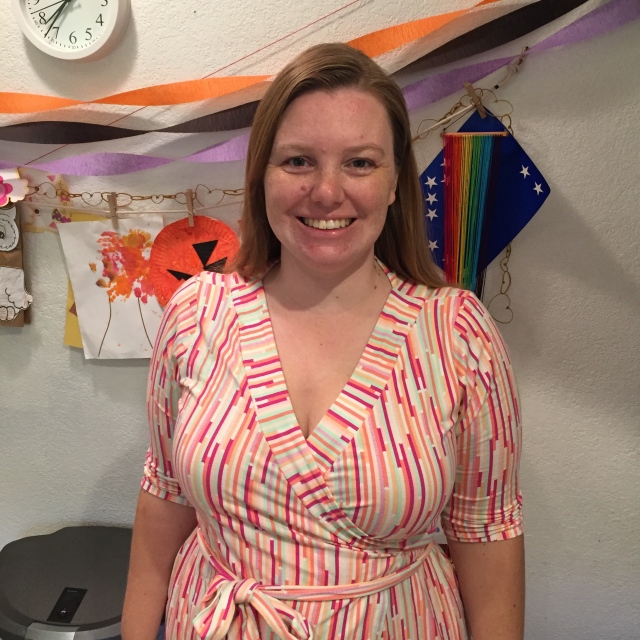
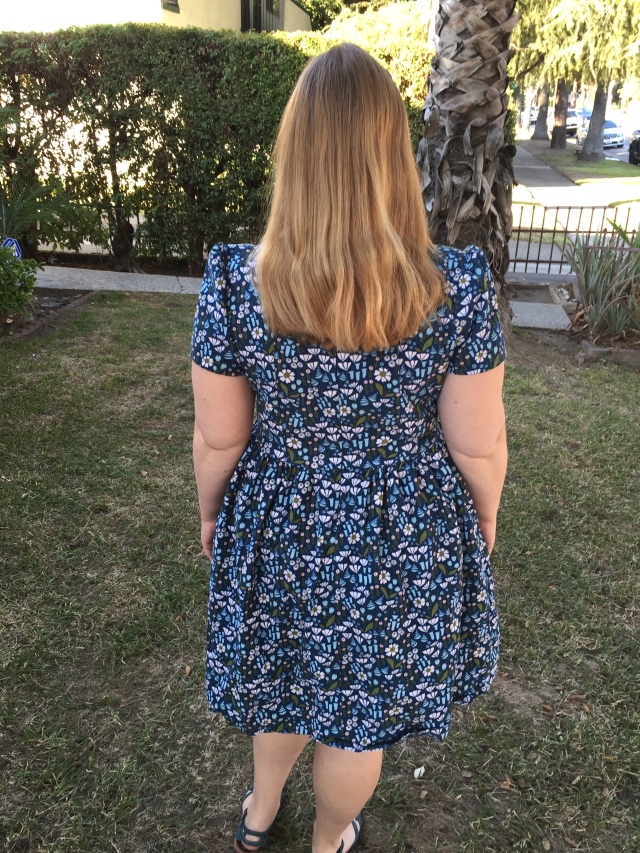
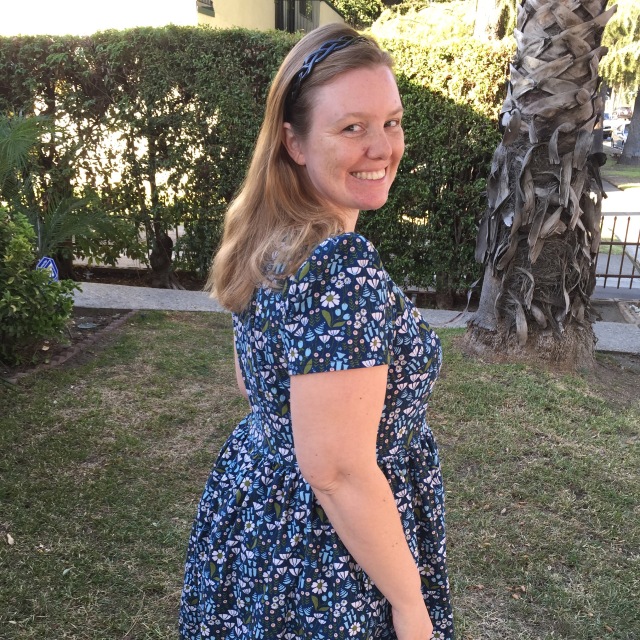
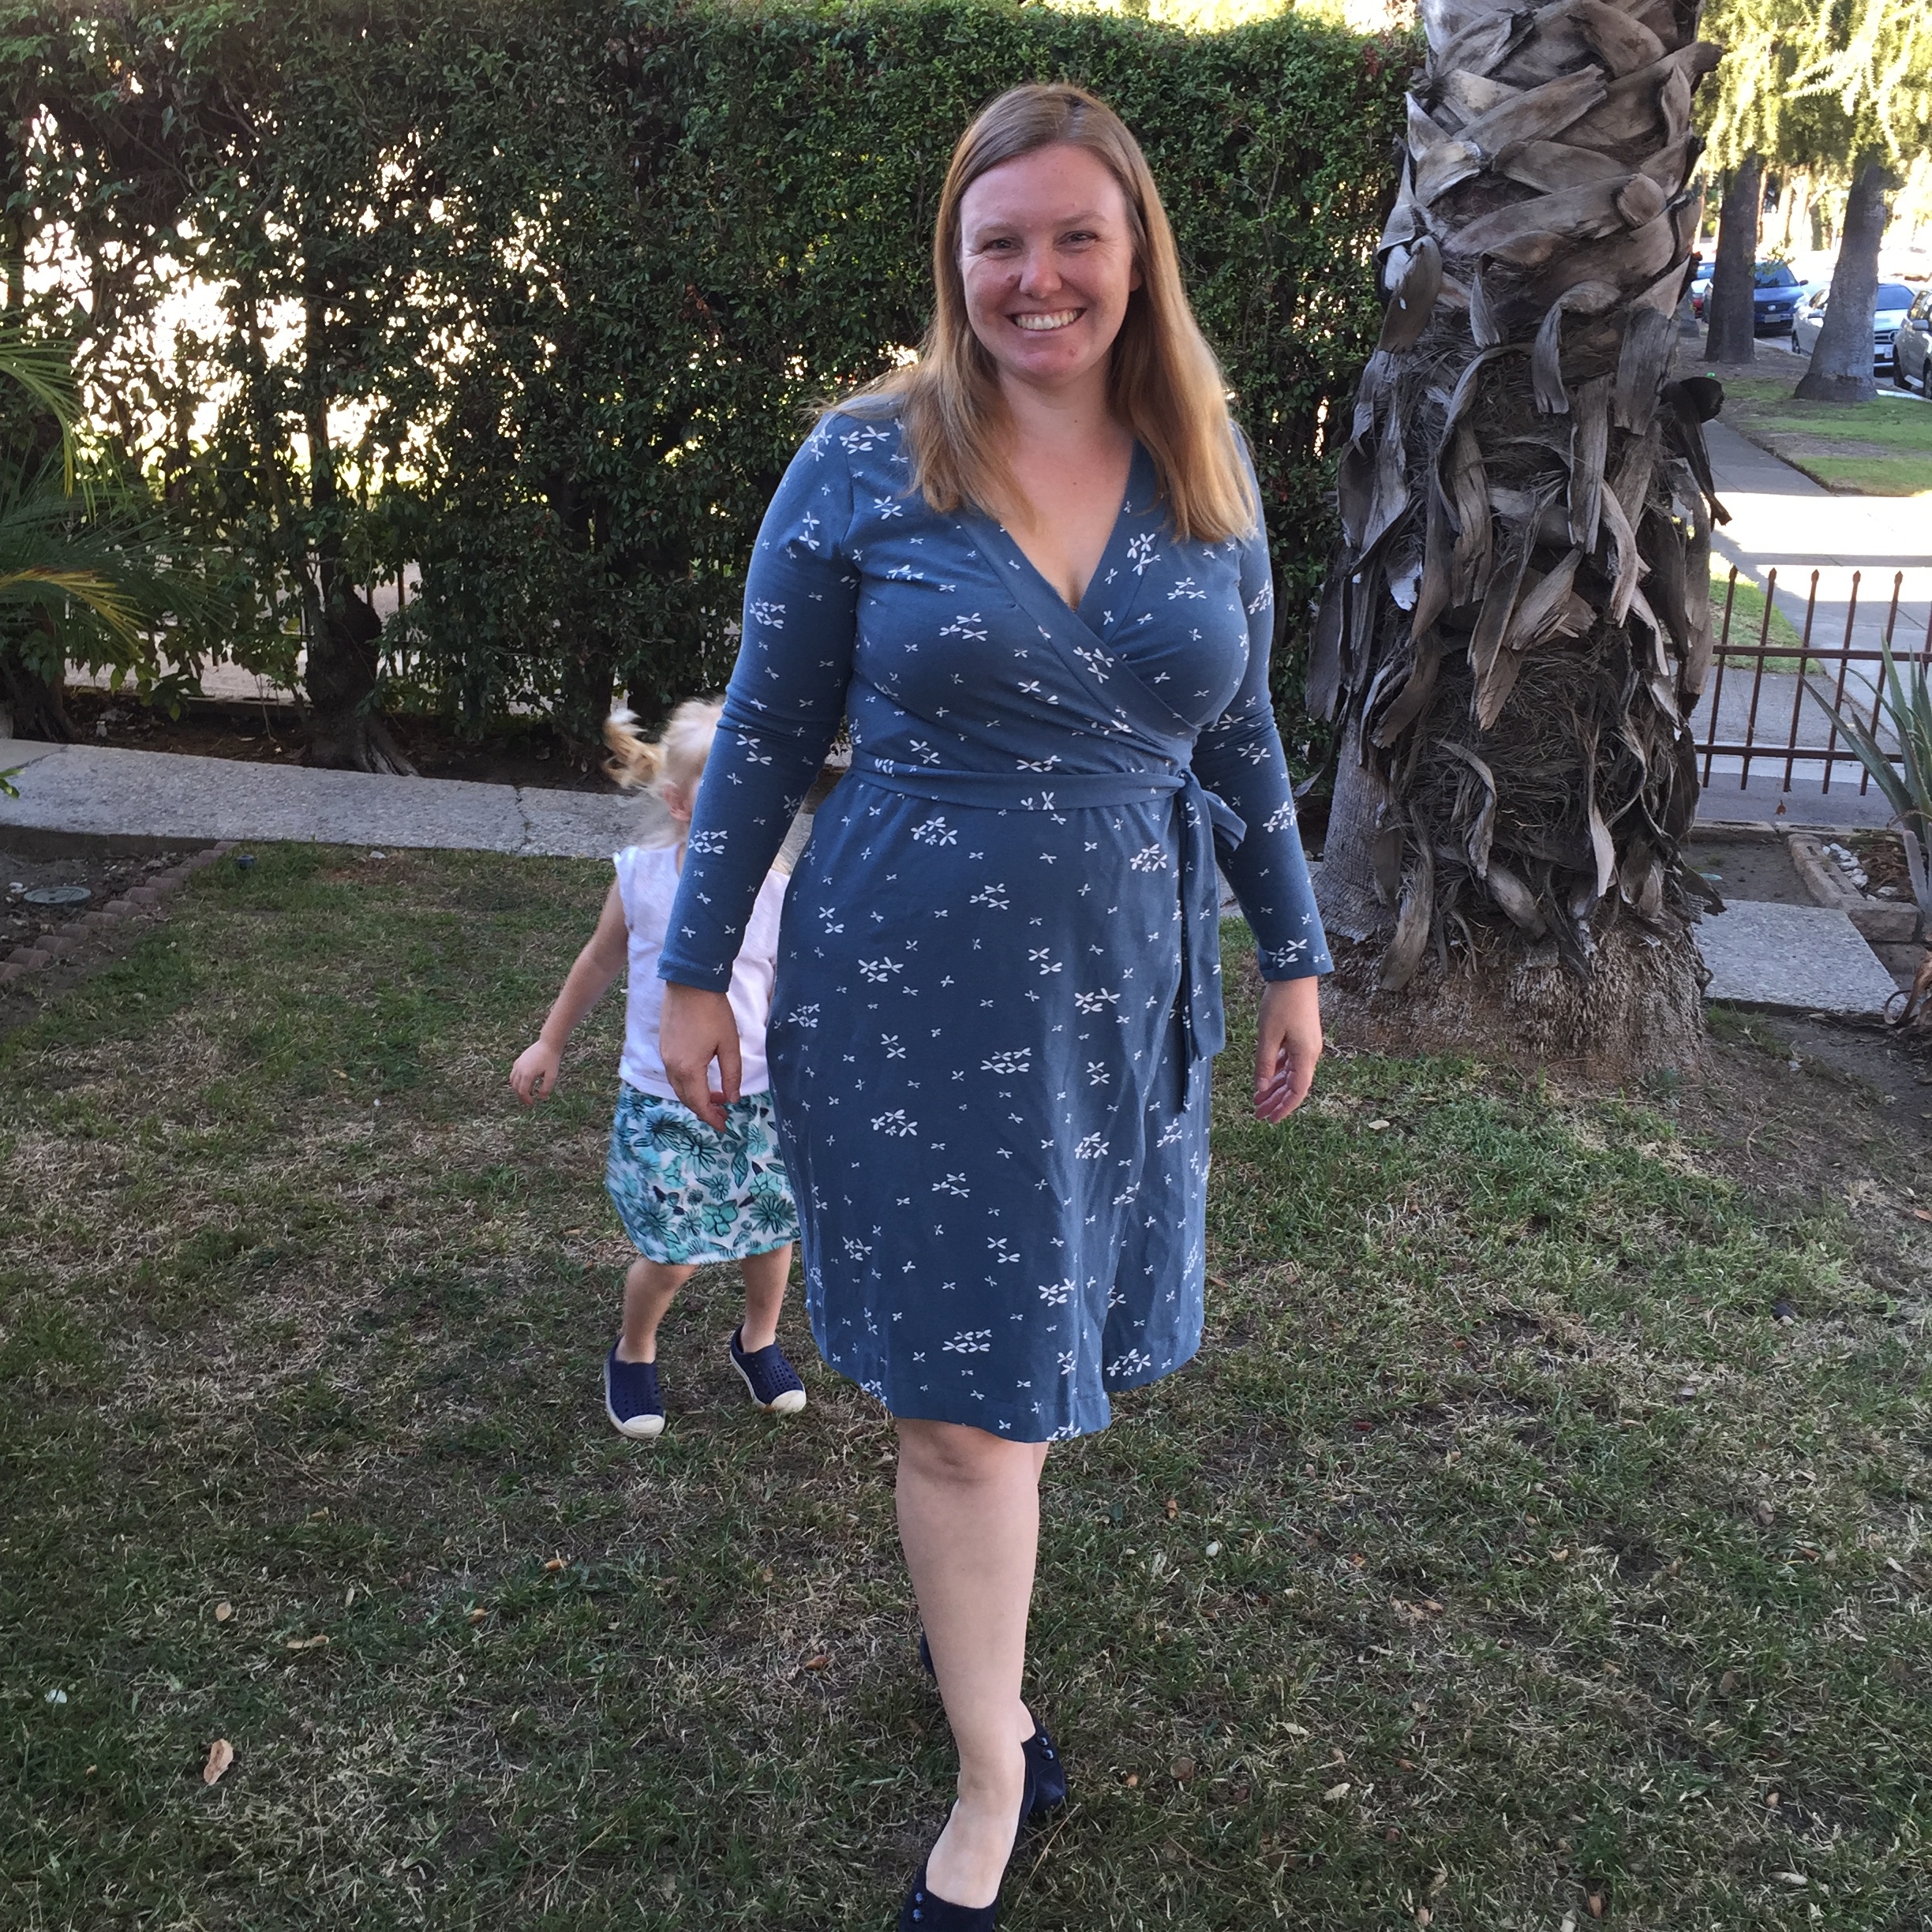
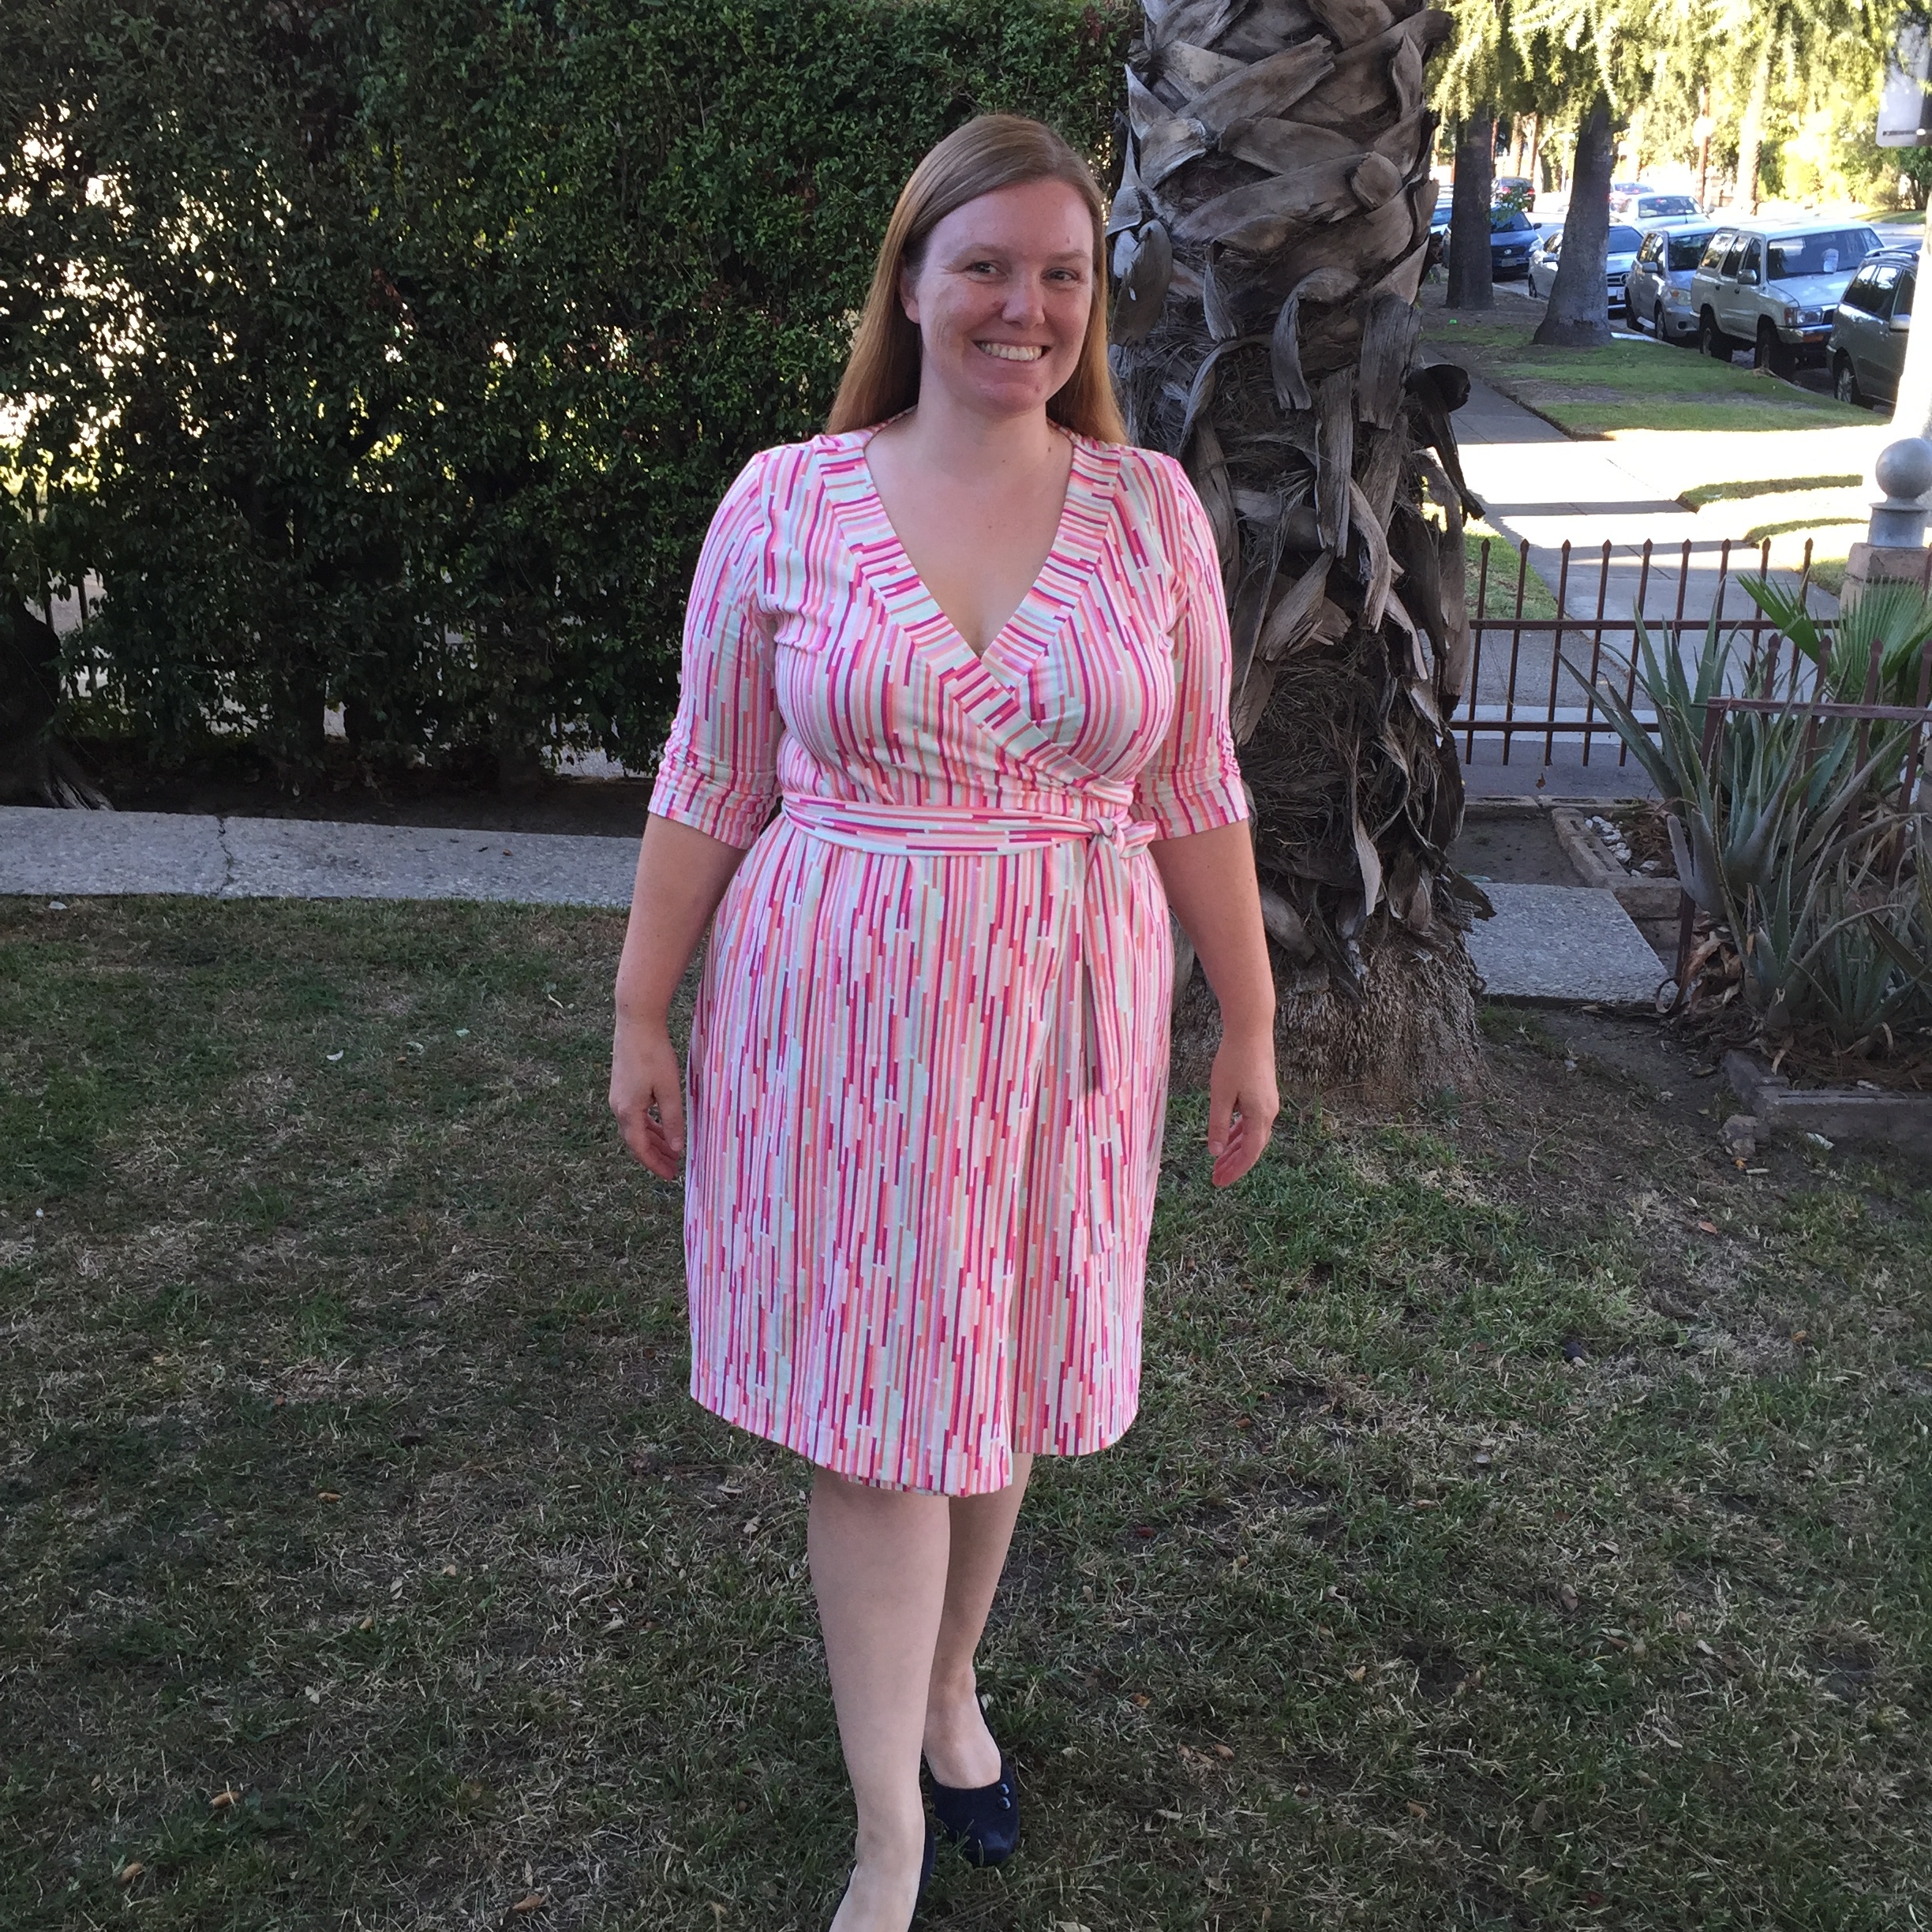
And as if friend time and fabric shopping wasn’t enough, I also wore my new Appleton Dress for the whole day to see how my fit adjustments would work out. And the answer is…nearly perfectly.

IMG_5144

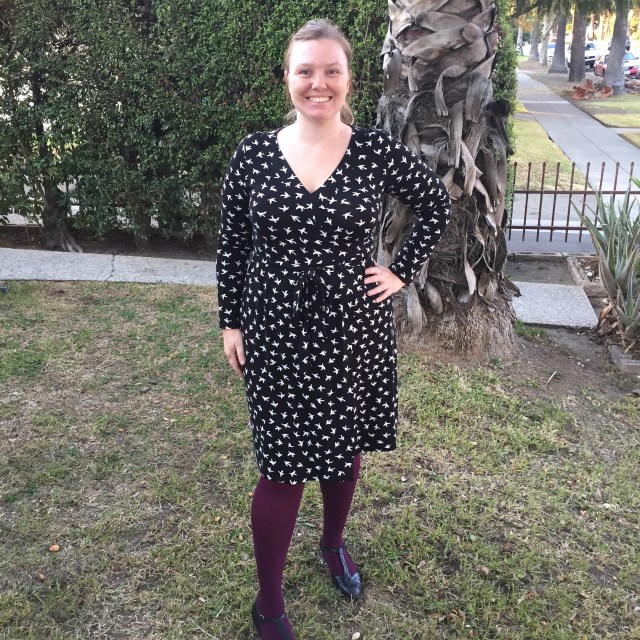
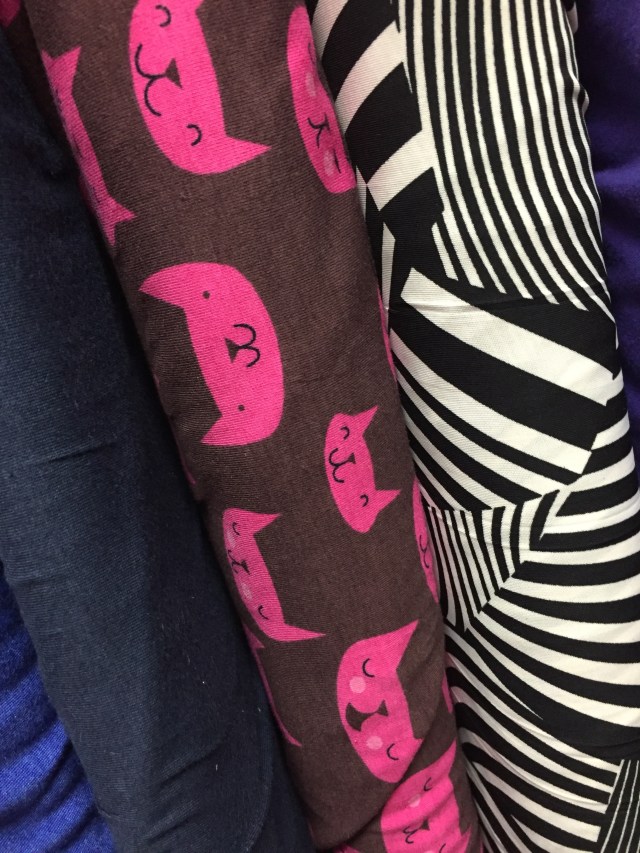
This version is made with one of the kits Jenny sold when the pattern was first released. I held onto the fabric because I was nervous about sewing with a rayon blend. But now that I’ve worn my two Appletons many times I had a much better idea how they fit and what changes I wanted to make.

IMG_5146

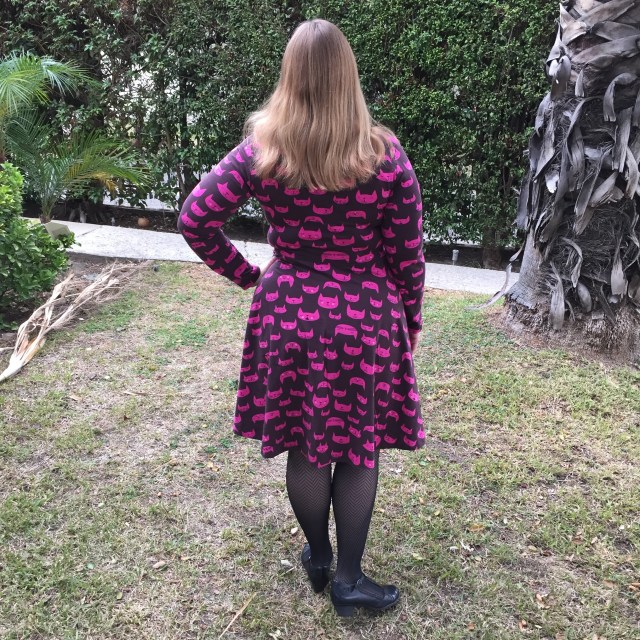
The biggest change I made was to lower the waist by one inch. This was tricky because there are no markings on the pattern to do this sort of alteration. So I ended up finding a nice small point between darts to add the length. Thankfully it worked! I cut both fronts the same so I’d have more overlap. Then I cute the neckline trim pieces a little longer to account for the extra length. That was the only fail. The neckline needed to be a tad bit more snug. Lastly I took some of the fullness out of the front armhole and now the front lies so smoothly. Perfection.

IMG_5142

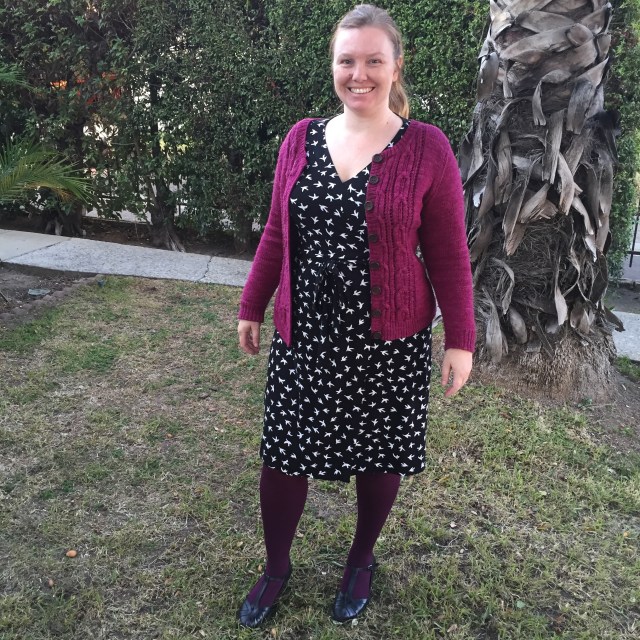
This dress will fit perfectly into my work wardrobe and I am so happy to leave 2015 with a bang! I cannot wait to keep tweaking and hacking patterns in 2016 so I can have a whole me-made wardrobe of custom fit clothes. Having a good fit really make me feel a lot more confident about myself. It’s super exciting.

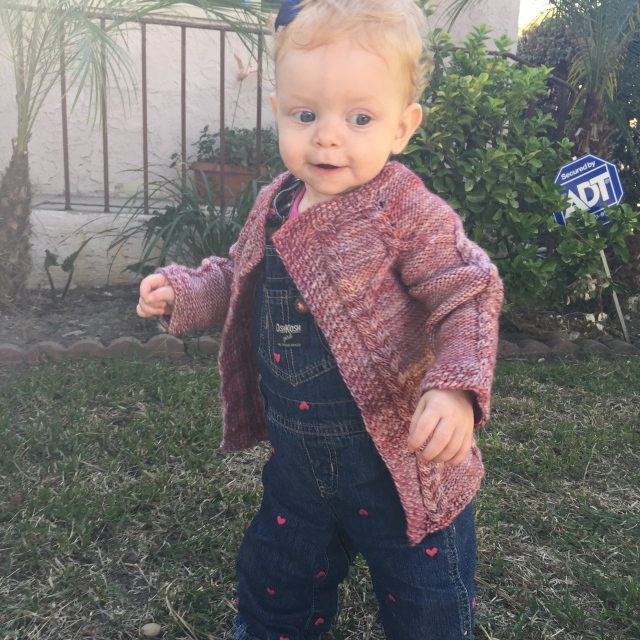
And this time Dottie got in on my photo shoot. Silly dog!


But You Don’t Even Like Cats Dress

Back in early November I came home from my local quilt shop with 3 yards of Lizzy House’s Hits Parade jersey in a cat print. As I’m showing my husband he blurts out, “But you don’t even like cats!” Ha! He has a point. I’m not much of a cat person, but that’s because I’m allergic to them. In fact I think most cats are quite cute, I just can’t get near them. But dang I love this fabric like, whoa. It’s so fun. Kitties!

IMG_4658

The fabric sat on the counter in the kitchen for weeks while I worked on various holiday projects and that whole Victorian get up until Sunday when I finally had the head space to tackle sewing math. Math is fun!

The resulting dress is 1 part Washington Dress, 1 part hack, and 1 part self drafted. I am so freaking excited about how it turned out! It looks just like the dance dresses I wore and loved back in the 1990s.

IMG_5121

So here’s the break down on how I turned the Washington Dress into more of a skater style dress.

First off I had to tackle the fit issues I encountered when I made my original Washington. Straight from the envelope I have two issues. The bodice is too short so I traced out the pattern, sliced along the lengthen here line, and then added 1 inch in length. I also took out some of the fullness I was getting between the armhole and the bust with a small dart. Both were easy alterations to make and I’ll be sure to do them whenever I make the Washington bodice in the future.

IMG_5123

Next up was figuring out how to achieve that sweet 90s style ruched neckline. I knew I could turn to Tilly and the Button’s Agnes pattern. It is so very cute and I love the style, but I really didn’t like the idea of purchasing a pattern just to look at one pattern piece. Especially since I’d achieved such a great fit with Washington. So instead I decided to try working it out myself and if it looked terrible I would purchase Agnes.

To alter my existing pattern, first I traced out the front bodice onto some swedish tracing paper (love that stuff). Then I lowered the neckline. I knew if I started the ruching as high up as the original neckline it would look kind of odd. I think I lowered the neckline about 2 inches and re-drew the curve. Before sewing the bodice pieces together I cut a piece of 3.5 inch long 1/4 inch elastic and stitched it down the center front, pulling the elastic along the way. Worked out pretty perfectly. I also cut the neckband piece to be longer and accommodate the lower neckline. I usually forget this part, so I’m glad I actually remembered this time!

IMG_5124

For the skirt I turned to my handy reference book Patternmaking for Fashion Design. Drafting my own patterns always makes me feel like a total badass, but this book makes drafting 1/4, 1/2, 3/4, and whole circle skirts so easy. I measured the waist of the bodice and then looked at Patternmaking’s handy chart for figuring out the waist radius. The next part was the only hiccup in the whole process. The first skirt I drafted was a 3/4 circle. I wanted a lot of fullness. But it was not to be. The kitty fabric wasn’t wide enough for me to cut a knee length skirt and still have the kitties facing the right direction. So I flipped back to the chart and drafted a 1/2 circle instead. No big deal. The skirt still has a decent amount of fullness and now I won’t have to worry quite as much about accidentally flashing people if a breeze comes along and lifts my skirt.

Spin skirt spin!!! Weeeee!!!!!!!

The fabric was really nice to work with. It is thin and not terribly warm, but also didn’t curl up as much as other jerseys I’ve used. I only wish it came in more adult prints. I love the kitties, but I’m not quite sure its work appropriate. I work at an arts school, but even they might find a cat dress a little much. We’ll see. I’ll probably have to wear it at least once to see my boss and her friend get excited by the kitties!!!!!

I’ve already made another one of these bodices as a tester and it turned out so nicely that I want to add a skirt. Just need to pick out fabric and I’ll have two of these beauties. I’m also glad to have found more use for the Washington pattern. It’s nice, but also very distinctive and by switching up the neckline and skirts I’ll get a ton of use out of it.


Washington Dress

This week I managed to finish up my first version of the Washington Dress from Cashmerette! And of course I couldn’t be a reasonable person and make it as shown on the pattern. Oh no, of course not. I had this idea of making it drop waisted and as you can see it was only sort of successful.

IMG_5046

Pros:

  • It is so so so comfortable. I wore it all day and it was so great. Like wearing pajamas.
  • Now that I’ve hacked it I know what I did wrong.
  • I used random fabric from my stash so this was a low cost way to test my ideas.
  • My husband really liked this dress and thought it was very interesting with the curve towards the side of the hip.

Cons:

  • I think I don’t need the hollow chest adjustment like I’d thought. I need to adjust the armholes instead like Emily originally commented on my Appleton. Doing the hollow chest alteration didn’t work. Oh well.
  • The bodice was drafted is too short. I’ve noticed this on my Appleton’s too. The waist is too high and I’m not even close to the amount of negative ease the pattern suggests. Maybe that means the dress isn’t anchoring at my waist, but next time I’ll be sure to add length.
  • By hacking it together I un-did the sway back adjustment. That was a terrible idea. I had a huge amount of pooling at the back. I took 4 inches total in two darts. It helped, but not quite enough.

IMG_5048

With all that said, I think lengthening the bodice would have fixed some of my fit woes since everything below my bust is sitting a little too high. I am contemplating adding a contrasting waist band to see if that helps.

The fabric used is Valori Well’s Quill Interlock. It’s out of print now, but dang. I wish I had 3 more yards. I love this print so much. My friend gave me 2 yards which was plenty for this long sleeve top. The skirt fabric is some mystery poly blend I’ve owned for who knows how long.

My final word on the Washington Pattern for now is…uh follow Jenny’s directions? I’ll be making another one soon, but I have to take stock of my fabric first and probably buy something new. I’d really like to try it in a solid knit top, but my only dress quantity on hand doesn’t have enough recovery for this pattern. So I’ll add it to my list for 2016 sewing. In the mean time I’ll be wearing this version with this perfectly matching cardigan and enjoying the comfort. When in doubt…put on a cardigan. It covers all kinds of fit woes.

IMG_5045

My Very Victorian Christmas 2015

Heritage Square is a museum where I try to volunteer at least once a month. It’s a museum that has several Victorian homes and usually I lead tours. However once I year I get to pretend I have a tiny bit of acting talent and spend one weekend performing in the Lamplight program.

IMG_4876

This year I was Virginia, a woman in my early twenties (ha!) who had just been engaged to Martin, a man who literally swept me off my feet. We perform a scene every 20 minutes from 4pm to nearly 9pm. It is exhausting. It is fun. It is a good excuse to make a new pretty outfit.

IMG_4874

Welcome to my home!

This year I was in the Hale house. It is the most restored home and quite lush inside! It’s also incredibly creepy and I think haunted. But at least no ghost sightings during our weekend! Just a few odd footsteps.

IMG_4915

And I made my whole outfit (except the corset)! Whew! It was a lot of sewing for a few weeks, but a little bit each night makes it easy to accomplish. I ended up making a corset cover, blouse, and skirt. Plus refashioned two petticoats. Thankfully I made a light colored chemise this summer so it was one less items to churn out in November.

The blouse came from an out of print pattern (Butterick 3417). The largest size I had was too small, but I did adjustments to the front, back, and sleeves to size it up a few sizes. I over compensated a bit, but no worries! It fits the style of the time. The fabric came from a new favorite shop, Renaissance Fabrics. I purchased the last of some dimity and fully lined the blouse with cotton lawn since this was for a winter night time event and the weather is often quite chilly. Then I finished off the blouse with lace from a fellow volunteer (thank you Kristine!) and some buttons a fellow knitted sent to me (thank you Liz!).

Really I owe Kristine a huge thank you for helping me with fabric selection. I am a novice when it comes to historical accuracy and she held my hand through the hold process.

IMG_4917

The skirt fabric also came from Renaissance Fabrics. It is their well priced cotton velveteen and was a dream to work with. Washed beautifully, a fabulous garment weight, and heavy enough that it didn’t need a full lining. I used Truly Victorian’s 1898 Flared Skirt pattern which was borrowed from another fellow volunteer. It eats up fabric (6 frickin’ yards), but was also simple to follow. The error I made was forgetting I’d be corseted when I cut the waistband. My waist corsets down 4 or 5 inches so the waist was much too big. Eventually I’ll re-do it.

The skirt trim was a light bulb idea. I wanted to trim the skirt with something I could sew right into the seam instead of having to hand sew to the velveteen. I ended up using Robert Kaufman’s Mammoth Flannel but on the bias. Then added the same lace as the blouse. So simple. The I added snap on black silk bows as the finishing touch. I just love this skirt so much. It was a joy to wear.

The weekend went by in a flash and just like that the whole program was over. But now I have a few new pieces I’ll get some wear out on my usual weekend tours.

IMG_4926

Happy Lamplight!


Man Sweater!

Last week Amy Herzog released new capabilities for her Custom Fit knitting pattern software and I was lucky enough to beta test this fall!

The new features allow you to make patterns for men and children in addition to the women’s features already used heavily in my own knitting. I am thrilled with the sweater I knit for my husband. I’ve been promising him a boring grey sweater for four years. But part of what held me back from knitting it was the lack of pattern for the yarn he had selected.

img_4758_medium2

Now that is no longer an issue!

It turned out so well. The ease they figure into the garment is very different than the ease for my own clothes. This is a straight silhouette sweater which means it has no shaping in the body. Perfect for my husband whose chest and hip measurement are the same. With an average fit it has about 4 inches of positive ease at both places.

img_4757_medium2

My only negative is that I think the sleeves have too much ease, but I will say my husband thinks it is fine. So maybe just a preference. It is the kind of measurement easy to tweak in the software if desired.

The other bummer is my row gauge was different between my swatch and the sweater so the length of the finished object is too long. Wholly my fault.

Most importantly my husband really likes his new sweater and has been wearing it all the time as our weather has turned cool. See the wrinkles from keeping it in his car so he can access its warmth whenever he needs it! He even wore it to work so he sent me this action shot! Makes me happy to see the hours of work I put into knitting for him are so appreciated.

image_medium2

And yes it is a warm sweater. I originally planned to use Harrisville Shetland in the color Sea Mist. I purchased the yarn back when I was pregnant with Lu. But since I had to knit this sweater in less than a month there was no way I could bust out a fingering weight man sweater in that short a time. Instead we looked at yarns together and settled on Quince & Co. Chickadee in Kumlien’s Gull. Which I’m now thinking I hope I told him the sweater isn’t machine washable…

In other news, I have more to share! So I hope to post up a couple times before the end of the year. In the mean time I’ll get back to binging on the soundtrack to Hamilton. Thank you Emily for tuning me in! Now I’ll have to watch for the tour to hit LA!


Process or Product

Some people love the process of making things. They make sure each step is perfect before moving forward. Maybe they take good notes. I’m not that kind of sewer. I like getting to the finished product. But I’ve been working on tweaking the fit of my clothes because finished projects aren’t worth much if they are badly fitting.

Moving forward I’m going to strive to take more time on the process of sewing, but for right now I’m in alterations land. For example, here is my Appleton Dress right after I finished it.

IMG_4619

See those folds above the bust? Well I contacted Jenny (the pattern designer) for her feedback and she mentioned something called a concave chest alteration. It can come from poor posture or a large and lower bust. That I certainly have even in a well fitted bra.

So armed with a name for the alteration needed I hit the internet and found this fantastic guide from Sew News. Ta-da! They have something you can do to fix an already finished garment! So I altered my Appleton Dress and while the fit is not as good with an after though fix, the results look much better!

IMG_4776_2

Next I tackled the Emery Dress that gave me such grief.

See the before?

Emery 2

And now the after!

IMG_4754

I ended up taking in the back all the way from neckline to waist by 1/2 inch and also re-did the zipper to take it in further. And the top of the zipper is still funky, but the rest of the fit is much much improved.

IMG_4755

Just look at how much more smoothly the fabric flows! Next I really need to make a muslin of the Emery dress so I can tune in the fit on a fabric without such a heavy pattern. And doing all these alterations reminds me how much I should make a new block. I’ve gotten comfortable with manipulating patterns and making up my own that it seem silly to so heavily alter someone else’s pattern. But on the other hand sometimes you don’t want to re-invent the wheel. So we’ll see.

Right now I am deep into making an 1899 winter dress. I need to be done by Thursday. Hopefully I make it! I know I will. All I have left to do is re-work my under garments and decorate the outer garments, but it is fussy work.


Kid Clothes – Fall Round Up

I’ve been making lots of little things for my girls this fall. They are so quick to make and so satisfying. Kids just don’t have the same level of fit concern that an adult has!

So Charlie first!

She has lots of hand me downs from her big sister and she’s teeny so some of the things I made last fall still fit. So I only made a few things for her this fall. Such as this cute little cardigan she modeled on her first birthday.

IMG_4509IMG_4516

This was part of a KAL on Raverly called the Child for All Seasons. The designers put out three patterns each quarter. One that is styled for girls, one styled for boys, and one accessory. This was the Fall girl sweater knit in two skeins of very poorly matched Madelinetosh merino dk in Truly, Madly, Deeply that had been sitting in my stash waiting for the right project. This is a great littler sweater that gets worn multiple times a week!

Next is my favorite thing I’ve knit all year, a baby dress I’ve named Rainbow Brite.

IMG_4649IMG_4653

Gah! This one just kills me with the cute. I love it so very much. The pattern is the Baby Bubble Tunic and this 6-12 month size should last Charlie all winter. The yarn is something really special. Neighborhood Fiber Co. made kits called Shades of the Rainbow to celebrate the Supreme Court’s ruling that same sex marriages are legal! Woot! So I snatched a kit in studio dk . Along with some leftovers I purchased from a knitting friend I have enough to make Lu something too. So more rainbows to come!

And now Halloween costumes! One of the things I just feel a deep desire to do is make homemade costumes. This year we had a baby Madeline and Frozen’s Elsa.

IMG_4561

Charlie’s costume is a big 4 pattern. I can’t quite remember which one. I made it with some Robert Kaufman corduroy and essex with a little red ribbon tie. Super simple and this is most likely her Christmas dress too. Lu’s costume was way more involved. I started with the Geranium Dress and re-drafted the bodice so I could sew in the cape. The whole thing is built on kona cotton to give those cheap sparkle fabrics something to hold onto. I wasn’t sure it would work, but it totally did! This costume has been worn to school, and for a birthday party, and trick or treating, and around our house and it still looks perfect. Yes! Most importantly the picky preschooler loves it.

IMG_4334

And now for Lu this fall I’ve been working on making her plenty of school clothes. She wears uniforms so I bought a mess of navy and red fabric have been making things as a palate cleanser between other projects.

IMG_3842IMG_3844

First up is this Music Box Jumper from Oliver + S. This is how I learned I don’t need to go so overboard on upsizing. Lu is pretty petite just like her sister so cutting a 3 with 4 length turned out kind of crazy big. But she still wears and lives this jumper.

IMG_3937

Next is another Oliver + S pattern, this time the Music Class skirt. It’s cute and very functional, but I will admit it is not Lu’s first choice to wear.

IMG_4665IMG_4670

Last of the uniforms is this Flashback Skinny Tee turned dress! I actually made two of these at once because I figured something this soft and easy would be a hit. It is. I will definitely be making more of these those I want to pick up some fun fold over elastic to trim the necklines.

IMG_3914IMG_3916

What uniform would be complete without a sweater for those chilly fall mornings? So now Lu has a Peachick Eyes Cardigan knit with Madelinetosh Dandelion in the Vintage Bandana color way. Another item she wears all the time. Sadly with the time change our mornings are much much cooler so another warmer sweater is already in progress.

Whew! So made kid things completed this fall with more to come, but also so much love put into clothing my girls.

An Apple a Day!

I’ve gone a tad bit nuts this week making new dresses for myself. The high temperature never topped 75F all week and now that the time has changed most of the time I am outside is in the early morning or after dark. I suddenly found myself wearing sundresses and cold.

Plus I got a new pattern in the mail right before the Halloween madness and I really really wanted to give it a go!

This week I worked up two versions of the Appleton Dress from Cashmerette! At first I wasn’t quite sold on the pattern, but then I read it came with 3 different bust ranges and a sway back adjustment built in! Sold!

I bought one of the kits she had for purchase, but I’m a little nervous to cut into the rayon jersey. So I turned to some Art Gallery jersey I’d bought but didn’t particularly love. It was not quite the color I’d expected so it has been sitting unloved. Then the other night I decided to go for it! Usually I don’t drink any alcohol on weeknights, but I’d really wanted a glass of wine. Bad idea. Between the wine consumption and the preschooler interrupting me with a request to shoo away a monster in her closet you could say I was distracted. And cut a straight size 14 E/F. I also cut two right sleeves and the front pieces backwards. Whoops! 

IMG_4626

It’s actually not near as bad as I thought it was when I first finished it! Wearable though a little tighter than I’d like. The fronts don’t cross over by that much and I’m interested to see if it becomes indecent at work. The sleeves are also tighter than I’d like. I wrote into Jenny to ask about sleeve ease and she very quickly replied that her testers found it okay. Thank you Jenny! But it was still too tight for my taste. 

IMG_4630

Anyways, I took a peak at my other jerseys and picked another print that had left me stumped. Its a stripe and I figure using them running vertically would be flattering. I was right. Here is version #2 a size 14 G/H top, 16 waist, and 18 hip with size 16 sleeves.

IMG_4619

My husband said I looked like a piece of candy. Yummy. And yes! This version looks awesome, though I probably didn’t need to go to the 18 hip. Next time I’ll just grade to the 16. And I totally love how the strips work to frame the neckline and waist. Fantastic!

IMG_4623

The sleeves are a lot better fit too and not hard at all to sew into the slightly smaller opening.

But, what about the bust? Did I need to go up to the G/H size?

IMG_4632IMG_4625

I probably didn’t need to, but I did have to tug a bit to get the blue dress to sit right. Jenny’s claim is a no budge neckline, but it did slip a on both versions. Anyone have any fit tips or opinions?

And I’m on a roll churning out dresses and have two more coming soon! So I’ll leave you with a Lu photo bomb. This kid is wonderfully crazy.

IMG_4628

Falling in Love with Corduroy!

I’ve been on a real corduroy kick lately. When I was younger I mostly bought quilting cottons because those were readily available and affordable. This was back before the boom in indie fabric production. You could by other types of fabric, but JoAnn’s mostly had polyester and it was incredibly hard to judge fabrics for purchase online. The few times I tried ordering I had very mixed results. So today I love that so many of the newer fabric companies (and many older ones too) are coming out with fabrics suited to garment sewing. Bring on the corduroy!!!

Elizabeth Olwen’s collection Floratopia from Cloud 9 is gorgeous. A lot of other lines skew too twee for me, but these are more appropriate for the whimsical adult so I purchased dress quantities in two colors ways, Go Your Own Way and Tiny Dancer.

Corduroy

Then I turned to the Emery Dress pattern from Christine Haynes. I saw a sample of the Emery Dress in the window at Sew LA (which recently closed, sob!) and purchased it immediately. I love it’s classic styling with fun details. Corduroy is not a recommended fabric, but I knew from sewing with Rae Hoekstra’s Small World fabric that it is light weight and has good drape. I forged on.

It is largely a very successful dress! Emery 1

But the neckline it too big. In the front it is okay. Wearable for sure, but the back bags really terribly. You can see where the zipper is flipping out and there is just inches and inches of extra fabric.

Emery 2

So this weekend I’m going to try and tackle altering the back so it fits a little more closely. I want room to move, but this is just too much. I should have made a muslin I know, but I made this for Halloween and was on a tight deadline!  Thankfully the way Christine designed the darts in the back means that it shouldn’t be too difficult to take in and hopefully I’ll be able to update you soon! Especially since I have another dress quantity of fabric to work up and the weather is actually fall-like in LA. Yay Fall!

This sweater is cursed!

I swear. It really feels like this sweater is cursed. I’m sitting here wearing it and loving how it feels, but…blah. I’ve procrastinating writing this post and hoping I’d finish something more fun, but I seem to be hitting a streak of unsatisfactory projects lately.

Back in November of 2014 I’d just had a baby and I was on maternity leave and determined to make as many things as I could before returning to work. So I pulled out my stash of Miss Babs Yowza in Aubergine. Hello gorgeous! Nice soft yarn with a fantastic reputation. I’d purchased it from a friend who didn’t love the color, but I found it to be so beautiful.

And at first I thought it was destine to be Fannie Fouche. Sort of a jacket/sweater combination. But then I read a few comments on Ravelry about the pattern and got cold feet. It seemed I would need to make too many alterations to the pattern for my sleep deprived mind to handle. Next!

Then I choose the pattern Effervescence Cardigan. I bought this pattern back in September 2013 and have wanted to knit it ever since.  I love the look of it! Really, I do. Several of my knitting friend have made Effervescence and it looks fantastic. I got to work and knit the back of the sweater using a mash up of Custom Fit and Effervescence. And then I just stalled.

The yarn was an issue. One of the skeins looked like maybe it had a tiny bit of a moth (!) problem. Or maybe it had accidentally been snipped at some point. By the time I would it all up I had several little balls of yarn, no, evidence of a moth problem, and no desire to actually keep knitting it.

Stall…

But then, magically I found some desire to pick this project back up and transform it into the ultra classic and chic Acer Cardigan!

Acer 3

Isn’t it pretty! But of course there were further complications. I got to the end and lost one of the sleeves! Frustrated and annoyed I just bagged up the pieces and hoping I would some day find the other sleeves. Finally in July I found the other sleeve! YES!

It all got sewn together and I bought buttons last month and managed to get the whole thing put together.

Acer 1

The detailing is so so so pretty. And it fits pretty well considering I knit it to fit my pre-baby #2 body. Wishful thinking. Though a little tight across my backside.

Acer 2

Over all very wearable and pretty. But I swear this sweater was just destined to be cursed because today is only the third time I’ve worn it and it is already pilling like crazy. At least it is no longer in my works in progress bin.