Sense and Sensibility – The Elegant’s Lady Closet

img_4153

Oh look, Regency dress!!! I was very unsure how this silhouette would look on my bottom heavy frame, but it turned out pretty well! It’s all due to peer pressure. Two of my friends wanted to go to a Jane Austen Evening and it gave us all an excuse to sew for a different time period.

Project: Jane Austen Evening Dress

Recipient: Me!

Pattern: Both from Sense and Sensibility, The Elegant’s Lady Closet for the dress and Regency Gown for the bodiced petticoat.

Fabric: Lots of stash busting on this one. Lavender dimity from @shopmakethislook on Instagram. Ribbon I bought at Costume College in 2018. Lavender organdy left over from my Lanvin reproduction, and left over white tulle from my (unblogged) Rear Window dress. White for the petticoat and hem came from Dharma Trading, but I can’t remember what I used.

img_4155

I love the back so so so much.

Hand embroidered purse to coordinate with my dress!

img_4160

I even found white ballet flats at Target in January. Why? Who knows. But I hot glued some pleated organdy on those suckers and it really made the whole ensemble that much better.

My friend group is planning to go again this year and I’m torn on whether to make another dress. How many Regency dresses does one woman need? I might just wear this one again because I still love it.

1918 Winter Ensemble

The museum is already planning Lamplight for 2019, so let’s look at what I made for last year’s program!

The 2018 holiday program at the museum picked the very boring fashion year, 1918. Our costume coordinator on the night of the performance said, “I think pretty good considering.” Ha! The late 1910s do have a pretty subdued palate, but I think I did pretty well on our limited budget. I ended up pulling everything from my stash except the skirt fabric! No way I could have done that if I’d needed a bustle dress, but 1918 is a pretty tame fashion year.

img_3899

But for fun, this time I thought I’d show you the under layers too. All these historical looks take some serious underwear and even though the 1910s are more relaxed, there are still underclothes.

The bottom most layer is a chemise. This is one I made years ago and I wear it under any light colored ensemble. Is that historical accurate? Heck no. I don’t care. Chemises din’t change a huge amount , so I think its good enough. I’m also wearing knee high stockings, sturdy shoes, and an underbust corset. I bought the corset, but I’m starting to maybe think on making my own. Or even better, do a trade with another costuming friend to see if we can do a skill trade.

Next up is a corset cover and petticoat. This corset cover was made last year when we performed Cinderella. I swapped the red ribbon for a white one and even though the cover was patterned after an original from 1880, the style was super similar to the 1910s. The petticoat is new! Nothing I already owned was short enough and shaped correctly. Thankfully I had left over black twill from Lu’s halloween costume. It wasn’t much, but by stitching a few panels together, I had just the right amount. Thank goodness I saved that strange shaped remnant.

Next, the blouse! Made with remnants from the girl’s baptism dresses using Wearing History’s Elsie 1910s WWI Era Blouse. It came with the original instructions that are best described as brief. But the blouse was similar to others I’d made so I was able to muddle through.

Finished with a skirt of plaid purchased from Renaissance Fabrics. I love their selection, reasonable prices, and fast shipping! The pattern is the 1918 Ladies Two Piece Skirt from the Vintage Lending Library. It also came with original directions that were pretty confusing, but Wearing History’s YouTube channel came in VERY HANDY!

So that was my sewing for last year’s Lamplight program. Next up…the knitting!!! We had a super tight budget last year so I am so thrilled with how much I was able to source from our own home.

Lanvin Reproduction

Okay, this was THE MAJOR PROJECT of spring! Heritage Square holds a fashion show and tea every spring. In previous years I worked the event, but this year I asked if Lu and I could walk in the show. Then I lost my damn mind and spent way way way too much time trying to figure out something that met the theme that also worked for our ages and was a known mother/daughter duo. I also needed to find something that was achievable.

I ended up finding 5 or so options and then asked the organizer which she preferred. And she was very unhelpful by telling me to choose. Darn it! In the end I selected Jeanne Lanvin and her daughter Marguerite.

Here is the fashion plate I selected.

sc113672

From the Museum of Fine Arts Boston

And here are our finished ensembles!

img_0135

I’m pretty darn proud of how nice our dresses look. Not exactly like the original design, but certainly close enough for real life.

I drafted both dresses from a basic bodice. Lu’s was based off the bodice block in the Building Block Dress. I used the pattern I fit for Christmas and then added cut on sleeves. It is a little tight to get her arms in, but it works! Then I added a densely gathered skirt. Mine is based off my sloper with a very slightly dropped waist. I’m sure on a slim woman there would be no bust darts and the waist would be lower, but I altered those things to better suit my figure. I love trying to be historically accurate and making clothes fit is an accurate direction to go. People have always preferred clothes that look nice!

I also drafted Lu a simple slip to wear underneath. I used cotton lawn for the top and organdy for the skirt. Jokes on me though, organdy is…sheer! I had to go back and line the slip with more lawn. On the plus side the slip organdy was a freebie my boss brought me years ago. She was so pleased to hear I’d used it. I had enough to do both our slips, but mine is not fully lined I think. My memory is kind of foggy on the details at this point. I made my entire ensemble in less than a week and did not have the time to sweat the small stuff!

Both dresses are made with organdy I ordered all the way from India. I’ve never ordered fabric from so far away, but I found the recommendation on Historical Sewing and figured Jennifer wouldn’t recommend a crummy business. Pure Silks‘ website was a tad clunky, but they had organdy of various stiffness and in colors, glorious COLORS! The prices were also really good even with international shipping.

img_1966

Our ensembles were topped off with hats I purchased off Amazon. I had such anxiety over hats. Finding the right shape, color, and size is so darn tough, but I haven’t learned to make my own yet. So two plain straw hats were ordered and then I trimmed them to match our ensembles.

img_1995

I’m most proud of the appliqué on the front of the dresses. I had planned to do it by hand, but that would have been so time intensive. A friend suggested appliqué and she was so right. Much more realistic in a time crunch. I used left over baptism dress fabric for Lu’s and some silk organza from Renaissance Fabrics on mine. Then I embroidered the stems by hand.

My mom (and two of my aunties) were able to attend the fashion show and captured this sweet video. Lu had such a blast that she is already thinking about next year. And I’m so happy to see my girls love the museum as much as I do. Next year maybe Chi Chi can join us?

Mourning Dress

One of my biggest projects of 2017 was tackling a mourning outfit. Every year Heritage Square holds an event that explores Victorian mourning customs including a mock funeral procession. I really needed something I could wear to the event each year, however I’m never actually in the mock funeral. I prefer a station in one of the other areas of the museum, especially since I bring my older daughter along. So as I was researching mourning wear I had a generous time frame to pull from (1870-1920). I also wasn’t restricted to the deep mourning of the recently deceased. It was freeing and yet felt pretty overwhelming.

Since I knew I’d be tackling this project for the fall I kept a look out for fabrics and hoped that eventually the right thing would come along and help narrow down my choices. Luckily I was able to get some black cotton lace yardage in a destash for a reasonable price. Shortly afterwards I found lavender cotton sateen (no longer available) at Renaissance Fabrics and the two paired together so nicely. A half mourning dress would be perfect for our annual event!

1986-20-1-3qfrontsmstraight90c106287730e31936587e6ed7e84b4a

I spent a whole lot of time looking at pictures of extant gowns to see if anything had used black lace and lavender. I found…not many options. Information about mourning clothes seems to be a little harder to find in the Edwardian-1920s period. I probably could (and should) have done more research, but I needed to get sewing. So I found a pattern that was very similar to the gowns I liked from 1910-1912 and ran with my vision.

img_1004.jpg

I think I did pretty well. The wrap front bodice with guimpe underneath is completely period appropriate. So was the lace overlay on the skirt and a belt (with bonus heirloom buckle from my MIL!). Not an exact match to my examples, but the basic elements are the same. The one detail that might have been nice to include is the contrast trim at the neckline, but I got a little fatigued during the process. The cotton sateen also turned out a little thicker than I remembered and so I started cutting elements to decrease the bulk.

img_1020img_1024

For such a time consuming project I don’t really remember many of the details. October was kind of a whirlwind between making this dress and planning my younger daughter’s 3rd birthday party.

I decided not to line the dress because the sateen was pretty bulky. The front neck edge has a bias binding hand sewn on. The pattern (Butterick 6093) called for a side zipper and I swapped that for hook and eye. I thought about having the lace overlap in the front, but now I can’t remember why I decided against it. Maybe not enough lace fabric? Lazy? Too tired? Maybe all of the above. Butterick patterns fit me decently well so the fitting process was not too bad. I compared the shoulders to my recently completed Jennifer Lauren Laneway dress and otherwise blended sizes. I’m getting better and faster at mock ups so the process moves a little more quickly. I need to trust my gut instinct more frequently.

The guimpe was made with Wearing History’s Edwardian Era pattern. I bought it because it was one of the only patterns I could find for a guimpe and I didn’t have the brain power to figure it out for myself. I could have drafted my own and it probably would have fit better, but I was balancing too many things in my life.

Because nothing could go smoothly, the original fabric I ordered for the guimpe ended up sold out. The seller more than made up for the inconvenience, but I had hoped for something slightly more transparent. This is black wool gauze. One thing I totally didn’t see coming was how badly the gauze would combine with the underside of the sateen. The fabrics LOVE each other. So now every time I wear this ensemble I have to have my husband yank my under sleeves for me. Whoops! Thankfully once they’ve been pulled down everything fits nicely and stays put.

img_1075

And then after wearing my new dress to the museum, it got a second life as my Halloween costume. For my daughter birthday I dressed as a witch and my adorable mom dressed as a gnome. Getting to wear the dress two days in a row was fun, and adding a witch hat was super simple. I purchased one from a halloween store and covered it with lace scraps from the dress. Whew! Thank goodness I didn’t need to make a mourning dress and a costume for the same weekend!

How’s everyone settling into 2018? I’m really trying to keep a positive attitude and in a couple weeks I’m going to follow along with the Orange Theory Fitness Transformation Challenge. I’m not officially signing up because I cannot physically make it to 3 classes a week, but will aim to work out 3 days a week and to OTF 1-2 a week. I’ve been attending classes for 6 month now and have made a ton of progress on my fitness. Plus the 8 week challenge sounds fun to way to kick a few bad habits.


Lamplight 2017

Well, the holidays are upon us! When we started planning Lamplight way back in June the event seemed a long way off. A whole 6 months away! Then suddenly it was Thanksgiving and dress rehearsal was a week away. It always seems to fly by in a flurry of committee meetings, rehearsals, and a whole lot of sewing.

This year I re-joined the planning committee after taking a few years off while Charlie was a wee thing. Now the girls are a little older and if I need to bring them to a meeting they can (mostly, sort of, kind of) behave. Two fellow volunteers write a new script every year and I cannot believe how well they can pull it off and find a way to showcase our very amateur acting skills.

This year we did a production of Cinderella. It was an interactive play with the guests playing a game in the first scene, making dance cards in the second scene, and dancing in the third scene. My fall has been pretty busy so I opted for a smaller role with fewer lines and an easier costume. It was a good call since I sewed my entire costume the week before the dress rehearsal.

img_1190

Pretty much as soon as we decided on Cinderella I started campaigning to be a step sister. There weren’t a ton of middle aged women roles this year, so step sister was my ticket to few lines and an opportunity to act like a fool. My fellow volunteer and friend opted to also play a step sister and it was really fun.

Right away we decided to wear our underclothes for the scene instead of making fell bustle ensemble. Thank goodness we made this call! I ordered a new corset from Redthreaded and already owned a camisole and flannel petticoat. All that I needed was a robe, corset cover, and petticoat.

img_1184

As luck would have it, the head costumer made me a robe back when I was pregnant with my older daughter. She based it on this original house dress that belongs to another volunteer. The original was on display for the holidays and while mine has no waist (due to its maternity design), you can see the resemblance!

img_1162

So all I had to make was a petticoat and corset cover. For the petticoat I was determined to use this silk taffeta from Renaissance Fabrics. It spoke to me. It probably looked more like my ball gown skirt for the scene, but I don’t care. I loved every second of swish through the evening. I bought 6 yards and used Butterick 3418. I used this skirt a couple times before and it is nice and basic and has a good sweep. I was even able to line up the plaid pretty well for such slippery fabric. And was just barely able to add on the pleated ruffle with the yardage I purchased! What a fabric hog of a skirt!

The corset cover is made with cotton lawn I also purchased from Renaissance Fabrics. It is one of my favorite fabrics ever. I buy it by 4 or 6 yards at a time and use it to line dresses. I used Butterick 3765 as a base, but that is more of an Edwardian pattern. To make it like this original corset cover in the Met’s collection I split the pieces at the waist line and added insertion lace to the top. Then I added darts to the bottom to make the waist more fitting. Worked like a charm! Not exact since I procrastinated, but still similar enough that it’s fine and the red ribbon at the neckline helped the look coordinate a bit.

To finish the ensemble I made a pair of fabric slippers while my friend was over visiting. Thank goodness for friends who don’t might chatting while you keep on sewing!!! I never did take a picture, but I might keep wearing them as house slippers because my feet are suddenly SO COLD.

So, that’s Lamplight 2017! And frankly, while 2017 was a pretty good year overall I’ve named it the year of minor emergencies. Much of it has kept me crafting for my sanity and I’m hoping in the next couple of weeks to share some more of my creations!


Groovy Girl

img_8364

Cultural Heritage Foundation. Are you interested in saving Victorian architecture?

Hope everyone in the USA had a lovely Thanksgiving with their family and friends. We took our first family road trip to visit my sister. Two kids, two adults, and one dog all jammed into a car for 6 hours. Really it was a lot of fun, but so hard to get back and head right into Lamplight at Heritage Square!

This is the biggest event the museum holds each year and and this year I was assigned to be one of the tour guides. I was super happy with my role as getting to weekday rehearsals is really tough with two small children. As a guide I only had to attend the 3 main rehearsals. But there was a catch, the tour guides were actually characters this year! We played the museum founders and spend the evening talking with guests about the importance of Los Angeles’ Victorian architecture and why it was important to save. It also meant we all dressed for roughly 1970. Groovy!

Every year I spend waaaaaaay too much time and energy trying to get my clothes as accurate as possible. This year was no exception. As soon as I knew I was aiming for 1970 I started scouring my pattern stash and looking for inspiration. It was a little harder than I expected because searching for 1970 brought up a lot of clothing for the 1970s that was too late for my particular needs.

img_8340

I settled on Simplicity 1059, one of their Jiffy patterns that was originally published in 1969. The big selling point was this pattern had sleeves! As a tour guide I needed to spend a portion of the evening outdoors at night in cold (for LA) weather. Sleeves!

img_8360

It was also a very simple shape. Here it is without the sash so you can see there are no darts, no waist seam. Really it was just a front, back, sleeves, and facings. All the bust shaping is provided by one pleat at each shoulder. I simply graded from one size at the bust to another size at the waist and hips to ensure enough wearing ease.

img_8347

The pattern was not without it’s issues though. If you look really closely at the pattern art you’ll see the neckline was supposed to be a deep V. What I didn’t realize is the V would go really low, like you could see a significant portion of my bra. I’d cut the front on the fold instead of putting in a front seam so I could avoid pattern matching down the front. I’d even raised the neckline a tad to account for the lost seam, but apparently it wasn’t enough!

I did play around with the idea of buttoning the front closed, but that pulled the shoulder pleats out of alignment, so the finished dress has a triangular piece sewn in for modesty. I tried to sort of line up the print to make it less noticeable.

Also I spend a lot of brainpower and timing putting in the invisible zipper and matching the pattern down the back only to find I could pull the dress over my head without ever unzipping the back. Sob!  If I make the pattern again I will cut both he back and front on the fold! Can you spot the center back seam?

img_8342

For the fabric I knew I wanted to use rayon. I wanted long sleeves, but it had to be thin fabric because my jacket sleeves are quite tight and thick fabric wouldn’t fit. So I started looking for some 60s/70s prints online. I sent the choices to my mom who helped me pick the best of my options. We settled on this print from Free Spirit Fabrics. It cost a tad bit more than I anticipated, but I can wear this dress to work.  A++ would buy again.

Was I cold? You bet! But I was only outside for 5-10 minutes at a time so I’m satisfied with my choice of fabric. Even though the dress isn’t a shape I usually wear, I really love the way it turned out. Especially such a dramatic sleeve!

And now with Lamplight behind me I’ve moved onto Christmas gifts. Anyone else doing some holiday sewing?

IMG_8350.jpg


Summer and Guiding

Oh hi! I guess I disappeared for longer than I expected. Mostly we’ve been busy with a staycation, a family reunion, and a new job for my husband, but yesterday I spent my afternoon volunteering so here I am to talk about a dress I actually made last summer.
As I’ve mentioned in previous posts, I volunteer at Heritage Square, a museum in Los Angeles that resembles a Victorian neighborhood. I’ve been there for nearly 6 years and I have to say I really enjoy it. Once a month I give tours and at first I felt like such an impostor, but then I realized how good it has been for my public speaking skills and how much it has become like a second home.

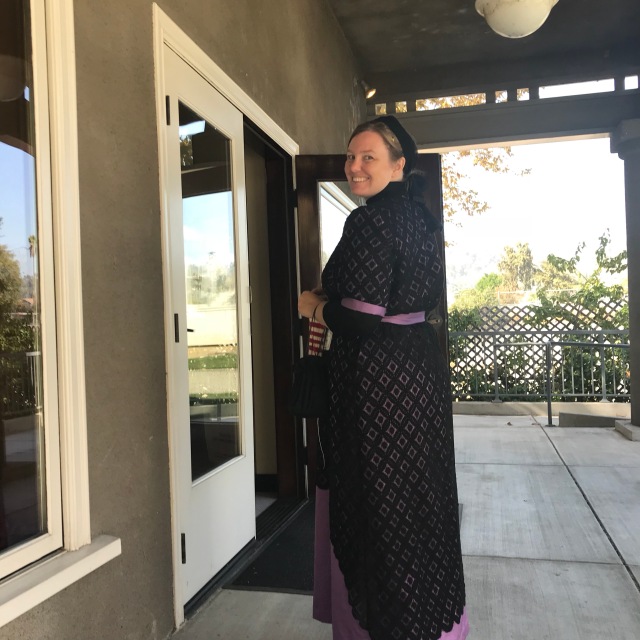
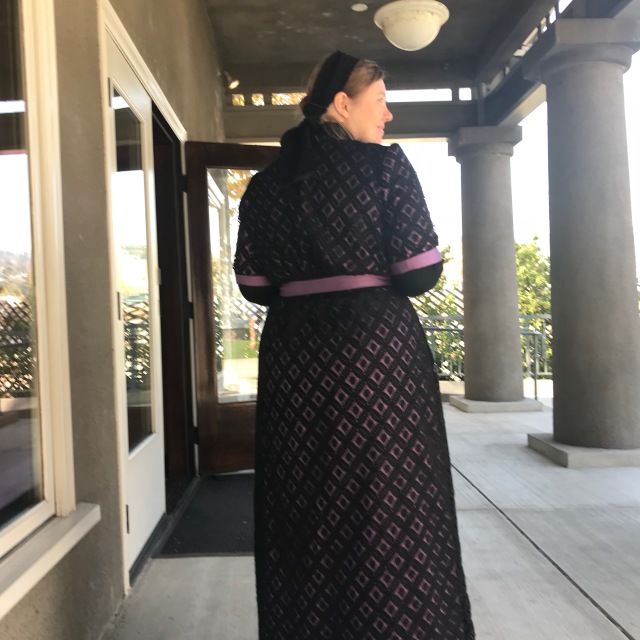
The pretty costumes don’t hurt either.

IMG_6897

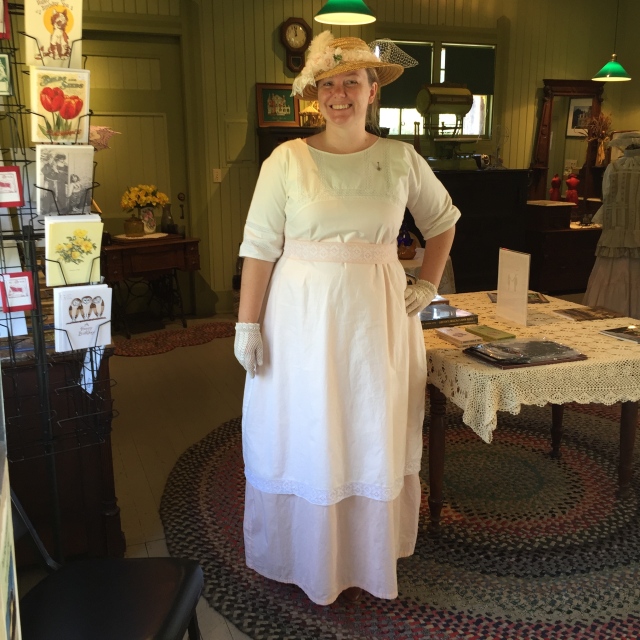
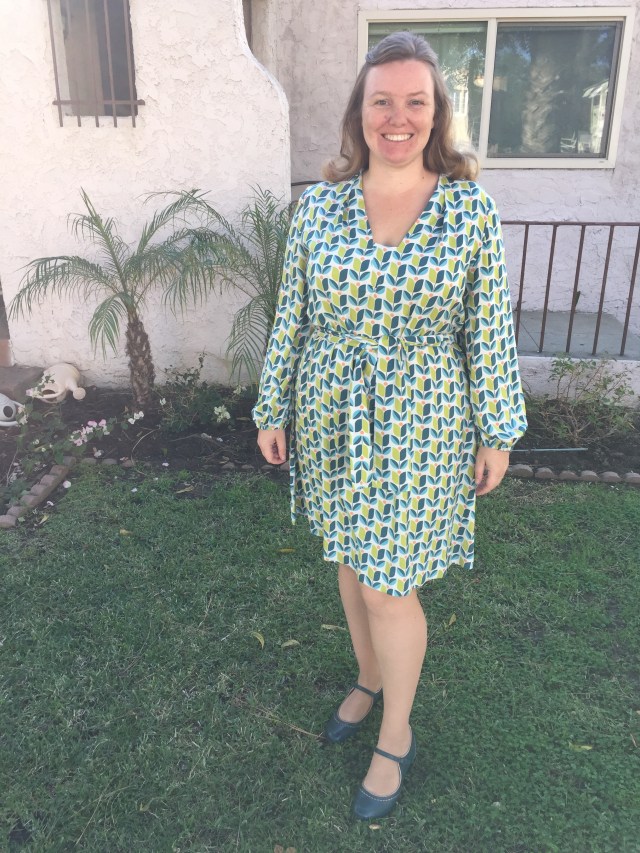
So here is my summer tour dress!

Like I mentioned I actually made this last summer. I spent months obsessing over which pattern and fabric to use only to finish the dress right before the weather turned cool. Whoops!

That’s the hard part of making historical garments…the self doubt. I am far from an expert. When I first started volunteering I had no clue. Polyester everything because it was what I could afford. Then I went and had 2 babies and nothing fit anymore.

So a year ago I decided to make something simple, summery, and easy that I could wear in the long hot summer season. Also a dress that didn’t use dozens of yards of fabric so I could afford to make it.

IMG_6898

I also opted for something nursing friendly.

Enter the 1912 kimono dress pattern from Sense & Sensibility Patterns. It was everything I was looking for. Simple to sew, easy to wear, and with easy nursing access.

And after sweating, stressing, and asking a few people for help I settled on using Robert Kaufman lawn as the main fabric.

IMG_6899

One year later I am happy with those choices. It took me so long to make that I skipped the nursing option. Otherwise there are a few fit issues, like it’s a little big through the upper back and the sleeves are an awkward length, but it is so easy to wear.

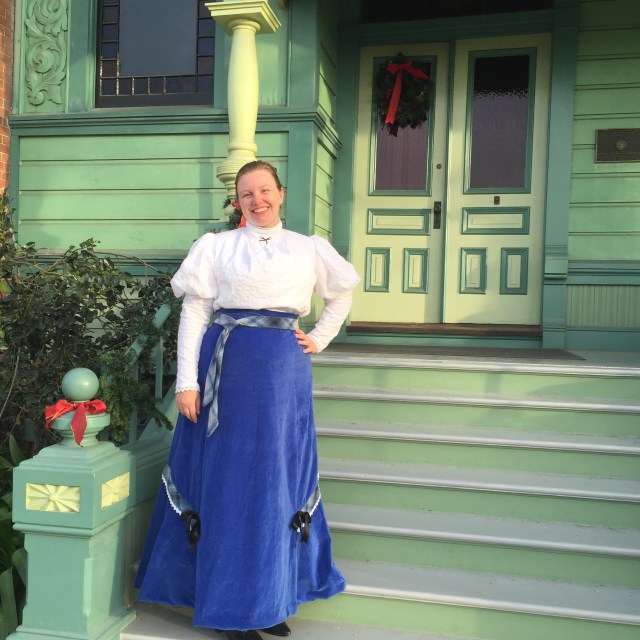
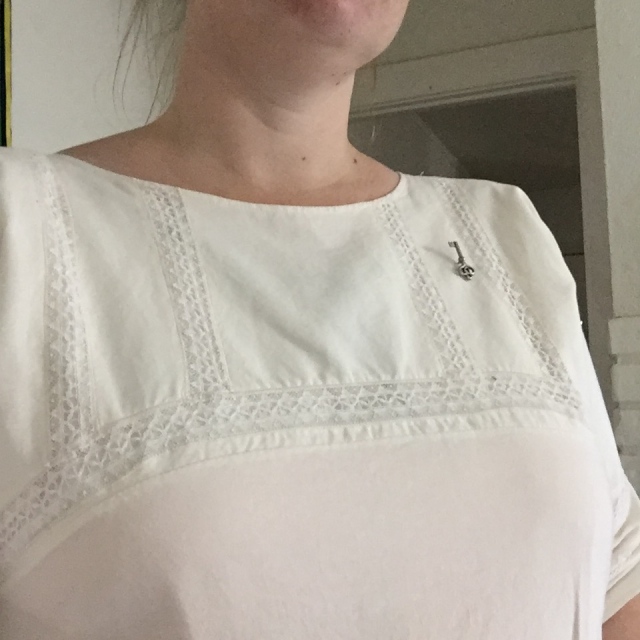
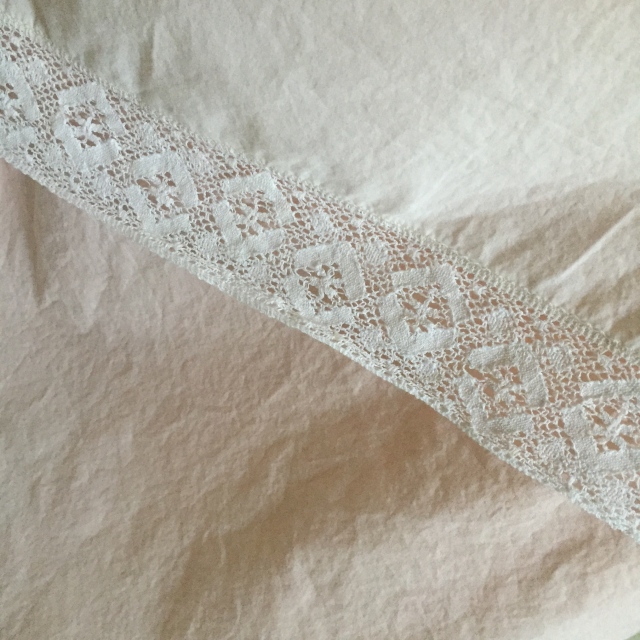
As you can see I added yards of insertion lace to make the pattern more like the lingerie dresses that were so popular through the 1910s.

IMG_6900

I also used 2 colors of fabric, an ivory and a soft peach. Both were common colors to wear 100 years ago.

And confession…I don’t wear Edwardian underwear underneath my dress. I’m sure historical clothing experts notice. I should wear a corset underneath. I know I know. I just don’t own one for the right time period so for now I skip it and only wear a chemise (and modern underwear). Eventually I’ll buy one because having a few different corsets would be helpful, but they are also costly to purchase with custom measurements. Oh yeah…I guess I should maybe make one? I’ll mull it over for next summer.

IMG_3505

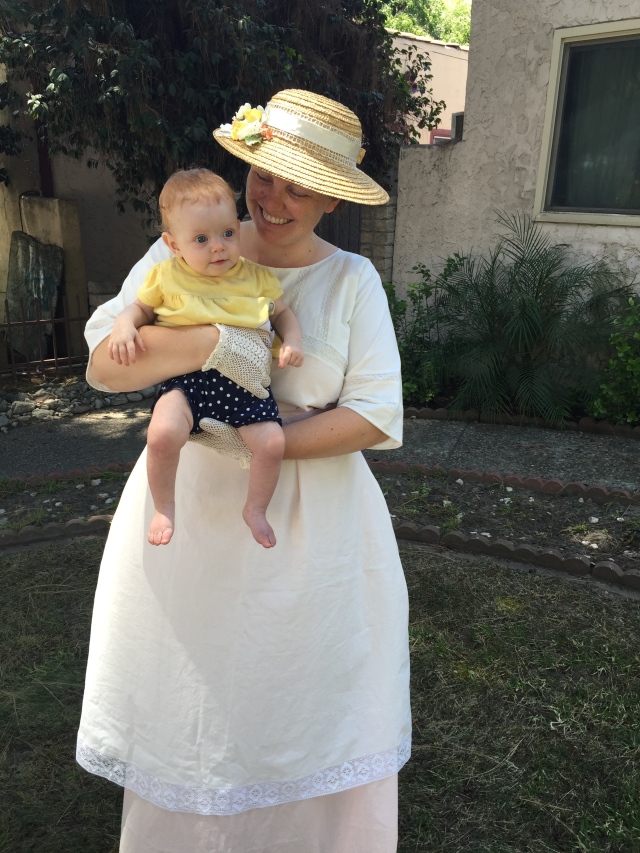
And here is my dress last summer with a much younger Charlie! You might notice the hat looks different. That’s because this spring I tried my hand at millinery. I took this same hat and redecorated it to match the dress. Many new skills in this outfit!!! I also received some new shoes for Christmas that coordinate perfectly.

So now I ponder what I’d like to make next. I should probably make something a mourning dress. We do an event every Halloween that explores the mourning customs of the Victorian era and my old outfit is super tight. At least for that one I have the underwear!

Me Made May – Week 1 Round Up

If you follow me over at Instagram, then you’ve probably seen these already. But I thought it might be fun to post them here too as a way to show that yes! I wear what I make!

What is Me Made May? Well mostly it is a challenge to give your self-made clothing a little love. But it is also a celebration of yourself and your skills. It’s a chance to see which of your self-made items you love and enjoy and which items don’t get any love. At the end of May I’ll be ditching some things I made that I just don’t enjoy wearing. Want to find out more?  There is a great post over at ‘So, Zo…What do you know?’.

Week 1 – Knit Dresses

I’m sure you’ll see these pop up again as the month goes on. My knit dresses are the first thing I reach for after laundry day. Frankly, I am not a morning person. Having to wake up to a baby crying for her breakfast is not my favorite part of motherhood. Having a stack of things that are easy to pull on and don’t need ironing is the best. I have plans to sew up a few more of these for summer as the weather warms up.

Clockwise from top left is Washington Dress Hack 1, Cats! , My Gillian Wrap Dress I never blogged. Whoops! , and Washington Dress Hack 2.

Week 1 – Cardigans

I should just accept that I like and wear one style of sweater almost exclusively. I have one completed pullover and one more in progress, but otherwise I am a cardigan girl.

From left to right is my beta test of Amy Herzog’s Custom Fit program (made pre-blog) and my Viridis (also made pre-blog).

Week 1 – Hat!

img_6354

Lastly, is my Edwardian Hat (upcoming blog post). I usually have a party for the Kentucky Derby, but this year I was so sick when I needed to start planning that I just could not face hosting a bunch of people. Oh well. I still enjoyed my mint juleps and wearing my fancy new hat!

One week down and I’m feeling pretty great about what I’ve worn so far! Is anyone else participating this year? Do you have a goal in mind for the end of the month?

My Very Victorian Christmas 2015

Heritage Square is a museum where I try to volunteer at least once a month. It’s a museum that has several Victorian homes and usually I lead tours. However once I year I get to pretend I have a tiny bit of acting talent and spend one weekend performing in the Lamplight program.

IMG_4876

This year I was Virginia, a woman in my early twenties (ha!) who had just been engaged to Martin, a man who literally swept me off my feet. We perform a scene every 20 minutes from 4pm to nearly 9pm. It is exhausting. It is fun. It is a good excuse to make a new pretty outfit.

IMG_4874

Welcome to my home!

This year I was in the Hale house. It is the most restored home and quite lush inside! It’s also incredibly creepy and I think haunted. But at least no ghost sightings during our weekend! Just a few odd footsteps.

IMG_4915

And I made my whole outfit (except the corset)! Whew! It was a lot of sewing for a few weeks, but a little bit each night makes it easy to accomplish. I ended up making a corset cover, blouse, and skirt. Plus refashioned two petticoats. Thankfully I made a light colored chemise this summer so it was one less items to churn out in November.

The blouse came from an out of print pattern (Butterick 3417). The largest size I had was too small, but I did adjustments to the front, back, and sleeves to size it up a few sizes. I over compensated a bit, but no worries! It fits the style of the time. The fabric came from a new favorite shop, Renaissance Fabrics. I purchased the last of some dimity and fully lined the blouse with cotton lawn since this was for a winter night time event and the weather is often quite chilly. Then I finished off the blouse with lace from a fellow volunteer (thank you Kristine!) and some buttons a fellow knitted sent to me (thank you Liz!).

Really I owe Kristine a huge thank you for helping me with fabric selection. I am a novice when it comes to historical accuracy and she held my hand through the hold process.

IMG_4917

The skirt fabric also came from Renaissance Fabrics. It is their well priced cotton velveteen and was a dream to work with. Washed beautifully, a fabulous garment weight, and heavy enough that it didn’t need a full lining. I used Truly Victorian’s 1898 Flared Skirt pattern which was borrowed from another fellow volunteer. It eats up fabric (6 frickin’ yards), but was also simple to follow. The error I made was forgetting I’d be corseted when I cut the waistband. My waist corsets down 4 or 5 inches so the waist was much too big. Eventually I’ll re-do it.

The skirt trim was a light bulb idea. I wanted to trim the skirt with something I could sew right into the seam instead of having to hand sew to the velveteen. I ended up using Robert Kaufman’s Mammoth Flannel but on the bias. Then added the same lace as the blouse. So simple. The I added snap on black silk bows as the finishing touch. I just love this skirt so much. It was a joy to wear.

The weekend went by in a flash and just like that the whole program was over. But now I have a few new pieces I’ll get some wear out on my usual weekend tours.

IMG_4926

Happy Lamplight!