Fifi Pajamas!

Happy Summer Solstice! It is suddenly quite hot here in Southern California. I can deal with the heat during the day, but is sure is uncomfortable trying to sleep when it is still 77F in my bedroom at 11pm. Ugh! Not looking forward to the long hot summer ahead of us.

Pajamas are one of the items I rarely make for myself. The main reason I sew is to have well fitted clothing for my non-standard shape. In pajamas the fit is less important. On the other hand, I’m getting tired of buying nightgowns and pajamas sets in XL or XXL to fit my bottom while my top half needs 2 sizes smaller.

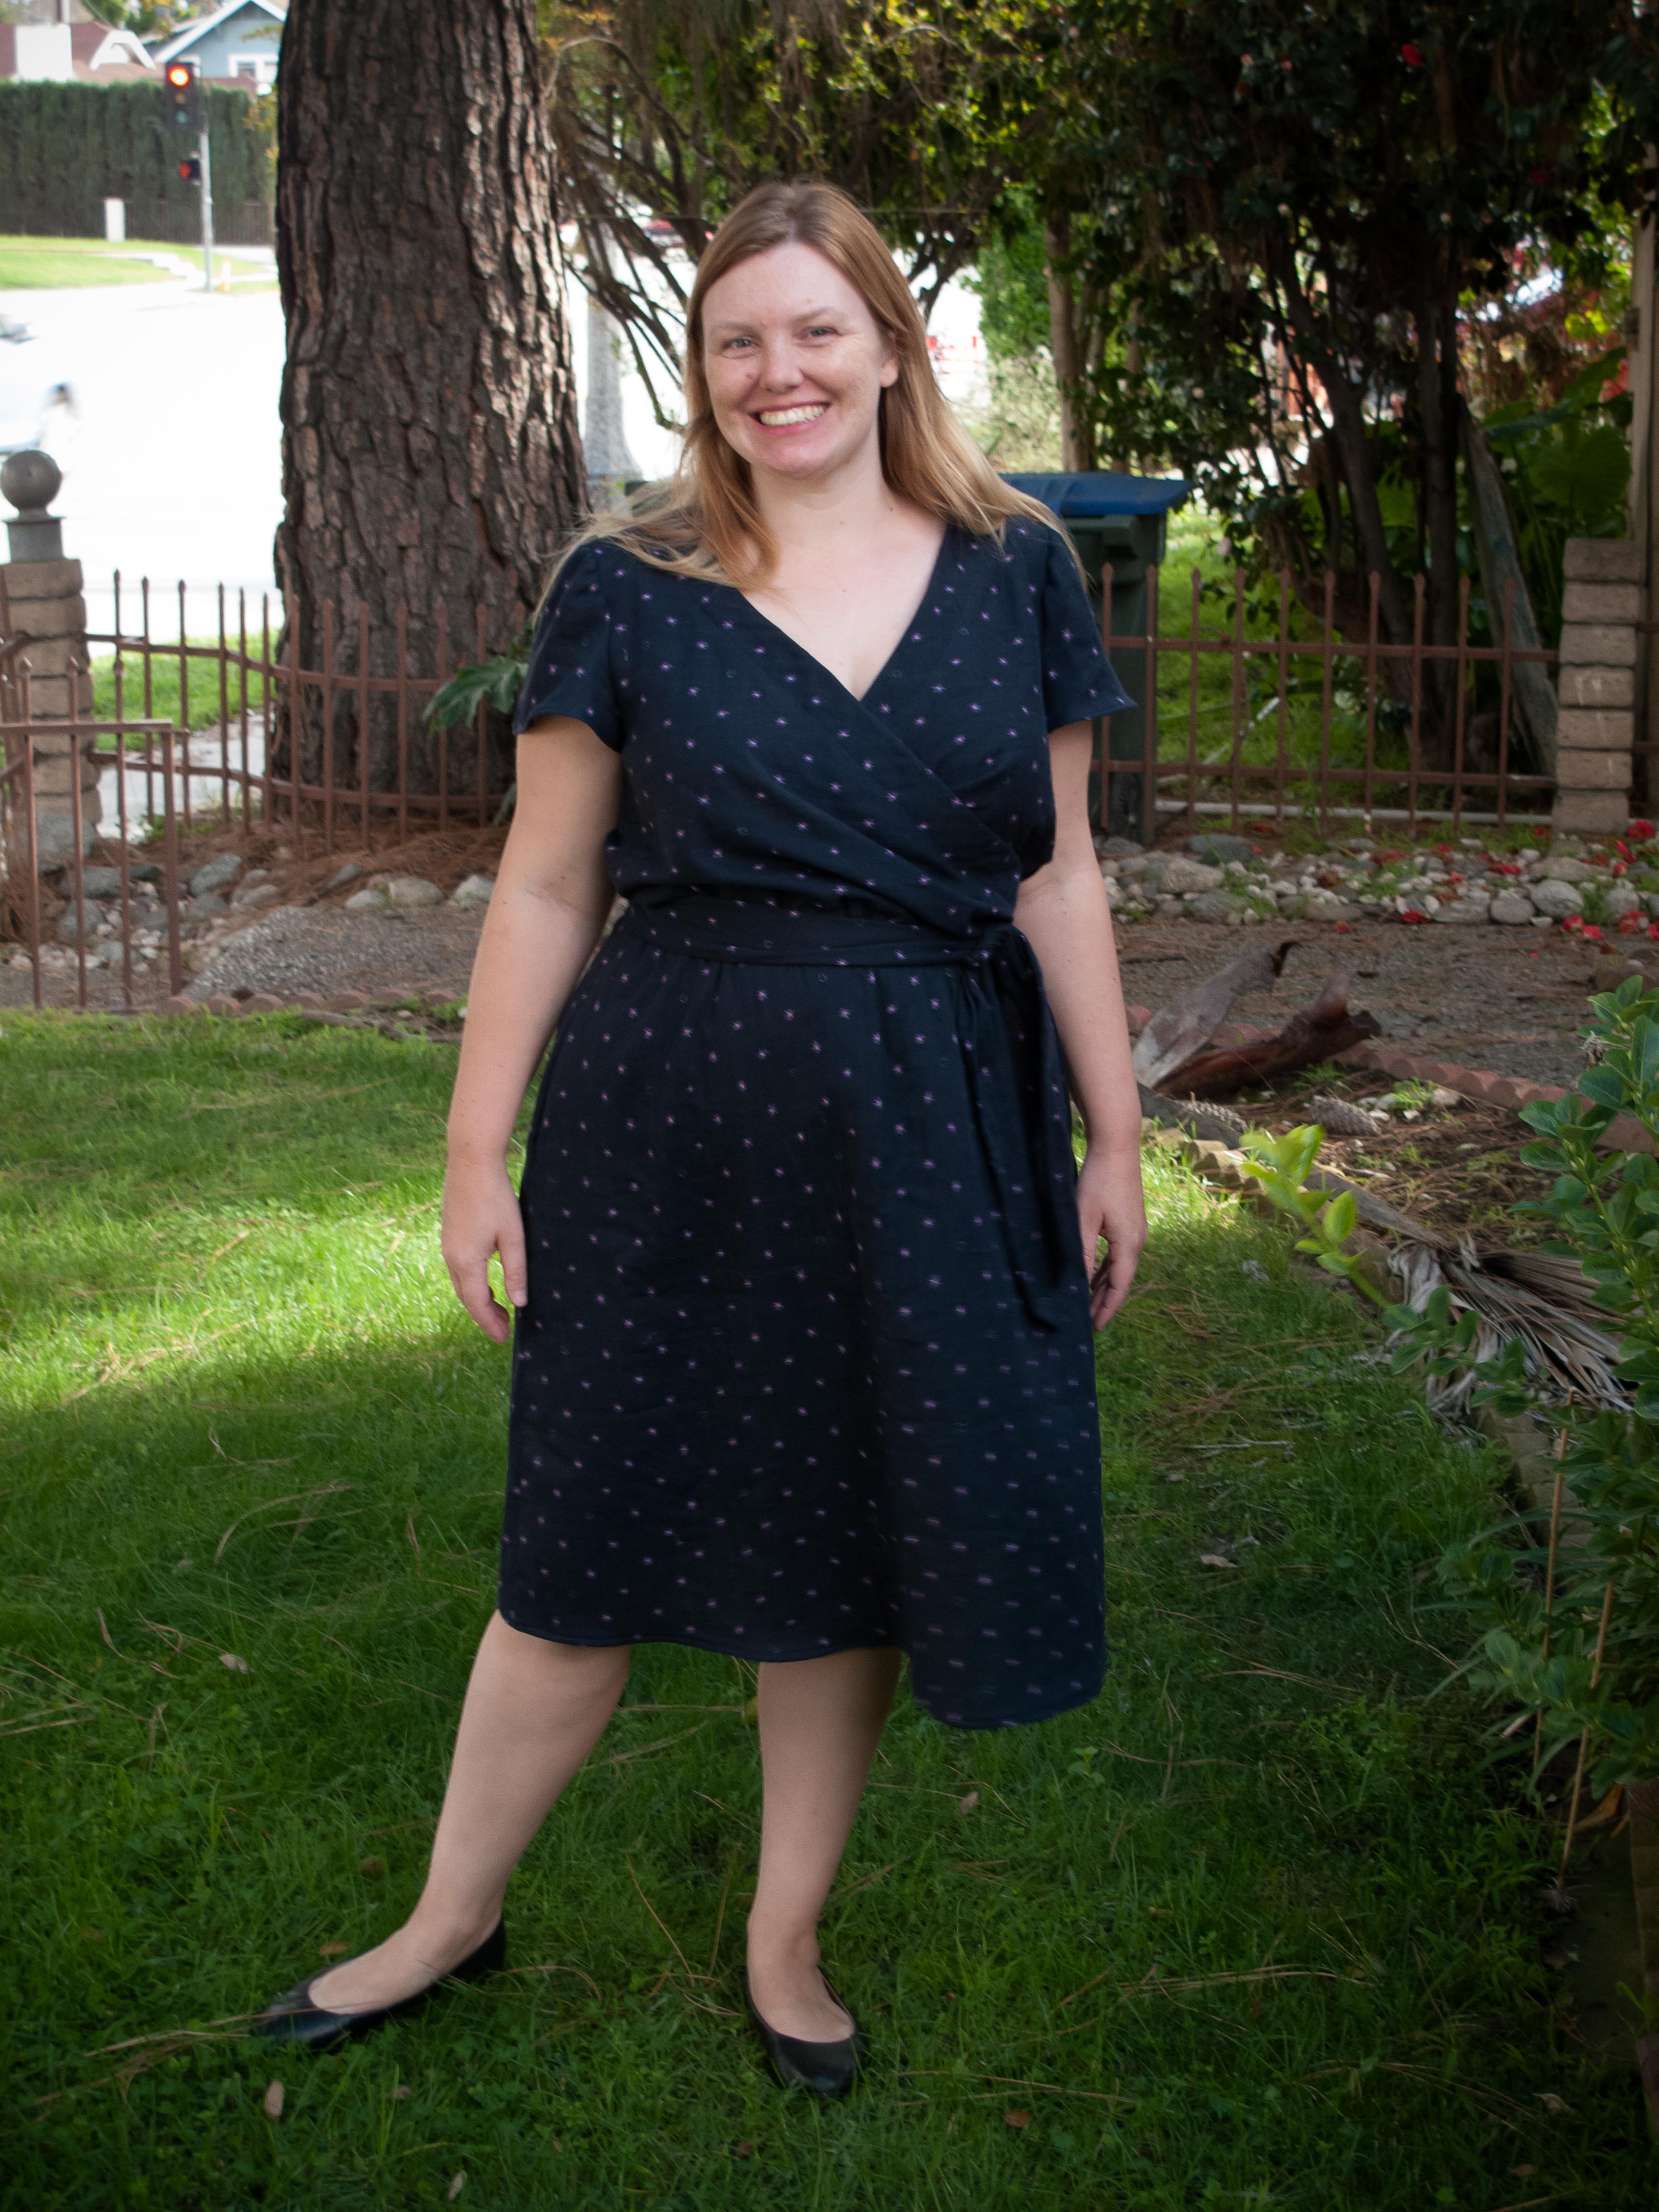
Recently I took a dive into my pattern stash and found Tilly and the Button’s Fifi. I actually made a nightgown version in January 2016 as a gift for my sister. It turned out really cute! And as luck would have it, I’d done an FBA on the pattern cups back then so all I had to do was trace off my size and get to sewing. Hooray!

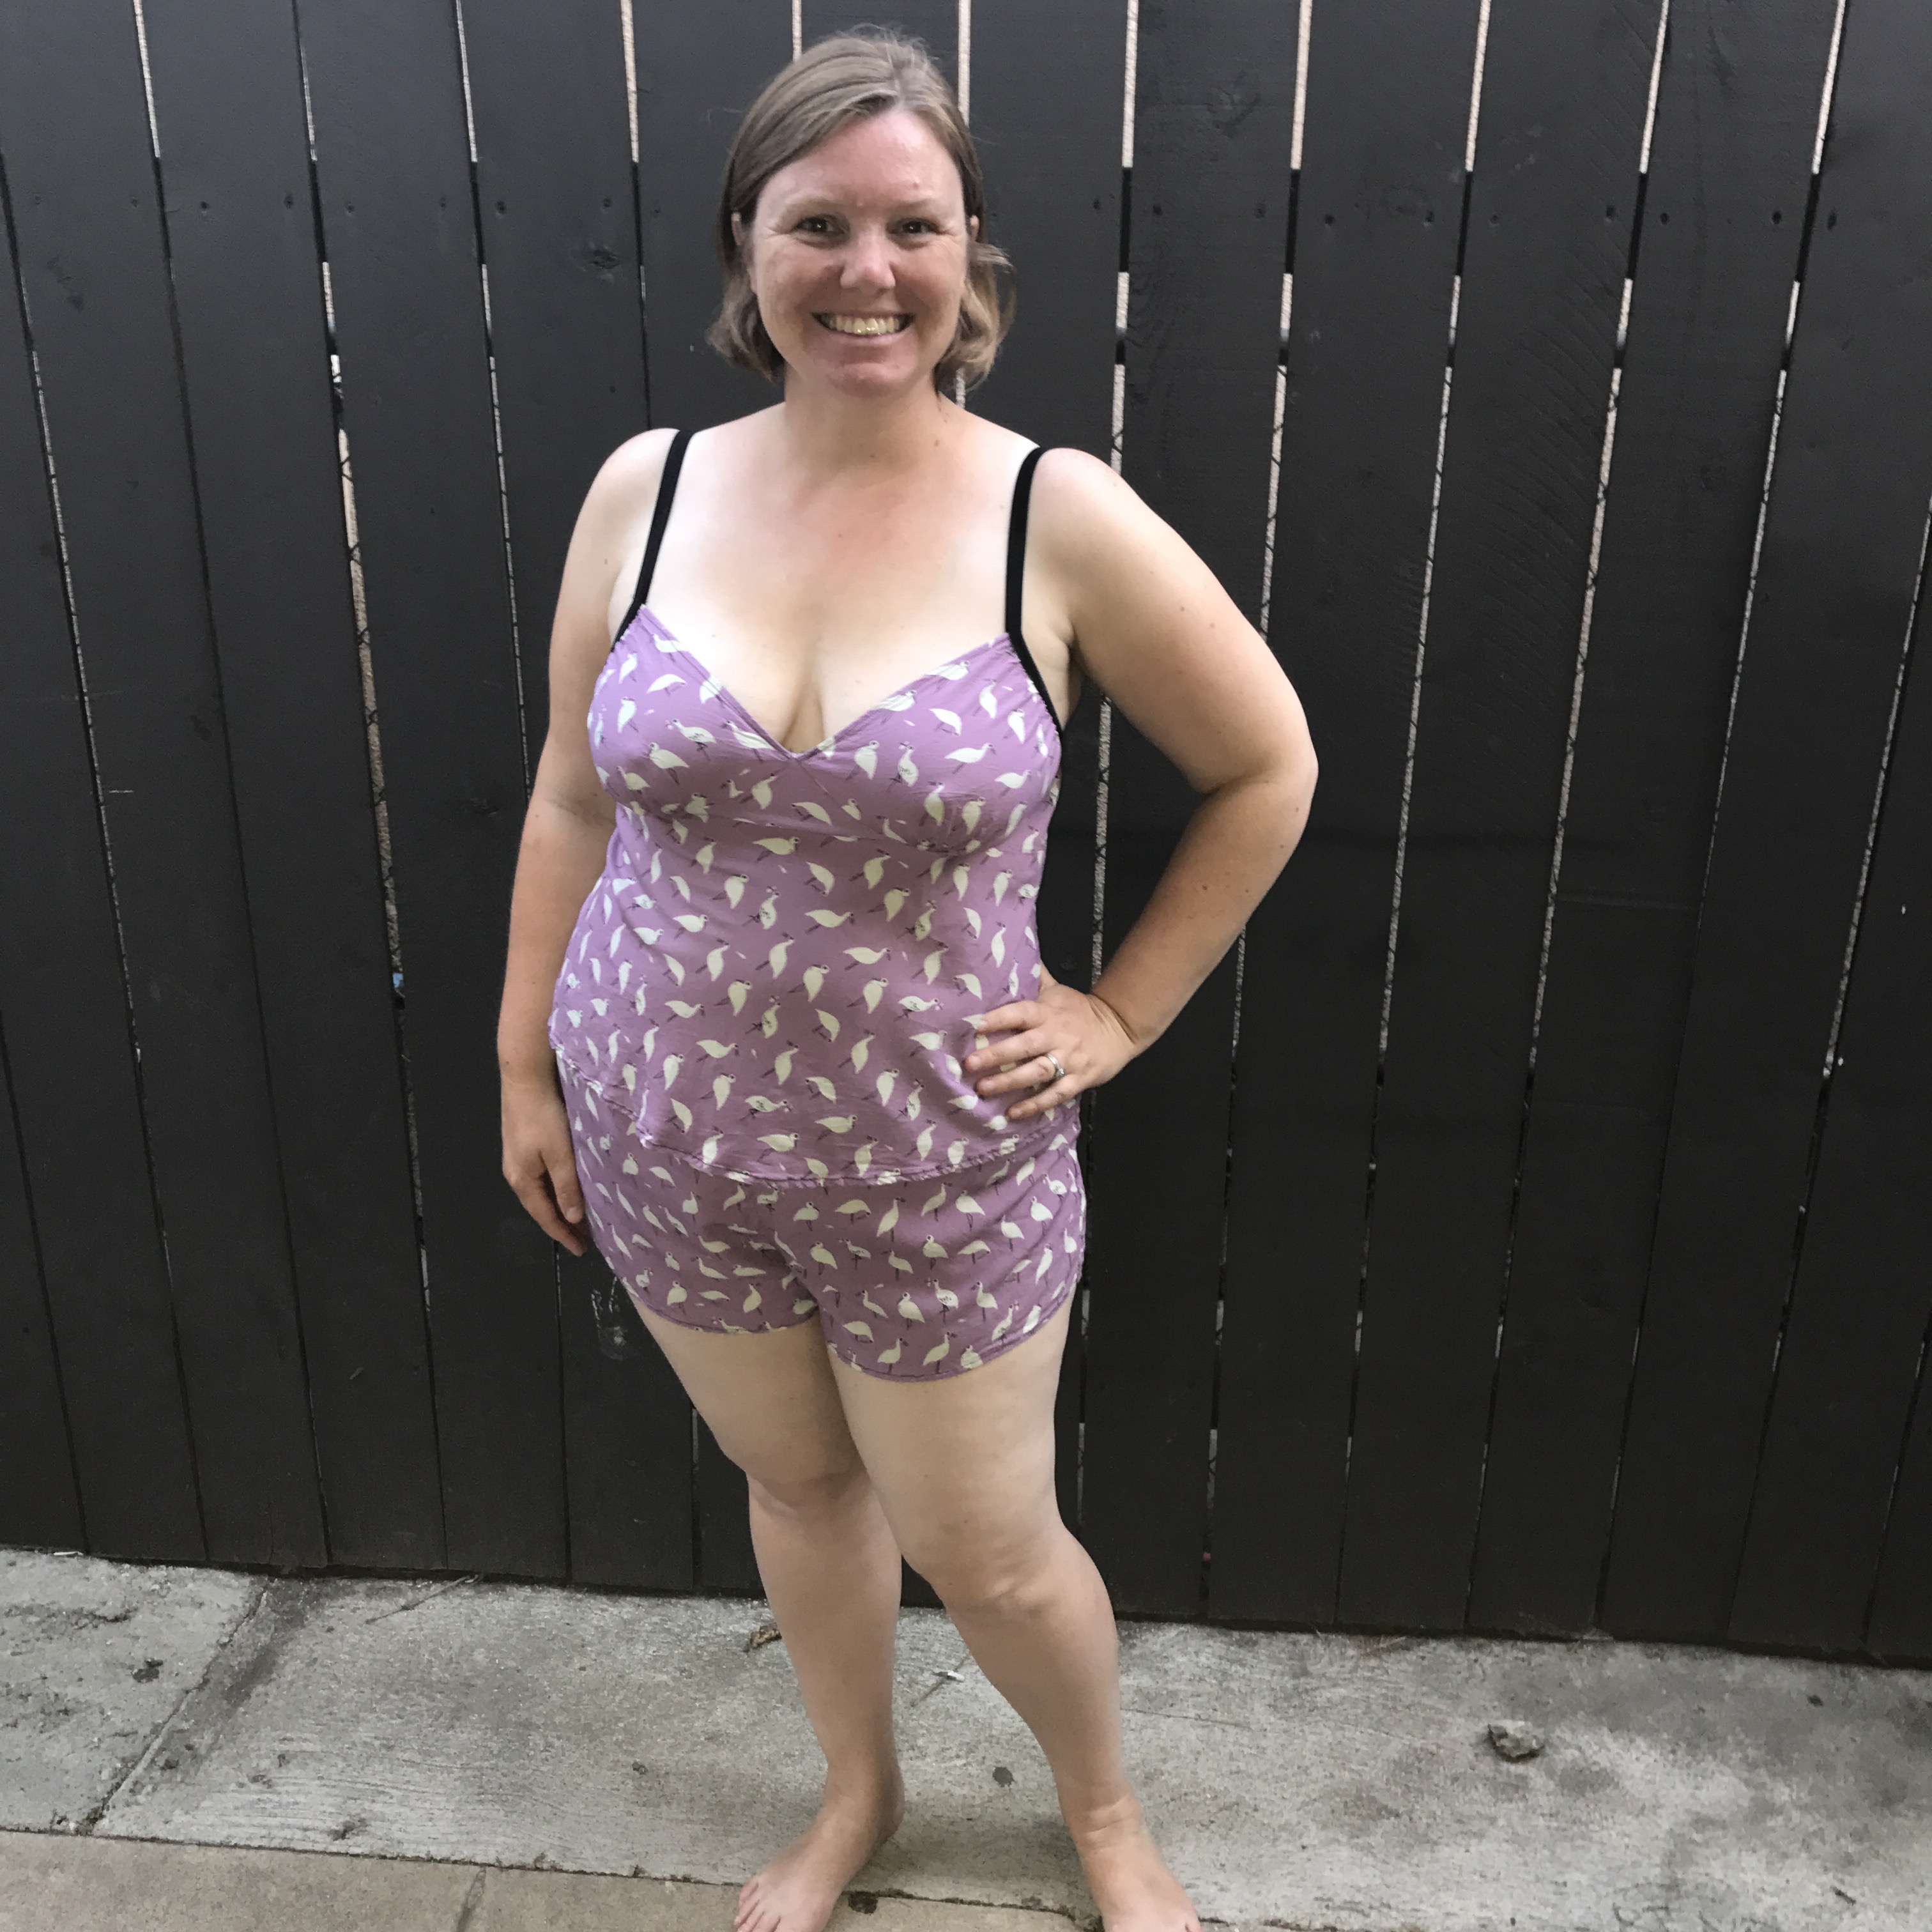
So cute, right? I ended up grading between sizes, the top is a 6/7 and the bottom is a 7/8. The only change I made to the pattern aside from the FBA was to swap the bias straps for fold over elastic (FOE) instead. That was a lesson learned when I made my sister’s version. If you look closely at the pattern photos you can see the bend where the bias goes from edging to strap. Drove me bonkers when I realized that was considered normal for the Fifi. I like the FOE much better. The back of the Fifi top is a tad large, but with the elastic gently gathering the edge, the back feels nice and snug. I also much prefer the FOE straps for their supportive yet flexible hold. Support! It is sort of important!

I’m still torn on the shorts. Really out of my comfort zone, but I do like them for pajamas. Less twisting around than a nightgown and helps with the summer thigh rub. They maybe look tight in the photo, but they don’t feel tight in person and if anything the waist elastic could be a tad more snug.

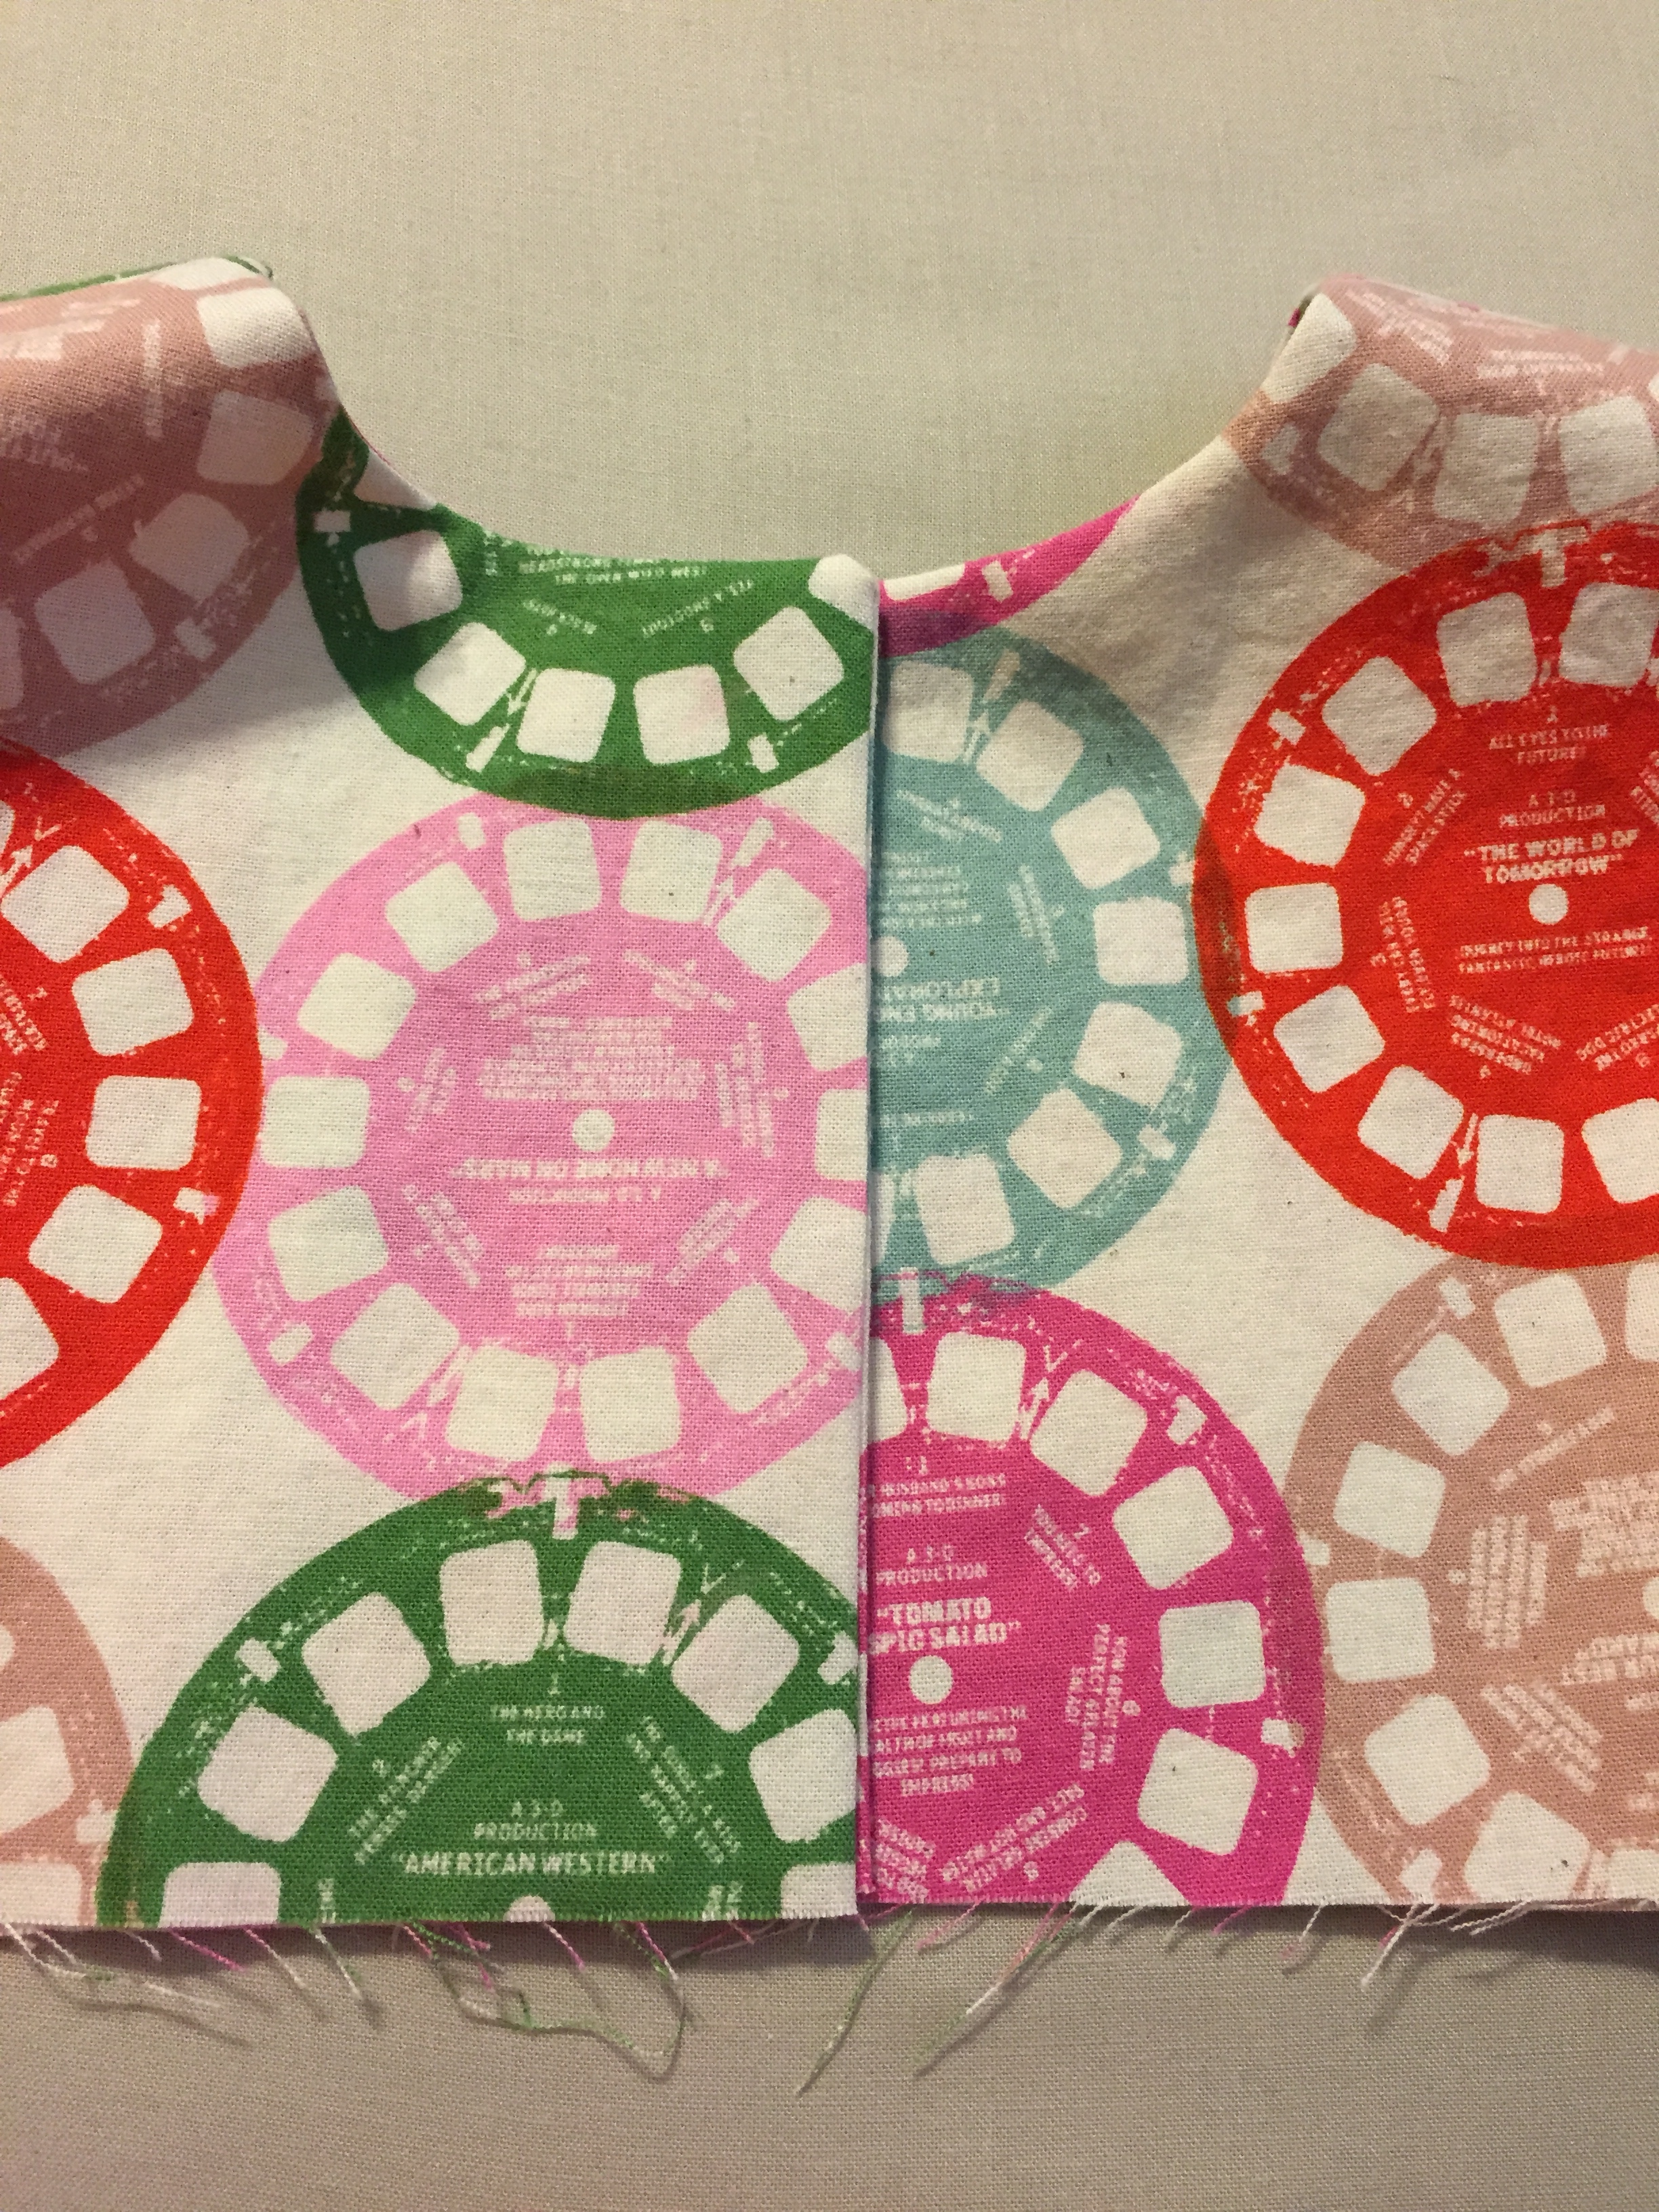
Tilly doesn’t recommend using fabric with a directional pattern. It’s a fair warning as the top is cut on the bias and the shorts are cut on the grainline. Originally I’d bought this Cotton + Steel rayon with a Cashmerette Springfield in mind. It was part of my epic Hart’s Fabric shopping spree in early May and I’d had my eye on this print for months. But after I made my first Springfield I knew I didn’t want a ton of them. Just 1-2 would fill the gap in my wardrobe and the crane fabric had just exactly the amount of yardage needed for pajamas. Sold! The pattern is so busy, that I don’t think the direction is super noticeable.

I’ve worn this Fifi set a few times now and I do really like the top a lot. The fit is exactly where I want it, but the shorts are just not holding up like I’d hoped. They feel great the first night, but then the fabric stretches and bunches and the crotch doesn’t sit where I’d like for another wearing. Ultimately I want to wear my pajamas twice before washing. I’m on the search for a different shorts pattern, so if you have an option that is free or not too expensive, please let me know! I’m tempted to try the City Gym Shorts, but they only go up to a 46″ hip and I need a 48″ hip.

Victorian Dresses and Glittery Ghosts!

I seem to have stumbled into Selfish Sewing Week! Hooray! I love when my project links with some sort of sewing celebration. It helps push me to finish something when I otherwise would procrastinate. For instance now that it is getting dark so early I need to have my husband take picture on the weekends. So last weekend he took photos of my new dress. but I didn’t like the photos. Luckily he was home earlier tonight, so yay! New better pictures in time for the celebration!

Enter another Washi!

IMG_4303

This one is even better than my last Washi Dress. Made with soft Cotton + Steel Spellbound I bought at my local quilt store. I’d originally fallen in love with this pattern in lavender, but my LQS only had this soft rose in stock. This is probably a better color with my complexion anyways.

IMG_4305

I also added the sleeves from the Washi Expansion Pack and am totally thrilled with the fit of them! Usually my arm measurement is far far different from a pattern’s measurement, but in this case fit so well that I didn’t have to alter the pattern one little bit. Yes!!!

I also added about 2 inches to the length of the skirt.

IMG_4306

It is a little hard to see in the photos, but on my previous version in Liberty the length ends at this odd point in the middle of my knee. So this version I aimed for just below the knee and when I wear it with my black shoes the length looks really nice. Those are the shoes I’ll usually wear with this dress. We were racing the daylight and the baby’s desire for dinner tonight so I didn’t change shoes after work tonight.

There is still one more alteration I’m going to need to make to the Washi pattern before I make it again. The neckline. It gaps a lot more than I’d like. I’m sure part of it is the FBA I added, but I’ve seen quite a few people have the same issues. I’d finished the whole dress and had to go back and somehow fix it.

IMG_4080

This will do, but next time for sure I will be rotating the extra fabric out to the bust dart. Having to take out all the top stitching was a pain, but worth it.

Now if only the weather would cooperate. I really want to wear this fun fabric as much as I can before Halloween and especially when I volunteer for Mourning Tours. Victorian gowns and glittering ghosts seem the perfect combination when helping guests at the event. But we’ll see. I may need to dress in my full Victorian dress depending on where I’m stationed. If nothing else I can wear this once a week to work where it is air conditioned.

And look who is 11 months old! We sent out invitations to her Halloween 1st birthday party and I can’t wait to celebrate my funny and determined tiny girl.

IMG_4311

Baby All Star Blanket

Confession time. Making baby quilts is a lot more fun than knitting booties and hats. Especially when your friend is having an August baby. August is so very hot in California and who knows what size her son will be by the time we get any kind of cold weather. A quilt can be useful for years!

And when your friend and former roommate of 5 years has her first baby it is well worth pulling out the good stuff!

The pattern is a free download from A Bright Corner and called Charming Lucy. As written the finished quilt is about 35 x 35, but I wanted it a touch bigger, so I made each block just a tad larger. I’m fairly certain I used 6 inch blocks instead of the 5 inch charm pack blocks the pattern recommends. It’s kind of hard to remember the exact details since I finished the quilt back in June and packed it away until the baby shower. Pre-planning is great for stress free shower attendance, but terrible for remembering pattern modifications.

The fabrics are from a few different places. Most of the blocks are made from fabrics I received in Westwood Acres I Want Her Stash Club. These are from February’s shipment which was curated by Allison at Cluck Cluck Sew. And the bold primary colors are a perfect nod at sports without covering the quilt with footballs and baseballs. The white background is Architextures by Carolyn Friedlander. It has become my go-to fabric for sashing because it gives interest to the quilt without over powering the other prints. The quilt is backed with Play Ball by Lori Whitlock and the binding is a random polka dot I found in a bargain lot that just happened to fit the team theme perfectly!

Whew!

In the end, I love this little quilt. It is simple and sweet and I’m so very glad my friend loves it.

I cannot wait to meet her little man! Congratulations Julie!

Nothing but Skirts!

It’s been a little quiet around here. Sorry! I’ve been working on a couple gifts that I can’t post about until they are given. Those have been in the big projects. But I’ve been busy with a few little projects too. Mostly making clothes for Lu to wear this summer. Her school usually requires navy and red uniforms, but summer they have free dress. Yay!

The only problem is that Lu has decided she only likes to wear skirts and with her little 19 inch waist almost all commercially made skirts fall right off of her. And yes, I could have just altered the waists on purchased skirts, but making them is more fun and super easy.


For instance this little elastic waisted skirt featuring Ann Kelle’s Super Kids fabric.

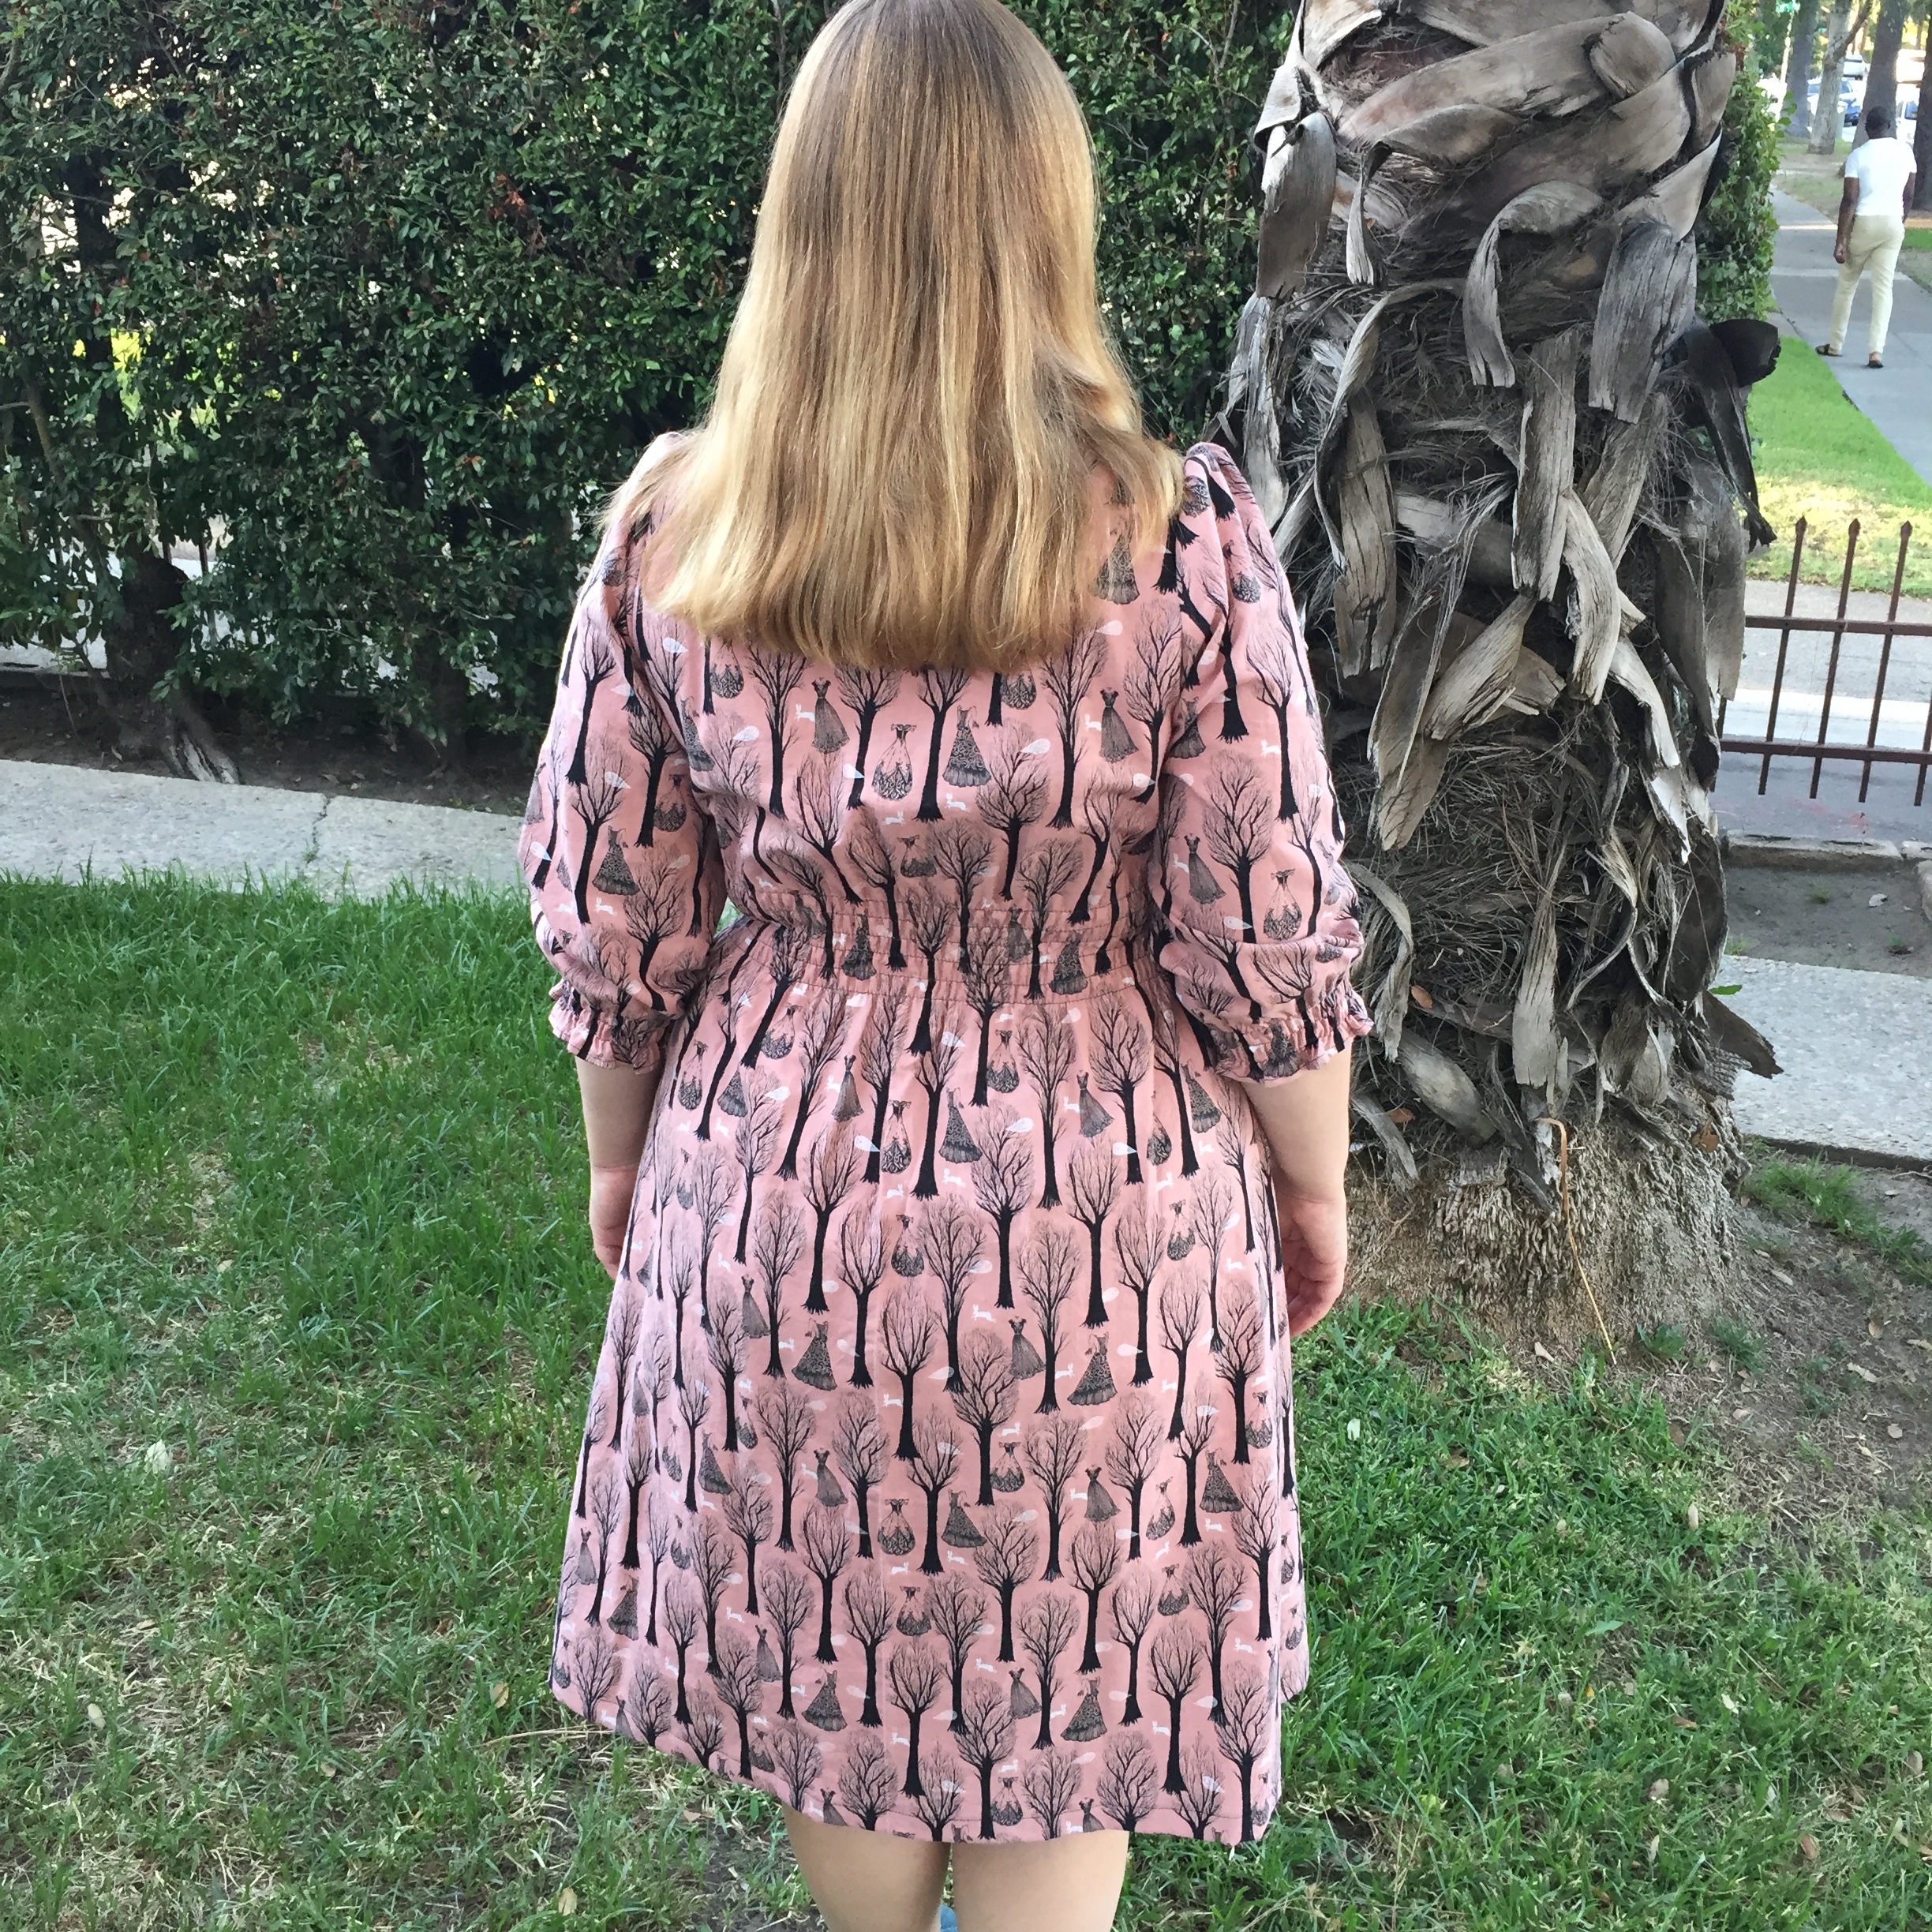
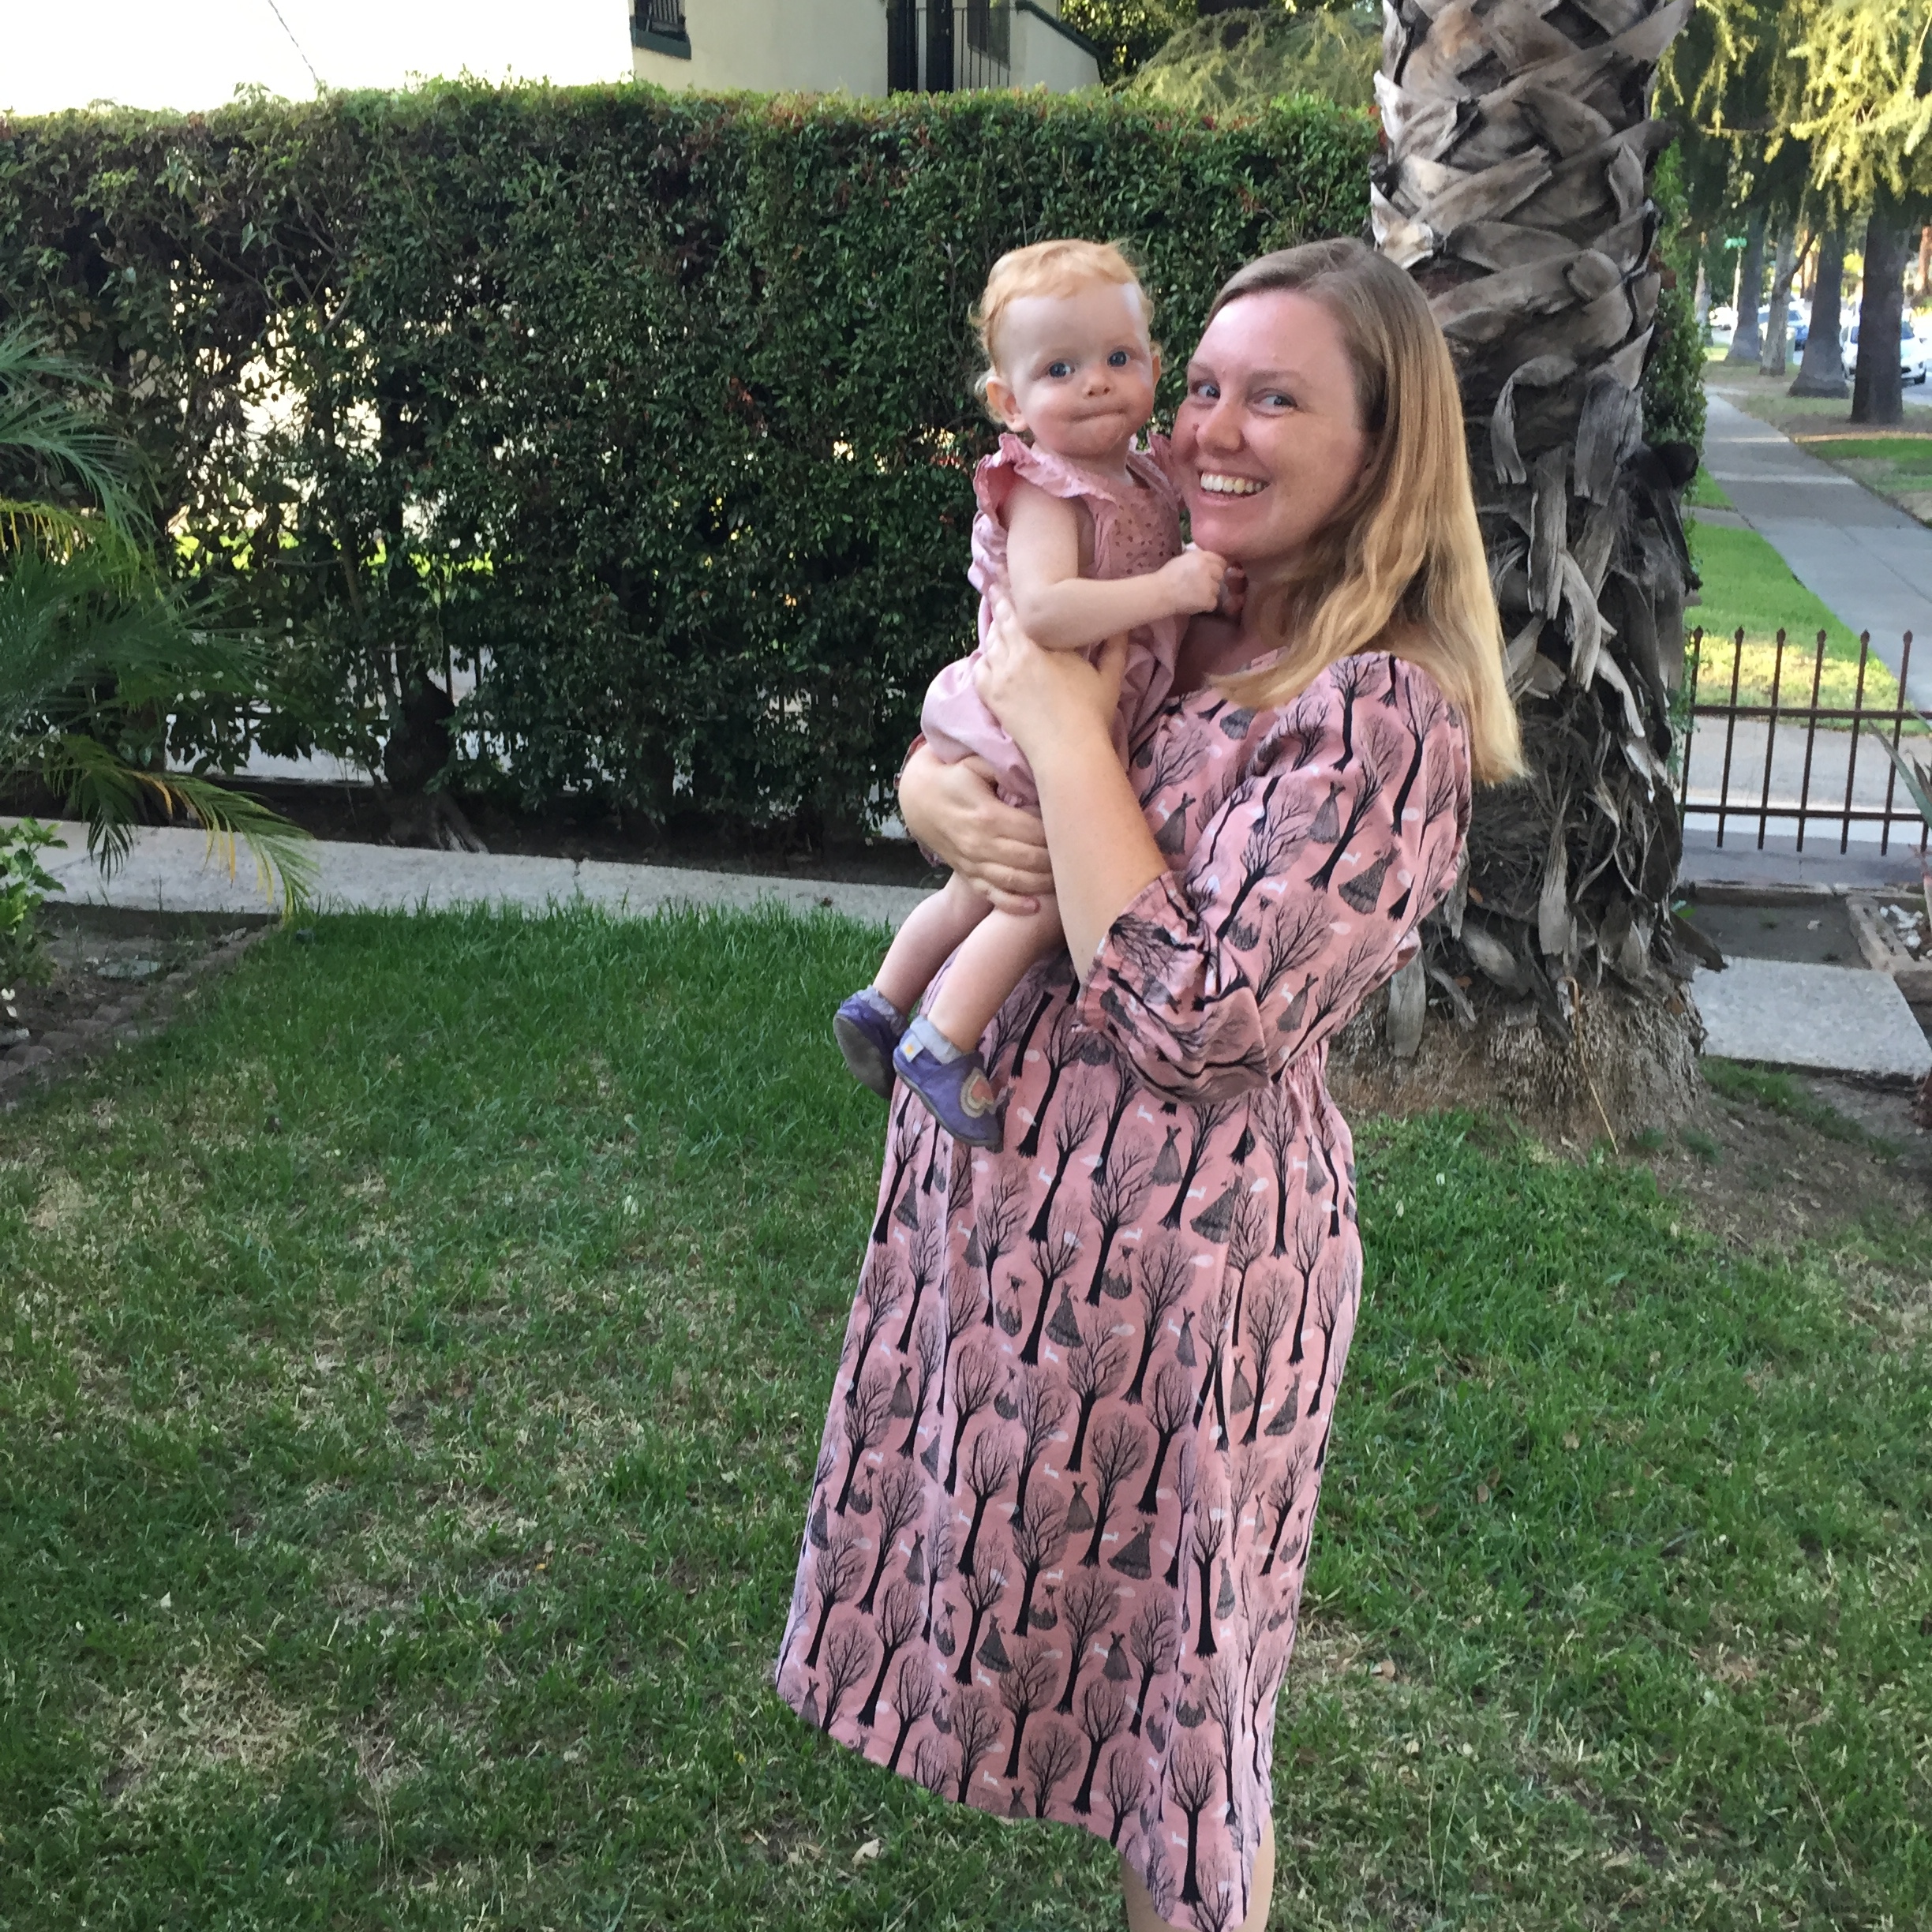
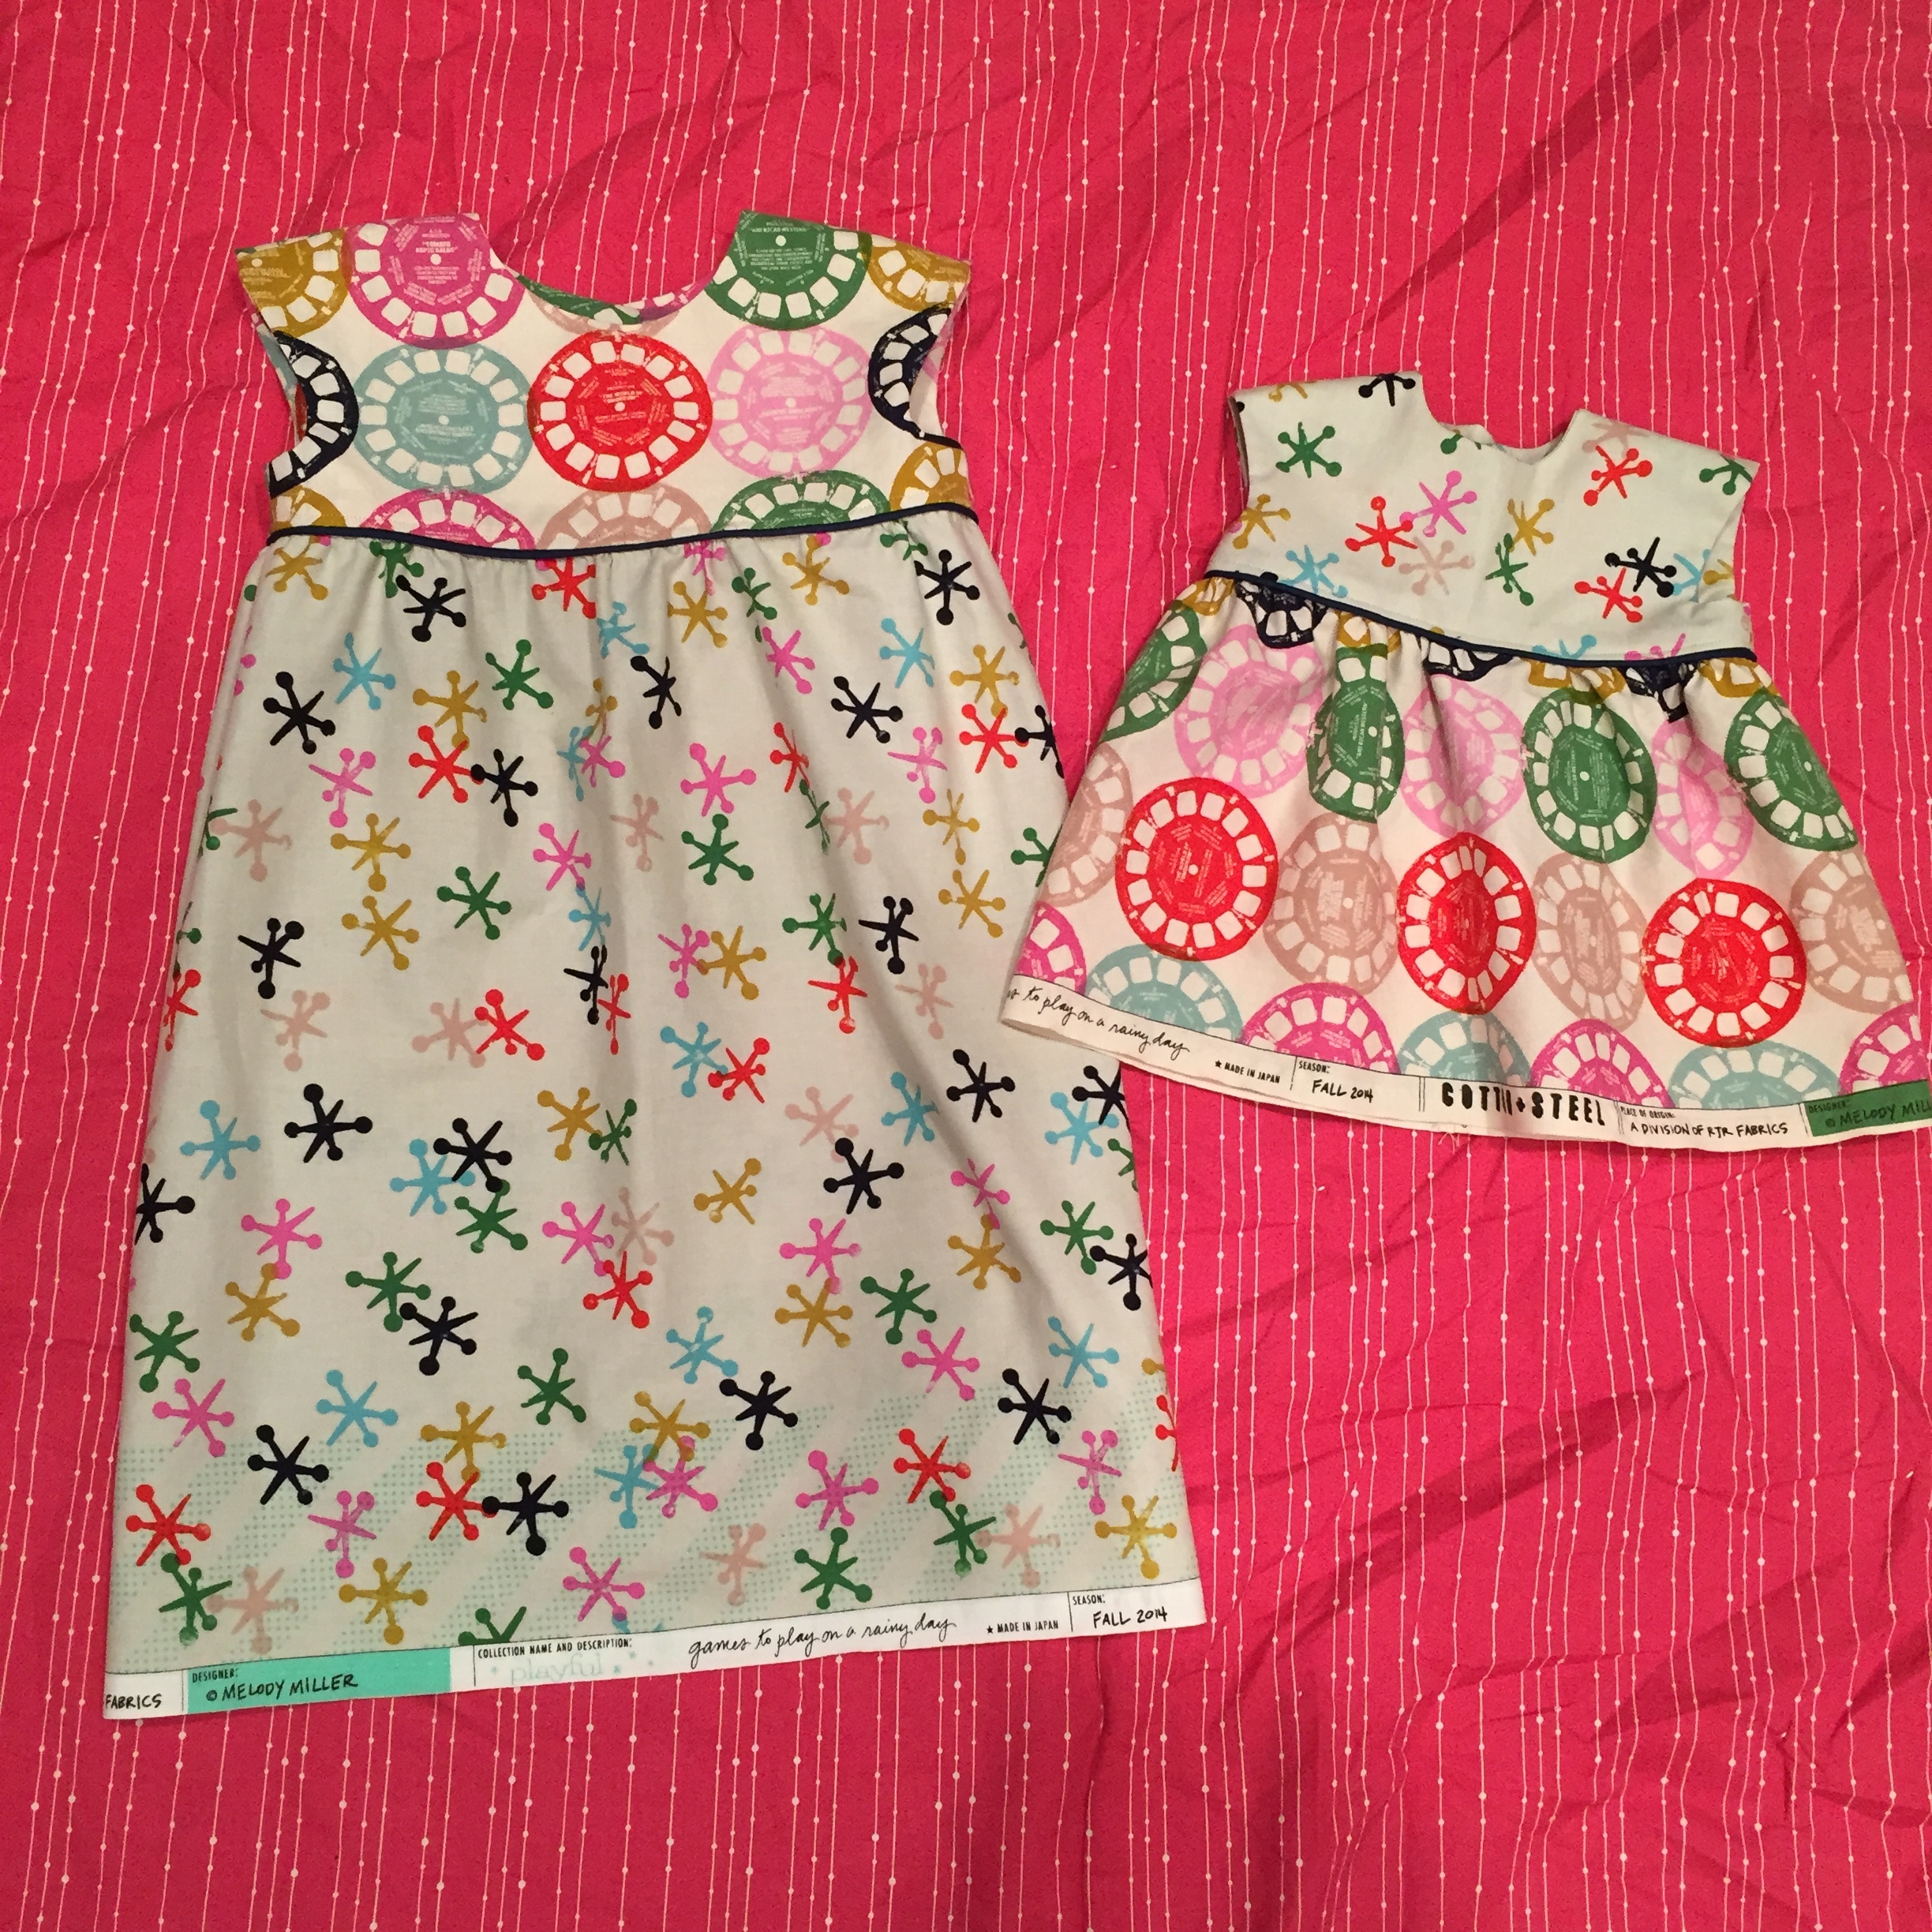
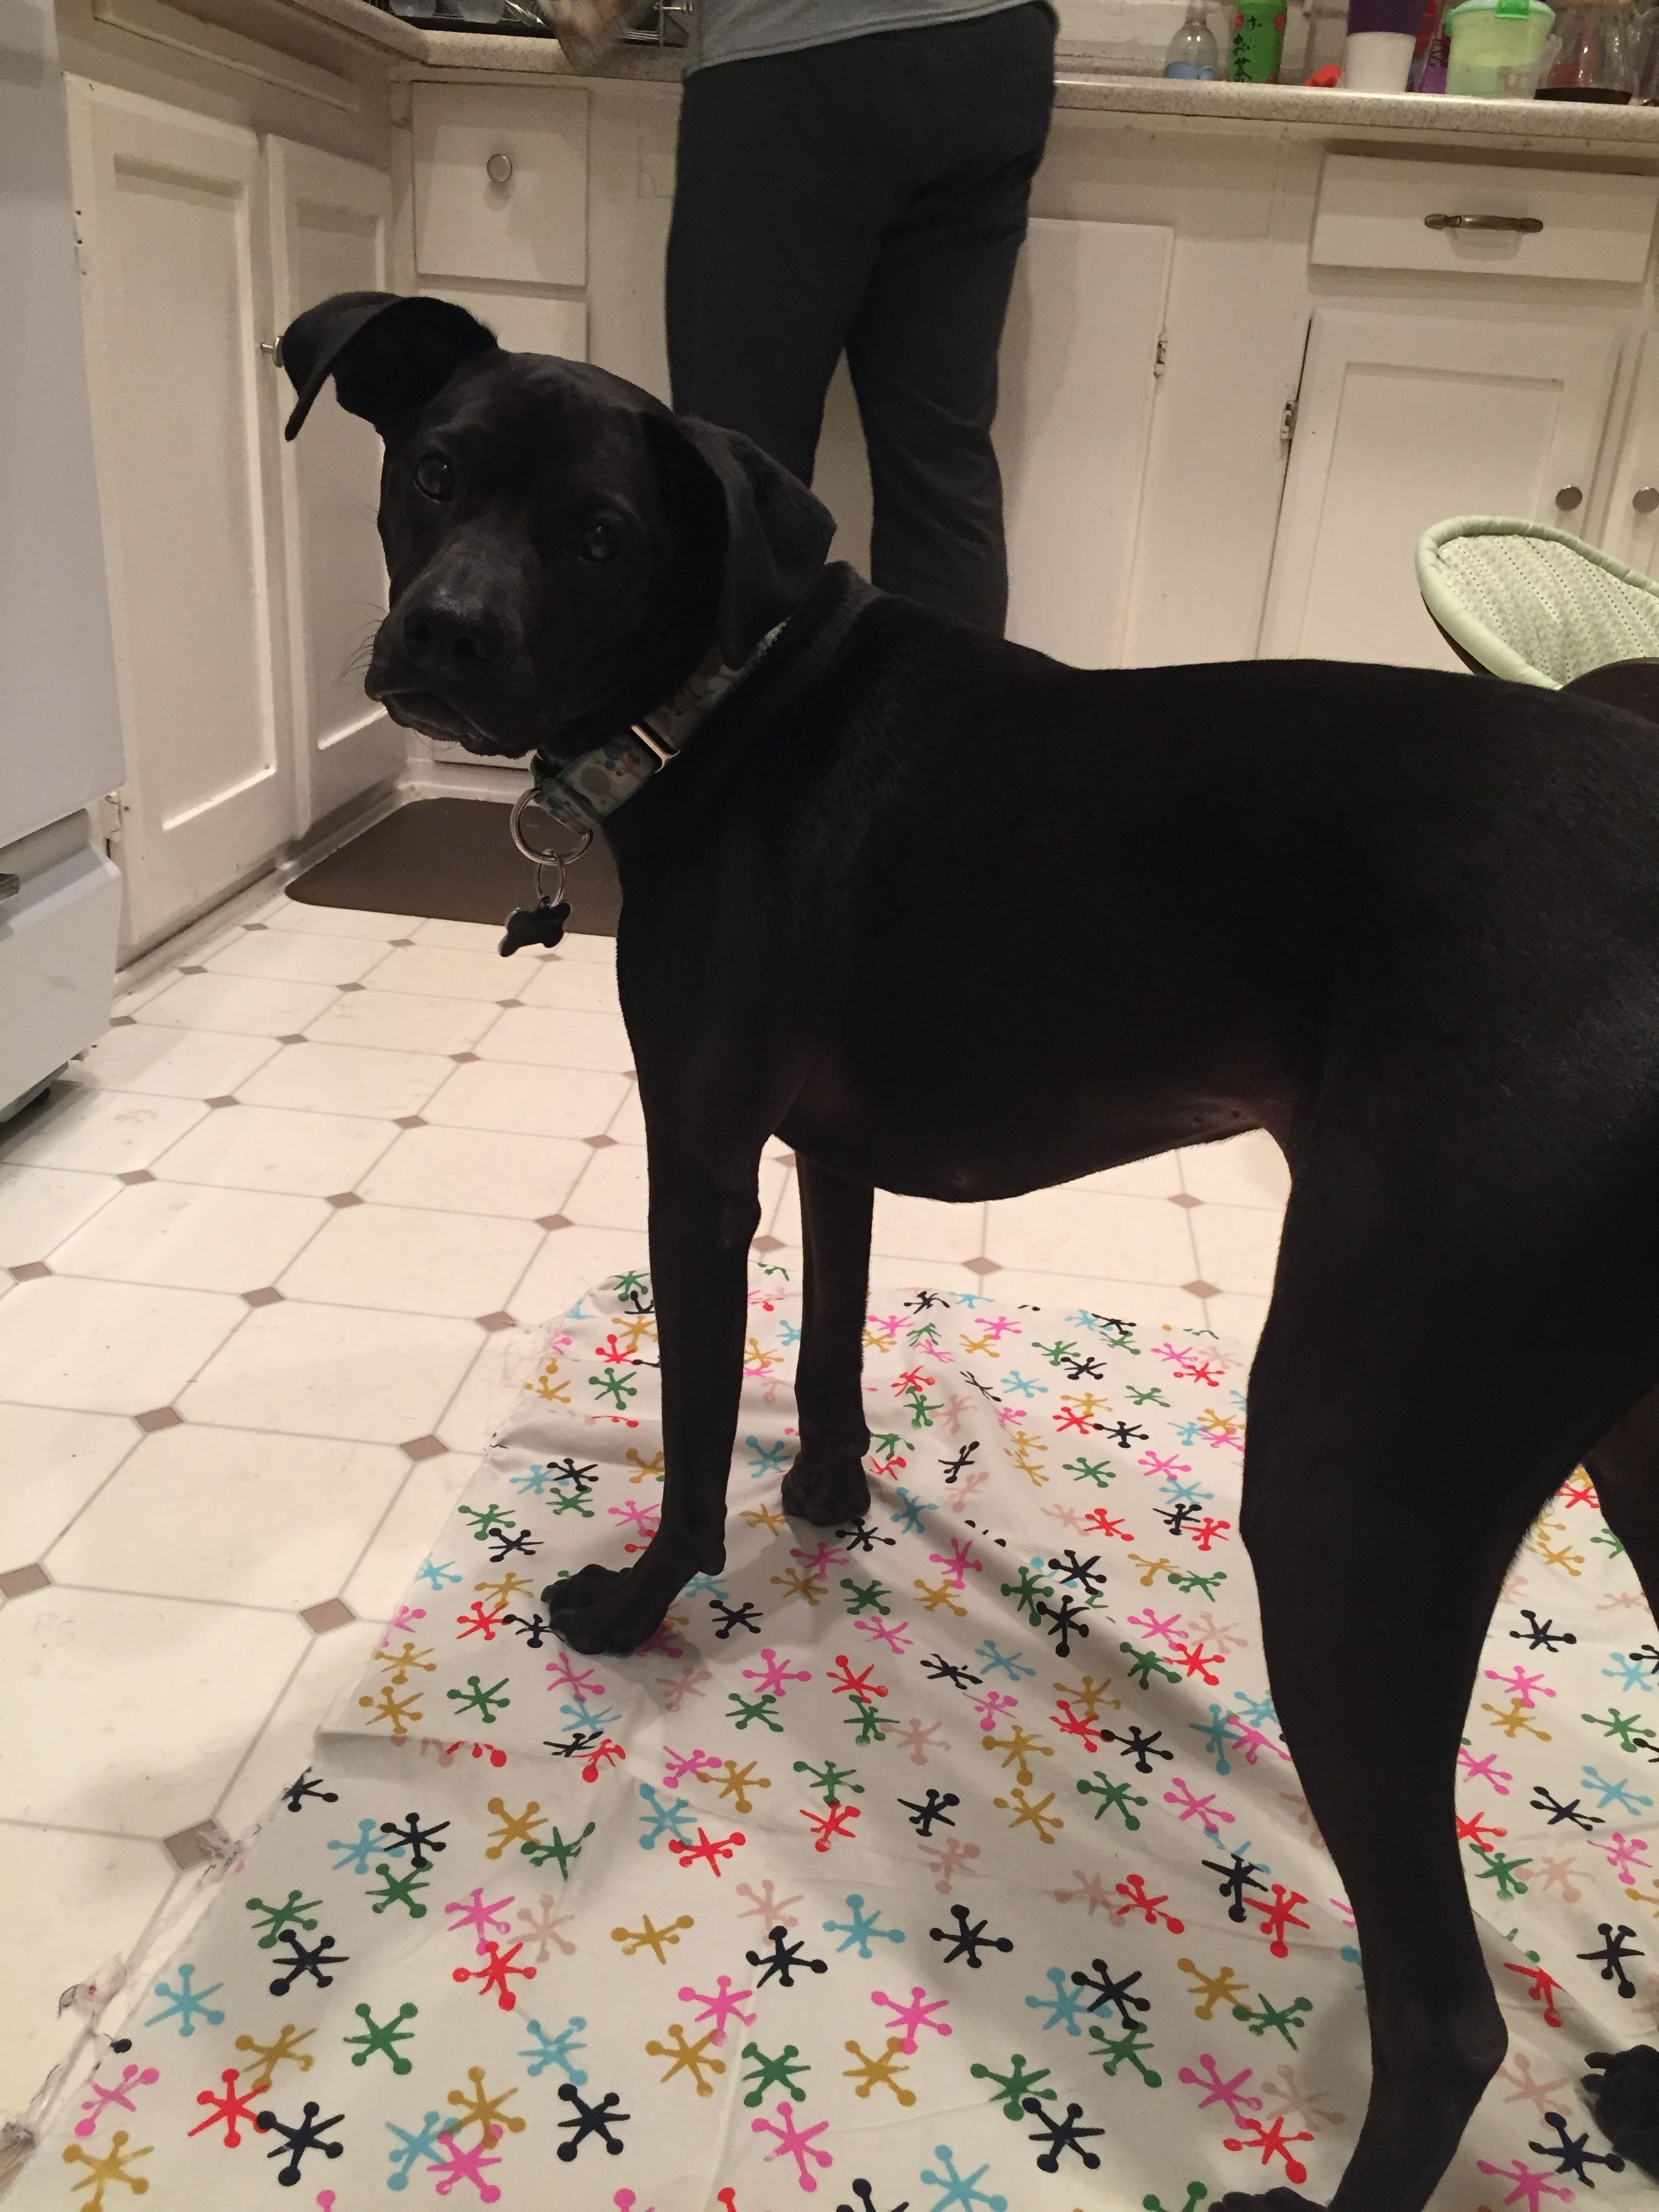
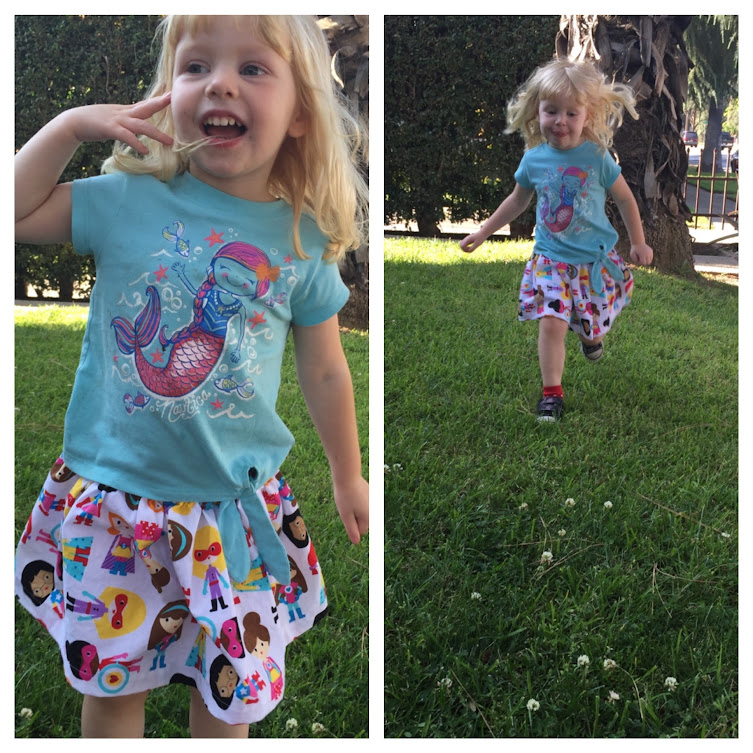
Such a simple skirt to make. I just cut a big rectangle, added a casing for the elastic, and hemmed it. A project that takes less than an hour from start to finish but makes the most of a larger scale print.


There is also this little skirt made with Heather Ross Briar Rose Fabric.

This is fabric Lu picked out when we went to The Intrepid Thread last February. To make this one I traced her favorite Hanna Anderson skirt for the shape and length. Then I added a ruffle to the bottom and an elastic waist band. I was cursing myself for adding the ruffle because it sucked up a lot of time, but the end result is so cute that I’m glad I stuck with adding the fun detail.


Then there is the skirt Lu and I designed together using Cotton + Steel’s Palm Springs lawn.

This was a fun skirt to put together. I had a piece just 26 inches long and spent a couple of months trying to decide how to use the fun pink border that runs along one selvage of the fabric. It wasn’t quite long enough to be on the hem of a dress or skirt. So one night Lu and I studied the fabric and we decided to put the flower on a pocket. Yes! a pink pocket. Lu was pleased. And I had just enough length left to make a pink waistband too. This one is fun because it is also fully lined with the blue flowers.


And the last to share today is not actually a skirt, but a skort!

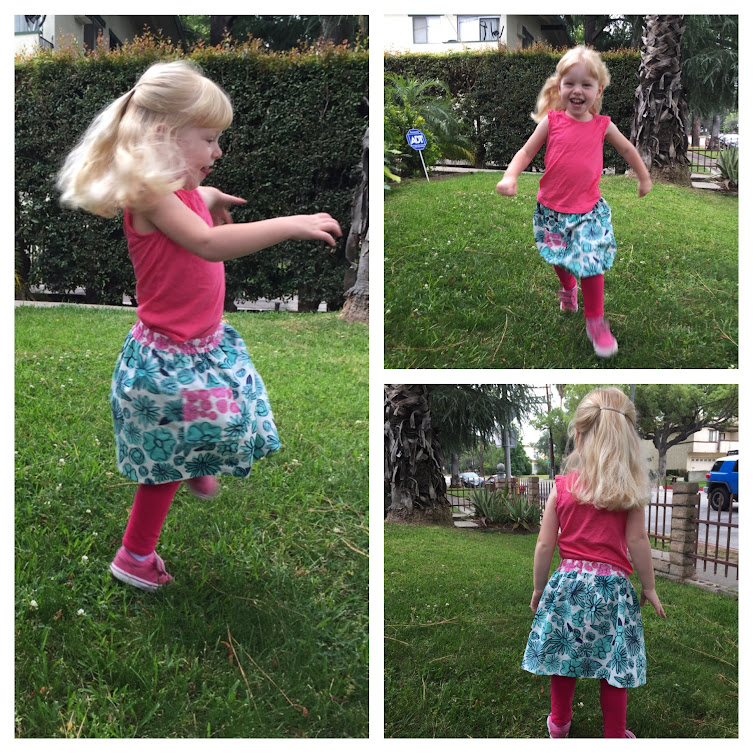
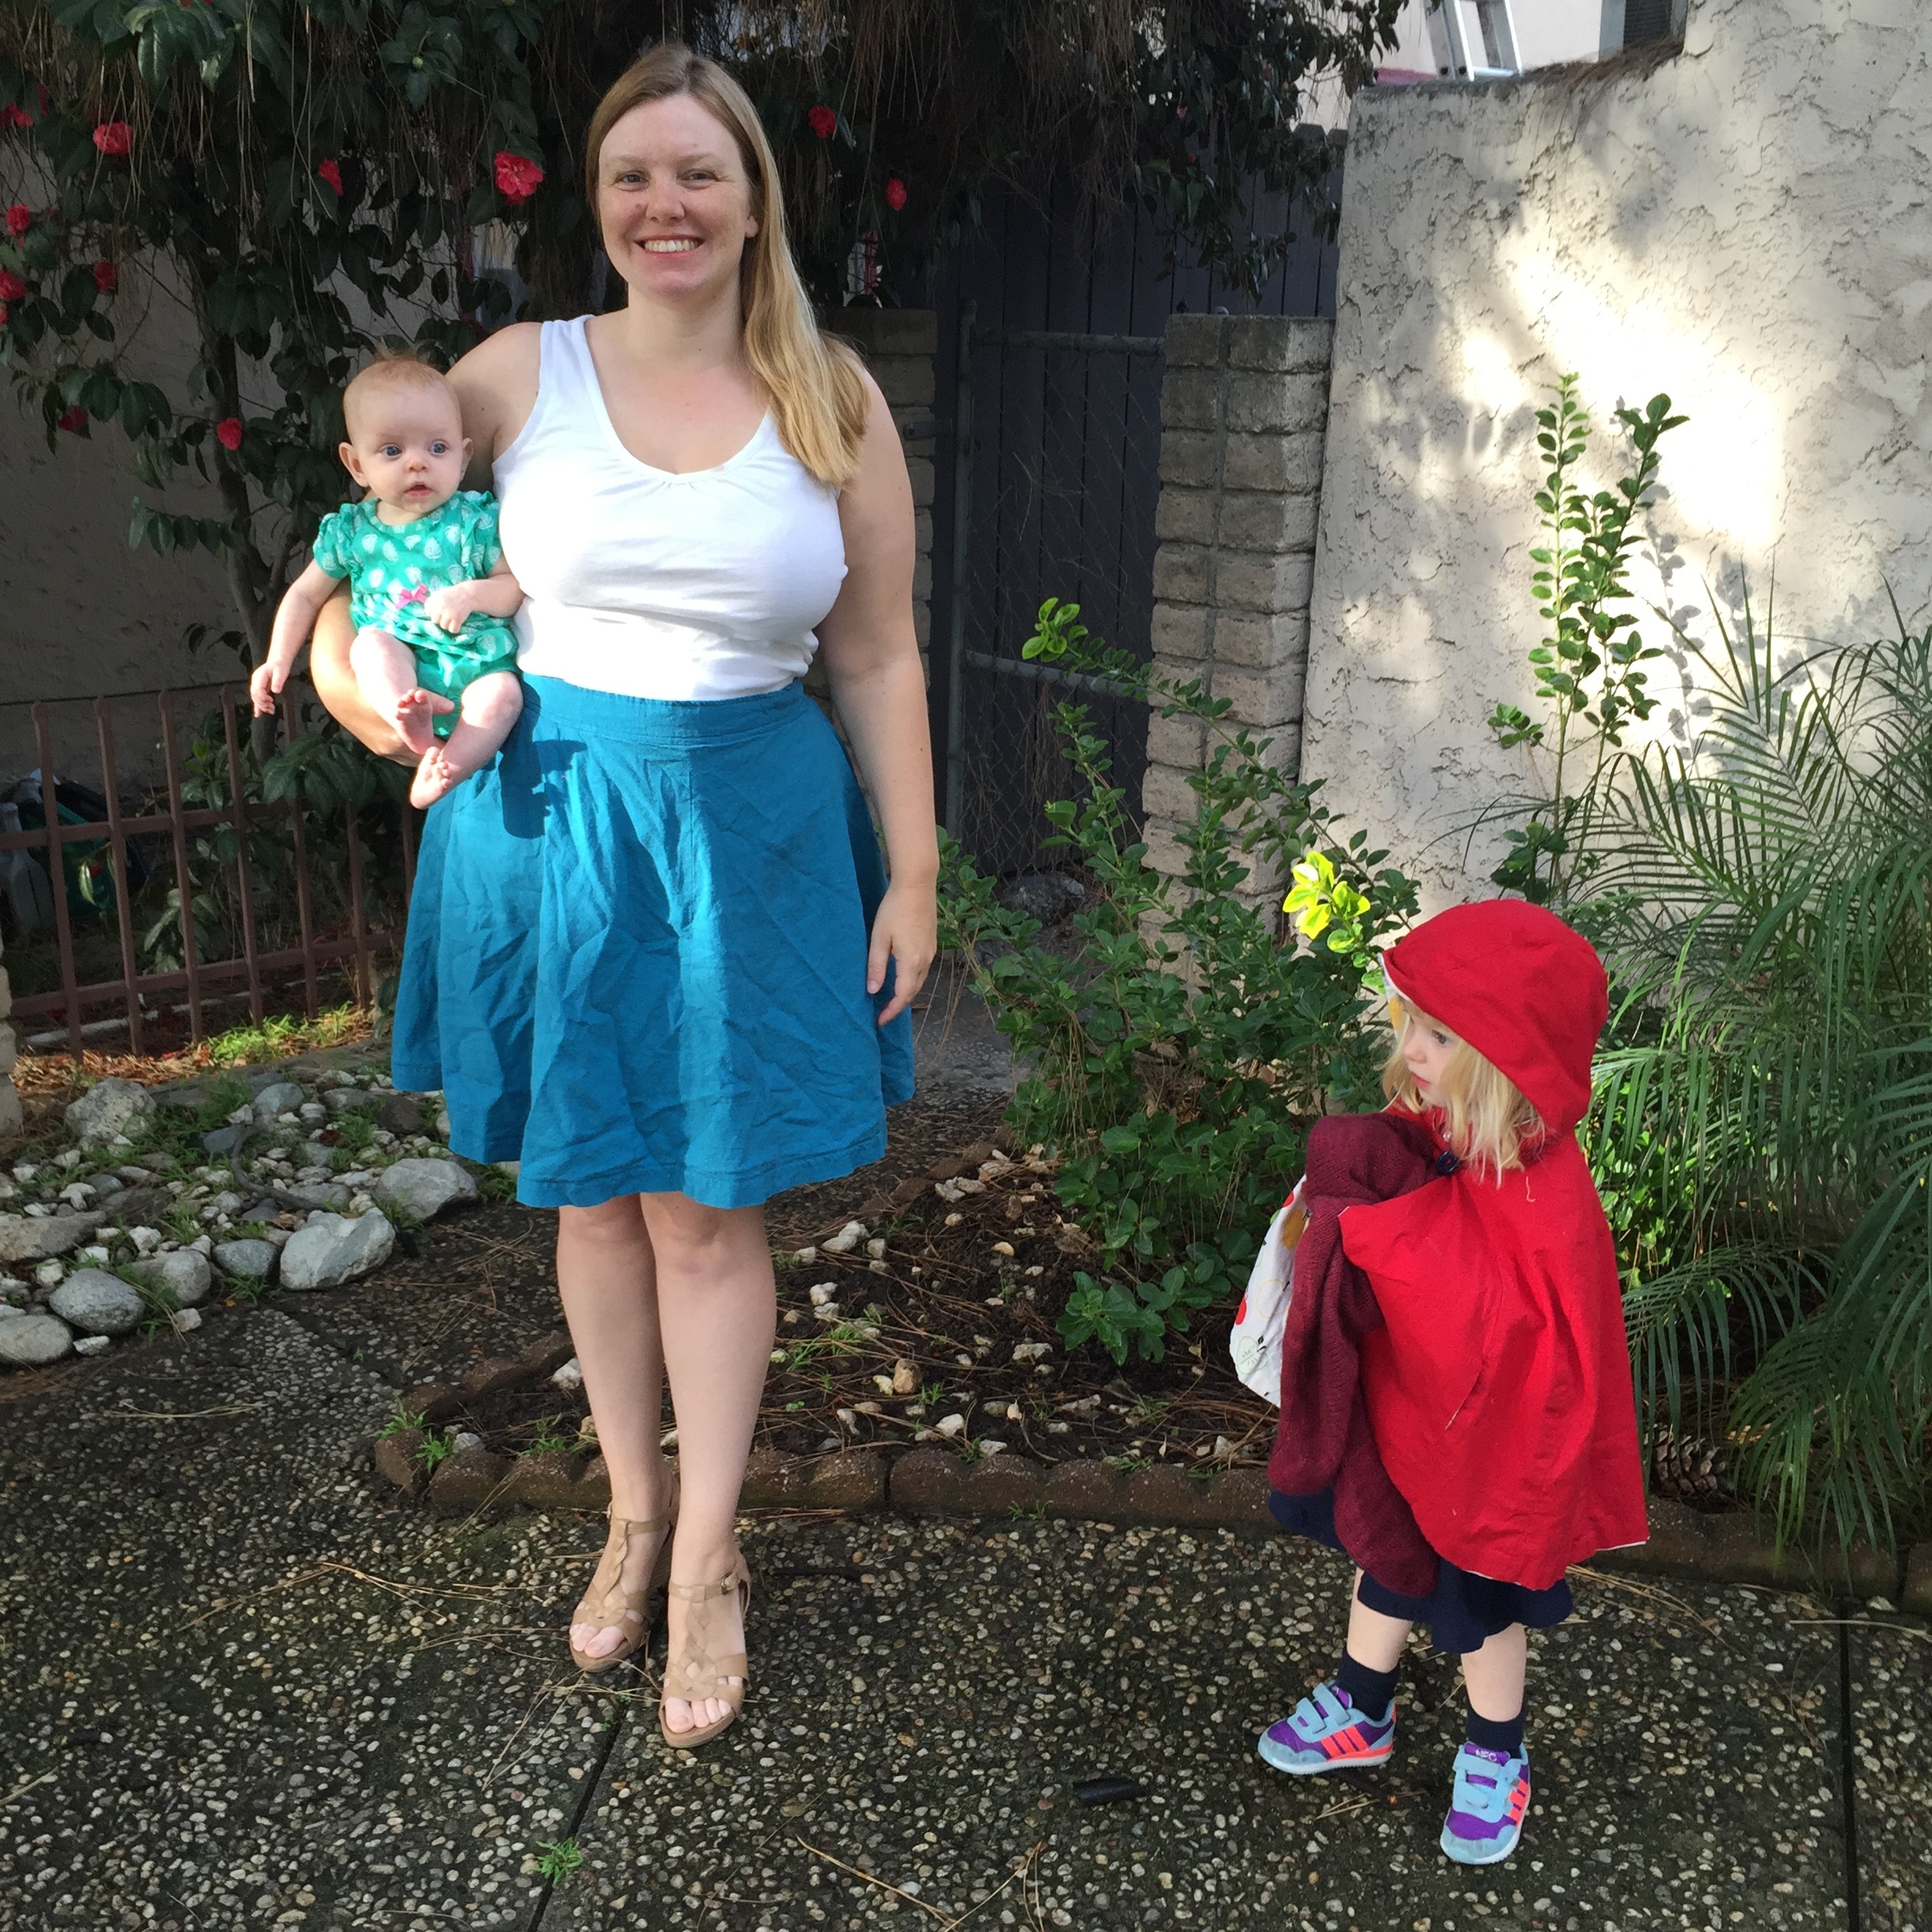
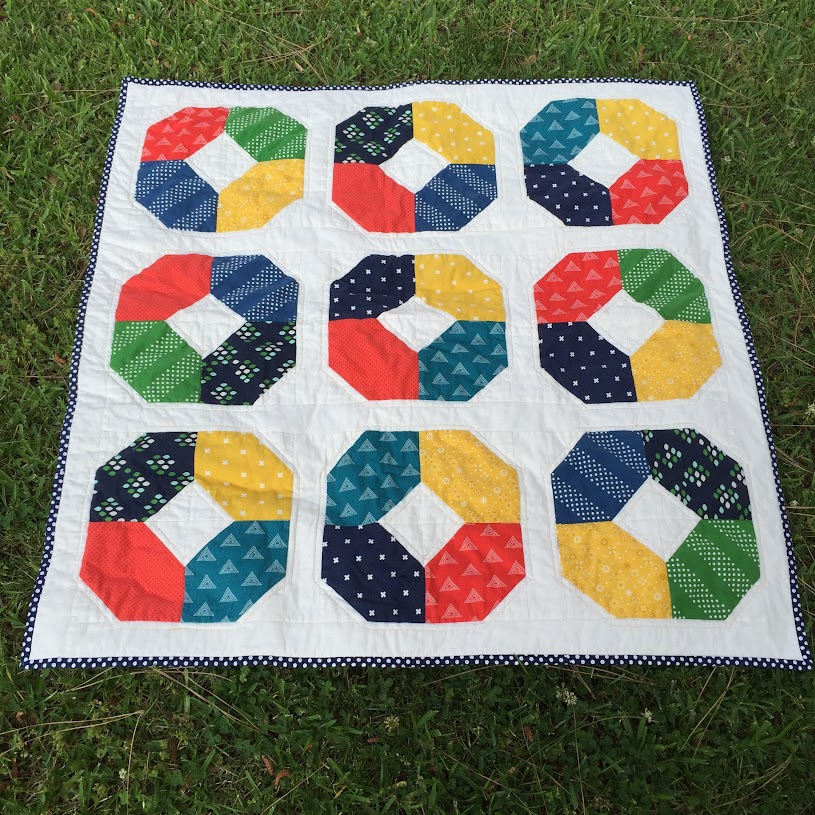
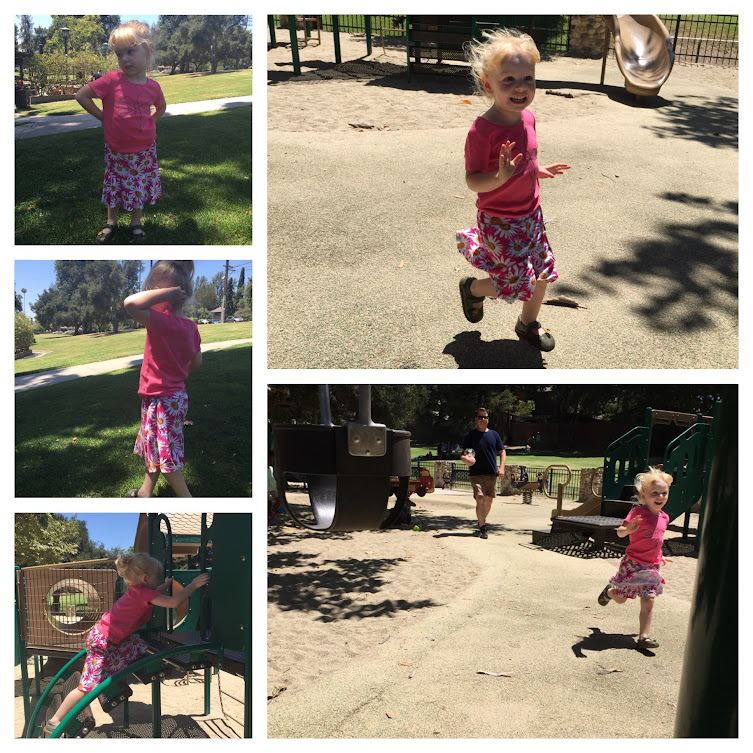
Skorts are the best. Looks like a skirt, but with shorts built in for modesty while playing. The fabric came from a Girl Charlee KnitFix. I decided to try it out one month and was disappointed in the prints and quality overall. But someone traded with me so I could have this daisy print which worked perfectly for this project.

Originally I’d thought to make a dress with it, but then I took a trip to JoAnn’s and found McCall’s patterns on sale 5 for $7. So I took a look through their catalog and found that their children’s patterns start at size 3. Perfect! M6918 is such a versitile pattern. 4 different skirt shapes and the option for shorts or capris underneath. I will get a lot of use out of this pattern. All I had to modify was the length of elastic in the waist!


Whew! So that makes 4 skirts for this summer, but that won’t be enough! More to come once I have them put together. But probably not for a couple of weeks as my machine is due for a little maintenance. In the meantime I’ll be knitting and update you on a couple of other projects I’ve been working on.

Kids Clothes Week: Day 7!

Ta-da! Last day! Here on the West Coast I suppose I still have 90 minutes, but I’m calling it done. Today I managed to fit in one last project. Another Geranium Dress for my younger daughter Charlie.

IMG_2443

My friend Erica gave me a completely random package of fabric. It turned out to be maybe several eighth yards of the Moda Grunge collection as far as I can tell from what I could read from the selvedges. And I had lots of small pieces of fabric left over from the dress I made from Cotton + Steel double gauze. The little slip of Moda fabric was exactly as much as I needed to cut out the bodice of the dress.

IMG_2424

It was also the perfect color match. I even had buttons to finish it off and a husband who took Charlie to run errands while Lu took a nap. I almost had it totally finished by the time he returned.

IMG_2444

And I love that it is lined with double gauze. Nothing but softness for my pretty little baby.

IMG_2445

So here is the full lineup of what I completed this week.

IMG_2441

And everything even has buttons.

IMG_2442

Happy Kids Clothes Week!

Kids Clothes Week: Day 3!

Today’s sewing brought to you by this tool

IMG_2391

That’s right, a seam ripper. Adding the piping didn’t go very smoothly. It’s been more than 10 years since I last tackled sewing in piping so I did what lots of people do…I headed to the internet for some tips. I don’t have a piping foot for my machine, so I tried using my zipper foot and then proceeded to swear and yell while ripping it out 3 times. Finally I put my regular foot back on the machine and got the piping to go in nice and smooth. Well, except for sewing the skirt into the waist multiple times in both dresses. It’s that kind of night.

IMG_2390

In the end I got both finished except buttons and buttonholes. I couldn’t find any buttons to match in my stash, so I’ll hit up a store this weekend or maybe even one of these evenings if I have a chance.

I think I like them as is with the selvedge edge as the hem. What do you think? I’d love to hear some opinions since I have a few more days to finish these before the deadline!

IMG_2393

I tossed these cute fabrics in the wash tonight. Tomorrow I think I’ll start on a skirt for DD1 in either the umbrellas or the lemons.

IMG_2392

kid's clothes week

Kids Clothes Week: Day 2!

Dinner time, bath time, nurse the baby, and do the dishes. A mother’s work never seems to be done, but tonight I carved out my sewing hour again. I made good progress on my girls’ outfits! Bodices are ready to be attached to the skirts. I made could have kept going tonight, but I want to add navy piping between the bodices and skirts. I need to be more rested to tackle piping!

IMG_2380IMG_2382

I think they are off to a good start. And it is nice to make clothes with just plain quilting cotton. I’ve been using other types of cotton fabrics lately and quilting cotton is just so much easier to work with.

I’m exceedingly pleased with the the way the backs of the skirts meet.

IMG_2381IMG_2383

However the back of the viewfinder bodice was not as orderly. Of well. Tomorrow I tackle piping, hemming, and buttonholes.

IMG_2384

kid's clothes week

Kids Clothes Week: Day 1!

And so it begins. Today is day 1 of Kids Clothes Week and I am joining the challenge to take an hour a day to sew for my kids.

kid's clothes week

Step 1: Get your dog to get off of the fabric.

IMG_2376

I have some good fabrics to pick from, but I only had a couple choices washed and ready to go, so I picked a couple prints from the Cotton + Steel Playful collection. Did you know the jacks fabric has a border? I did not, but now that I do it will be at the hem of DD1’s dress.

IMG_2378

Tonight I was able to get DD1’s dress and DD2’s tunic cut out. Tomorrow I’ll start doing the sewing!

IMG_2379

Back to Work!

As I mentioned in the last post I have headed back to work full time. I cannot believe it has been 4 weeks already! I’ve sewn up 3 dresses and 3 skirts so far with plans for a few more as summer comes closer. I’ve share the first already, but here are a few more things I whipped up.

Double gauze is amazing. I bought a dress quantity of Cotton + Steel Bespoke double gauze because I was intrigued by how much people seems to love wearing this fabric. And while it was a bit difficult to sew due to the easily frayed edges and its ability to stretch along the curves, wearing my finished dress is like wearing pajamas to work. Two thumbs up. I picked this up from Westwood Acres which usually only has pre-cuts, but sometimes has yardage available too. It’s a very nice shop to order from as things ship quickly and the prices are very competitive with other small fabric businesses.

20150301-IMG_2989

And maybe it isn’t the most flattering dress I’ve ever made, but the Sewaholic Yaletown dress pattern was dead simple to make and the fit of the bodice is easy to fit with the amount of ease built into the pattern. Plus the cross front makes it very easy to breastfeed when I’m home or pump while I’m at work.

It also fit in easily with shoes and sweaters I already owned which is a big plus when you’re having to buy or make an entire new wardrobe. I snapped this picture when I was in the office this last week. Now I’m trying to decide if I have enough time to make a sleeveless spring version in time for Easter next week.

IMG_2163

Next up is a simple dirndl skirt I made with a print from Zoe Ingram for Robert Kaufman in the line Carried Away. It was a total impulse purchase from my local quilt shop and I also have some yardage of the feathers. But honestly I don’t like this skirt and I’ve never worn it aside from these pictures. I think I’ll cut it apart to make summer clothes for one of my daughters. Two yards is plenty for a skirt of dress for littles.

20150301-IMG_2991

Lastly I made a skirt using Sewaholic’s Hollyburn Skirt. And I’d like to say a big thank you to Sewaholic for printing patterns made for women with more of a pear shape. I was able to cut one size and have it fit right out of the envelope!

IMG_2062 IMG_2064

IMG_2066

I ironed this skirt that morning. Probably less than 20 minutes before these photos were taken, but it’s made from linen. Gloriously light and easy to wear but always wrinkled linen. And I have two small children who need lots of help doing everything. It is what it is. I’ve already made two of this pattern, so it’s on the back burner for now, but I’ll pull it back out eventually because it was so great to sew together.

And that is all for now. I’ve continued to sew up a storm so next time I should have at least one quilt to share and more clothing as well.

Thank you for reading along!