Halloween 2018

img_3564

The girls talk about Halloween all the time. 2019 will bring a vampire and…a superhero? Plans are not yet set. But 2018 was pretty fun.

Our budget was very tight last fall, so I might have pressured the kids into costumes I could make mostly from my fabric stash. Plus, what is more fun than Dorothy and the witch???

img_3565

Project: Halloween 2018

Recipient: Lu and Charlie

Pattern: Simplicity 4139

Fabric: Lots of leftovers from my stash. I don’t remember where I got the solid black, but the purple and black lace was from my 1910s mourning dress. The white on the Dorothy costume was the same leftovers from their Baptism dresses, my 1918 winter ensemble, our Lanvin reproductions, and my Ottobre blouse. I STILL have more of that fabric! The gingham is 1/4″ gingham from Robert Kaufman. I wished I’d bought 1/8″ gingham because tiny child is tiny.

img_3567

We also found a single pair of ruby red slippers at Payless Shoes (RIP) and they were exactly Chi’s size. Kismet.

I used the same pattern for both and holy cow, Simplicity runs huge! Lu’s was I think a size 4 and Chi’s was a size 3. I didn’t bother to save the pattern when I was done because the proportions were so strange.

While Chi’s costume was very cute she really rarely wore it. On the other hand, Lu wears here witch costume ALL THE TIME. Both wore their special Halloween shoes until they had holes. So I’d call it a successful holiday.

Back to School!

So, I’m just a little bit behind on sharing projects from late 2018. Moving forward I’ll be intermixing newer projects with older project until I get through the backlog. Today, back to school outfits!

Both of my children wear a uniform for school, but the dress code is not terribly strict. As long as their shirt has a collar and the colors are correct-ish neither school will complain. I usually buy most of their school clothes as polo dresses and leggings as both cheap and easy to acquire, but the first day of school is special and deserves something fun to wear!

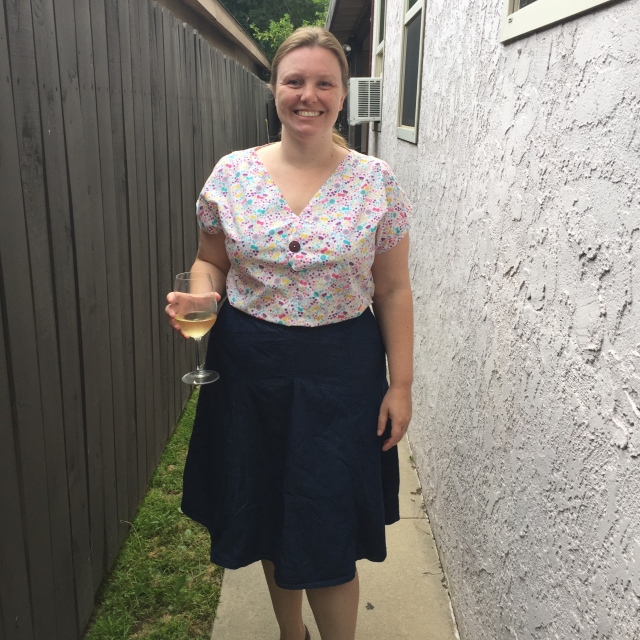
For Charlie I went with separates.

img_3011

This is the Oliver + S Music Class pattern. It’s a great little uniform pattern with a classic blouse and simple skirt. Great for wearing to school and pretty easy to sew as well.

Back when Lu went to preschool I bought all kinds of uniform fabric. I was definitely going to make all her uniforms. Ha! Nope. I had a Charlie a few months into Lu’s preschool years and that fabric has mostly sat in my stash. This fall I used most of the uniform stash to actually make more school uniforms including this adorable back to school outfit.

img_3019

Charlie likes it pretty well, especially those cat buttons.

img_3018

Charlie is very obsessed with cats, even though we don’t own one. When I saw these buttons at the Costume College marketplace, I just knew they would bring a smile to Charlie’s face…and they did!

img_3016

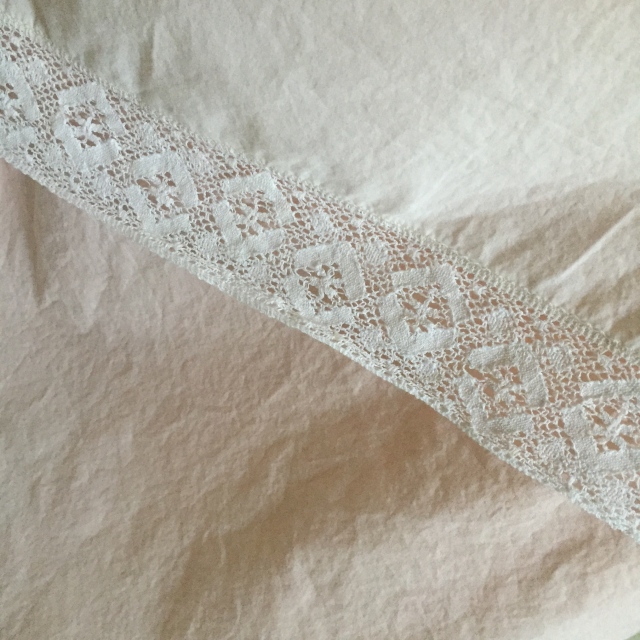
The fabrics are both from Robert Kaufman, but after 3+ years my memory of the specifics is gone. I’m sure the shirt is lawn, but the skirt is…? Who knows. Something sturdy that took the pleats really well.

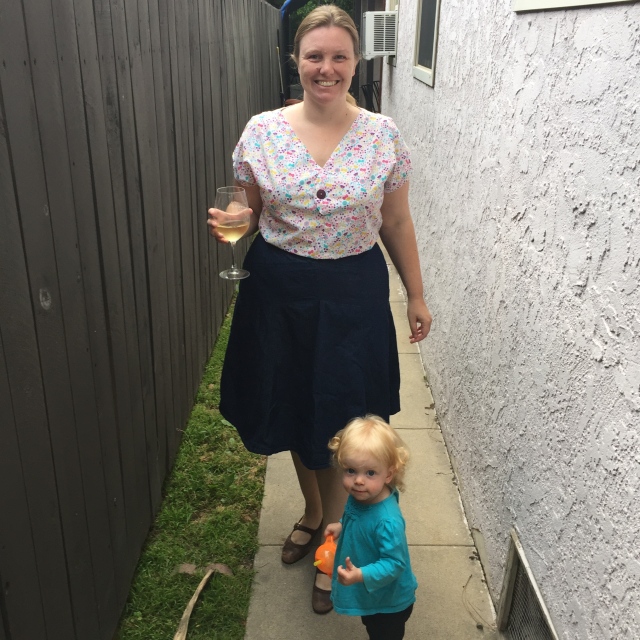
This little girl is not real fond of school, but wearing pretty clothes makes her happy and that makes momma happy too.

img_2841

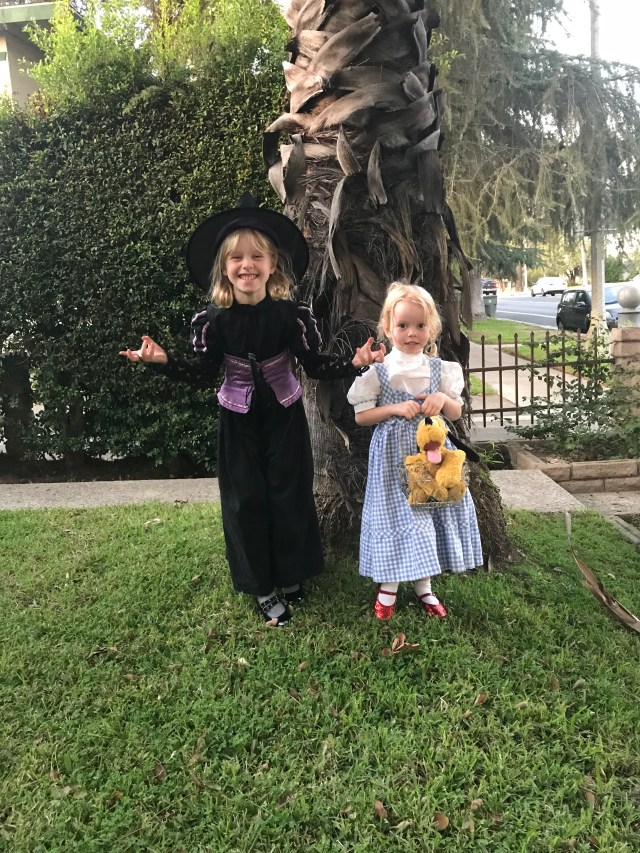
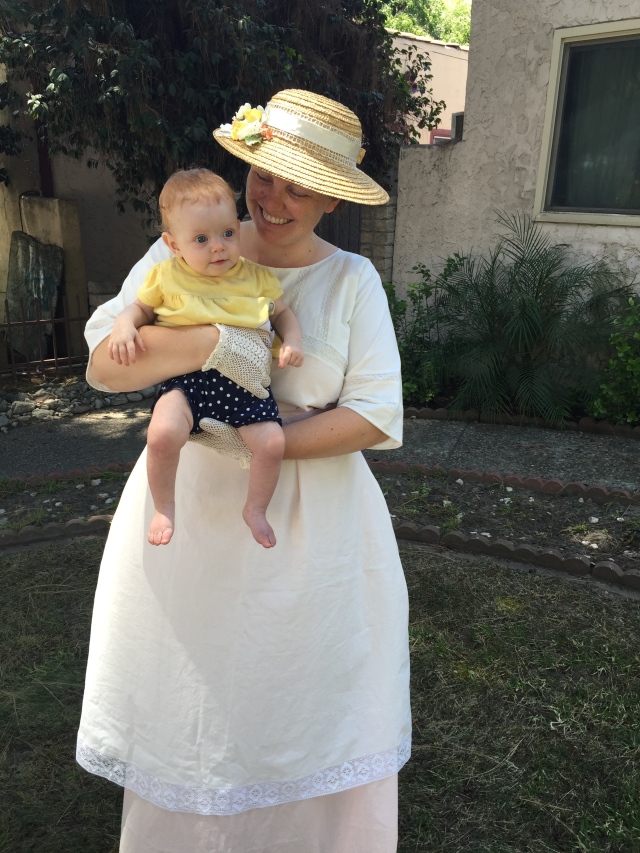
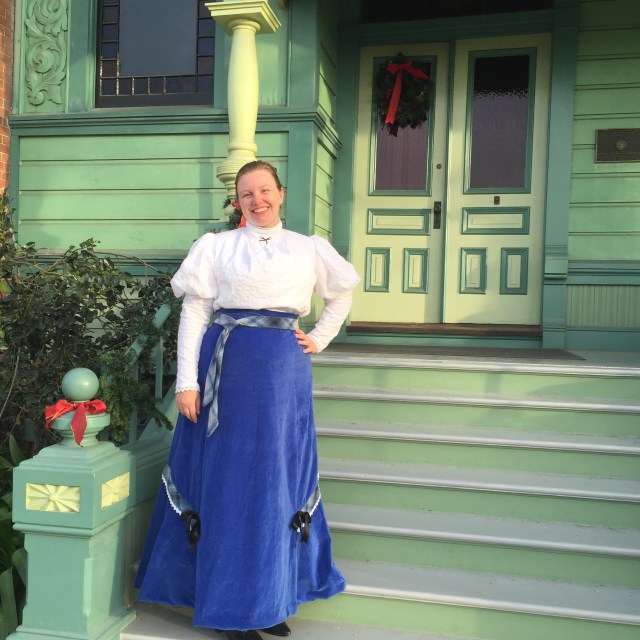
For Lu’s first day of first grade, I used a vintage pattern. I went on a little vintage pattern ebay spree over the summer and this little number called my name as something cute, uniform-ish, and practical. It’s Hollywood Pattern of Youth #1504.

img_2849

I could not find it on any of the vintage pattern cataloging sites and was a bit hard to date, but I’d guess its from the 1930s. The starlet for this pattern is Virginia Weidler who was born right now the road from us and it best known from The Philadelphia Story and The Women.

img_2845

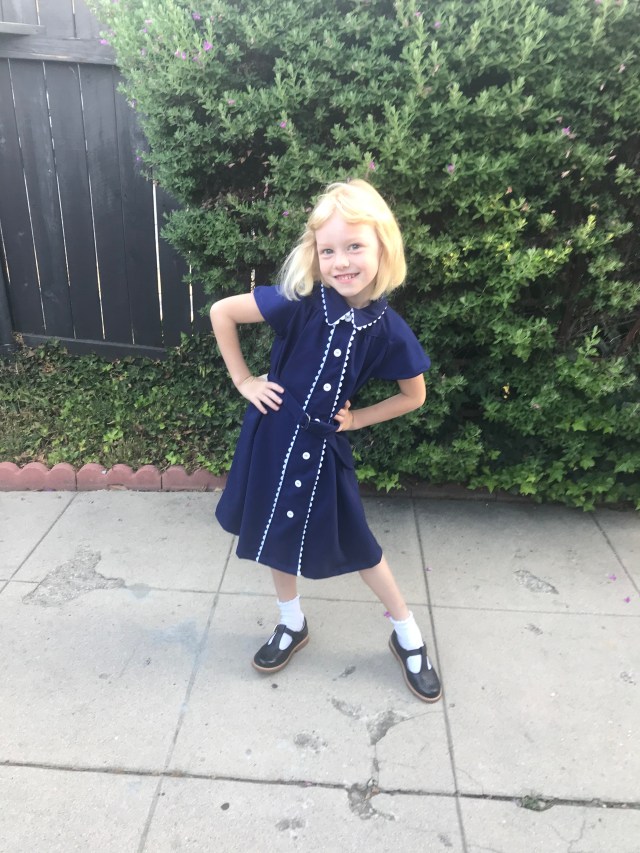
Lu was a total ham in this dress. I think she liked it quite a lot, but she really loved those shoes! Too bad they broke on the third wearing and had to be returned 😦 The belt was also a huge hit. I had no idea such an accessory could bring so much joy to a child.

img_2847

The fabric was nothing fancy. My stash was all really stiff skirting fabrics and so I journeyed to JoAnn’s to find something with a touch more drape. I returned with a rayon blend twill and some white rick rack. The twill was also a bit too stiff for the pattern, but I didn’t want something too delicate.

img_2848

Neither of their first day of school outfits has made it into heavy rotation. Those polo dresses really so just so much easier to maintain and comfy to wear. That’s okay though. Special clothes don’t have to be worn all the time. Making them brought all of us such joy. They have served their purpose.

Stretchy Fabric Strikes Again!

Well, I’m still continuing on my journey to learn about stretch fabrics. My latest project is a testament to why I need to slow down and think a little more. Probably a reoccurring theme on this blog. I’m not a process sewer. I want a finished item and I want it NOW! So sometimes (most of the time) I forge ahead even when things don’t seem quite right.

So here is another one of my Washington Dress Hacks.

img_7700

Oh hey! That doesn’t seem too bad. And really the dress looks pretty good in the photos. So why am I unhappy? Well this fabric is SO STRETCHY. The first time I used this fabric I made a Moneta (post here) and it stretched all crazy out of shape. I thought it was the pattern. Now I’m thinking it was the fabric choice.

img_7703

This is some crazy cheap fabric I found at M&L Fabrics in the $3/yard section. It’s a Robert Kaufman interlock as part of a Valori Wells collection. I love the print. I’ve been hoarding it for a year deciding what to make. But it is also totally different from the Valori Wells interlock knit I bought that was from Free Spirit. So confused!  I’m guessing she switched companies between collections and suddenly I’m shopping the discount bin and finding things from a long while ago. Whoops!

img_7698

Anyways, to make matter worse this fabric is also 100% cotton and has zero recovery. So while it drapes beautifully it wouldn’t be so great for something that needs to snap back throughout the day. I’d contemplated making a wrap dress, but I’m glad I went with something simple. Even sewing this fabric was a total pain. I had to wash and dry it just to make it wearable post stitching.

img_7712

Regardless I will keeping wearing the dress. Probably only over the weekends. It is really comfy even if I’m not in love. It makes my bust look down right saggy as shown in this photo my mom snapped while we were miniature golfing.

img_7681

Plus the weight of the fabric pulls it all forward. Not a huge deal on the putt putt course, but not exactly appropriate for the office!

I’m pretty certain I’m going to take it in at the side seams a touch. The fabric has the stretch and I lowered the arm hole depth on this version so the space is there. Maybe it will help anchor the dress to my body. Worth a try?

Summer and Guiding

Oh hi! I guess I disappeared for longer than I expected. Mostly we’ve been busy with a staycation, a family reunion, and a new job for my husband, but yesterday I spent my afternoon volunteering so here I am to talk about a dress I actually made last summer.
As I’ve mentioned in previous posts, I volunteer at Heritage Square, a museum in Los Angeles that resembles a Victorian neighborhood. I’ve been there for nearly 6 years and I have to say I really enjoy it. Once a month I give tours and at first I felt like such an impostor, but then I realized how good it has been for my public speaking skills and how much it has become like a second home.

The pretty costumes don’t hurt either.

IMG_6897

So here is my summer tour dress!

Like I mentioned I actually made this last summer. I spent months obsessing over which pattern and fabric to use only to finish the dress right before the weather turned cool. Whoops!

That’s the hard part of making historical garments…the self doubt. I am far from an expert. When I first started volunteering I had no clue. Polyester everything because it was what I could afford. Then I went and had 2 babies and nothing fit anymore.

So a year ago I decided to make something simple, summery, and easy that I could wear in the long hot summer season. Also a dress that didn’t use dozens of yards of fabric so I could afford to make it.

IMG_6898

I also opted for something nursing friendly.

Enter the 1912 kimono dress pattern from Sense & Sensibility Patterns. It was everything I was looking for. Simple to sew, easy to wear, and with easy nursing access.

And after sweating, stressing, and asking a few people for help I settled on using Robert Kaufman lawn as the main fabric.

IMG_6899

One year later I am happy with those choices. It took me so long to make that I skipped the nursing option. Otherwise there are a few fit issues, like it’s a little big through the upper back and the sleeves are an awkward length, but it is so easy to wear.

As you can see I added yards of insertion lace to make the pattern more like the lingerie dresses that were so popular through the 1910s.

IMG_6900

I also used 2 colors of fabric, an ivory and a soft peach. Both were common colors to wear 100 years ago.

And confession…I don’t wear Edwardian underwear underneath my dress. I’m sure historical clothing experts notice. I should wear a corset underneath. I know I know. I just don’t own one for the right time period so for now I skip it and only wear a chemise (and modern underwear). Eventually I’ll buy one because having a few different corsets would be helpful, but they are also costly to purchase with custom measurements. Oh yeah…I guess I should maybe make one? I’ll mull it over for next summer.

IMG_3505

And here is my dress last summer with a much younger Charlie! You might notice the hat looks different. That’s because this spring I tried my hand at millinery. I took this same hat and redecorated it to match the dress. Many new skills in this outfit!!! I also received some new shoes for Christmas that coordinate perfectly.

So now I ponder what I’d like to make next. I should probably make something a mourning dress. We do an event every Halloween that explores the mourning customs of the Victorian era and my old outfit is super tight. At least for that one I have the underwear!

Art Deco Separates

My love affair with separates continues! And mostly it is thanks to the patterns from Sewaholic! Having skirt patterns pre-drafted to a pear shape is making my life so much easier! I have many pretty blouse patterns I’ve never made because finding commercially made skirts is so frustrating! I’ve tried making skirts too, but the all too often looked homemade. This is the year I change that trend.

IMG_6572

This is the Gabriola skirt. You might not recognize it because the pattern is for a maxi length skirt and its supposed to be made with a drapey fabric. But I like to make things my own, so I hacked a ton of length off the bottom and made it in denim. Rules? What rules?

IMG_6569

And because my goal is to make my skirts appear less homemade I put in an exposed metal zipper. It is not my best zipper installation of all time, but it looks pretty good. Then I top stitched every single seam. And I love the lines of the skirt! It reminds me so much of those 1920s and 1930s bias cut dresses!

IMG_6576

Here is where you can see the combination of denim and this front point isn’t perfect. But whatever. Most women seem to think leggings are appropriate to wear out on public, so I’ll forgive a few oddly draping spots in my skirts. Still way way way better than anything I’ve seen in a store in many many years.

And I’ve wanted a jean skirt for quite a while. Summer at my job is very very casual and heck even during the year a dark denim skirt wouldn’t be out of place. So I picked up this fabric at JoAnn’s on sale figuring I could use it for another Hollyburn skirt. But recently I’ve really enjoyed wearing skirts that fit closer through the hip. It seems more flattering to my shape. That’s when I decided to go for the Gabriola instead.

IMG_6568

The blouse is also new! It is Jennifer Lauren’s Afternoon Blouse and another lovely nod to retro shapes. The hardest part of this pattern is taping all the pieces together! Sigh, I love a printed pattern so much more than a pdf, but this pattern kept calling to me, so I took the plunge. So glad I did. Jennifer currently drafts her patterns for a D cup, so I cut a straight size 18 and it worked perfectly. Plenty of room in the cut on sleeves (so rare for me) and I’m happy with the fit for a casual summer blouse. The fabric is from the collection London Calling from Robert Kaufman. I’m pretty sure I bought it to make the girls something, but too bad. Mine now.

I’m tempted to make the dress version, but I can’t decide if it will just end up looking like a tent. I’d say I should try it for a weekend dress, but I have plenty of those already. I think I’ll ponder a little longer.

Really I like both of these pieces a lot and I know they will get plenty of use once our weather warms again (its only in the high 60s right now). I have some striped chambray set aside for another skirt and some Liberty of London yardage for another blouse. I’ll get to them eventually.

And hey! The outfit even gets a thumbs up from Charlie!

IMG_6564


Washington Dress

This week I managed to finish up my first version of the Washington Dress from Cashmerette! And of course I couldn’t be a reasonable person and make it as shown on the pattern. Oh no, of course not. I had this idea of making it drop waisted and as you can see it was only sort of successful.

IMG_5046

Pros:

  • It is so so so comfortable. I wore it all day and it was so great. Like wearing pajamas.
  • Now that I’ve hacked it I know what I did wrong.
  • I used random fabric from my stash so this was a low cost way to test my ideas.
  • My husband really liked this dress and thought it was very interesting with the curve towards the side of the hip.

Cons:

  • I think I don’t need the hollow chest adjustment like I’d thought. I need to adjust the armholes instead like Emily originally commented on my Appleton. Doing the hollow chest alteration didn’t work. Oh well.
  • The bodice was drafted is too short. I’ve noticed this on my Appleton’s too. The waist is too high and I’m not even close to the amount of negative ease the pattern suggests. Maybe that means the dress isn’t anchoring at my waist, but next time I’ll be sure to add length.
  • By hacking it together I un-did the sway back adjustment. That was a terrible idea. I had a huge amount of pooling at the back. I took 4 inches total in two darts. It helped, but not quite enough.

IMG_5048

With all that said, I think lengthening the bodice would have fixed some of my fit woes since everything below my bust is sitting a little too high. I am contemplating adding a contrasting waist band to see if that helps.

The fabric used is Valori Well’s Quill Interlock. It’s out of print now, but dang. I wish I had 3 more yards. I love this print so much. My friend gave me 2 yards which was plenty for this long sleeve top. The skirt fabric is some mystery poly blend I’ve owned for who knows how long.

My final word on the Washington Pattern for now is…uh follow Jenny’s directions? I’ll be making another one soon, but I have to take stock of my fabric first and probably buy something new. I’d really like to try it in a solid knit top, but my only dress quantity on hand doesn’t have enough recovery for this pattern. So I’ll add it to my list for 2016 sewing. In the mean time I’ll be wearing this version with this perfectly matching cardigan and enjoying the comfort. When in doubt…put on a cardigan. It covers all kinds of fit woes.

IMG_5045

My Very Victorian Christmas 2015

Heritage Square is a museum where I try to volunteer at least once a month. It’s a museum that has several Victorian homes and usually I lead tours. However once I year I get to pretend I have a tiny bit of acting talent and spend one weekend performing in the Lamplight program.

IMG_4876

This year I was Virginia, a woman in my early twenties (ha!) who had just been engaged to Martin, a man who literally swept me off my feet. We perform a scene every 20 minutes from 4pm to nearly 9pm. It is exhausting. It is fun. It is a good excuse to make a new pretty outfit.

IMG_4874

Welcome to my home!

This year I was in the Hale house. It is the most restored home and quite lush inside! It’s also incredibly creepy and I think haunted. But at least no ghost sightings during our weekend! Just a few odd footsteps.

IMG_4915

And I made my whole outfit (except the corset)! Whew! It was a lot of sewing for a few weeks, but a little bit each night makes it easy to accomplish. I ended up making a corset cover, blouse, and skirt. Plus refashioned two petticoats. Thankfully I made a light colored chemise this summer so it was one less items to churn out in November.

The blouse came from an out of print pattern (Butterick 3417). The largest size I had was too small, but I did adjustments to the front, back, and sleeves to size it up a few sizes. I over compensated a bit, but no worries! It fits the style of the time. The fabric came from a new favorite shop, Renaissance Fabrics. I purchased the last of some dimity and fully lined the blouse with cotton lawn since this was for a winter night time event and the weather is often quite chilly. Then I finished off the blouse with lace from a fellow volunteer (thank you Kristine!) and some buttons a fellow knitted sent to me (thank you Liz!).

Really I owe Kristine a huge thank you for helping me with fabric selection. I am a novice when it comes to historical accuracy and she held my hand through the hold process.

IMG_4917

The skirt fabric also came from Renaissance Fabrics. It is their well priced cotton velveteen and was a dream to work with. Washed beautifully, a fabulous garment weight, and heavy enough that it didn’t need a full lining. I used Truly Victorian’s 1898 Flared Skirt pattern which was borrowed from another fellow volunteer. It eats up fabric (6 frickin’ yards), but was also simple to follow. The error I made was forgetting I’d be corseted when I cut the waistband. My waist corsets down 4 or 5 inches so the waist was much too big. Eventually I’ll re-do it.

The skirt trim was a light bulb idea. I wanted to trim the skirt with something I could sew right into the seam instead of having to hand sew to the velveteen. I ended up using Robert Kaufman’s Mammoth Flannel but on the bias. Then added the same lace as the blouse. So simple. The I added snap on black silk bows as the finishing touch. I just love this skirt so much. It was a joy to wear.

The weekend went by in a flash and just like that the whole program was over. But now I have a few new pieces I’ll get some wear out on my usual weekend tours.

IMG_4926

Happy Lamplight!


Buzzzzzzzz Quilt!

The eagle has landed! The eagle has landed! The quilt I made for my sister was delivered today and I couldn’t be happier with how it turned out and how it was receivedIMG_2366

The fabric is the Sweet as Honey collection by Bonnie Christine for Art Gallery Fabrics I found at Westwood Acres and the grey background is Architextures by Carolyn Friedlander for Robert Kaufman. Gosh it was hard to find a coordinating fabric that would show off the bee fabric. This grey was a good find at my local LQS.

IMG_2365

I knew I wasted a honeycomb look, but as a new quilter I wasn’t sure I could handle a hexagon quilt, so I followed this tutorial from Amanda of Westwood Acres. It was a lot of cutting, but also very fun to put together Everything didn’t quite line up, but I think you can’t tell much.

But the back, the back is my favorite part. Its a hexagon!!!!!

IMG_2368

I probably would have picked a less busy background, but my sister owns two fluffy silly dogs that shed like crazy. I see the flowers as camouflage. And I followed this tutorial from Cluck Cluck Sew to make the backing the binding as well. So so simple and perfect for when you don’t want a binding made from a different fabric. Mine was 2 inches wide instead of 1 inch, so it makes an extra wide border on the front.

For the quilting, I like simple designs, so I followed the zigzags of the grey down the front.

IMG_2371

This was just such a fun surprise. I can’t wait to do it again!