Oh August, you really got the best of me. I had plans for at least two items this month, but it looks like I’ll only finish one. Thank goodness for deadline sewing? I thought I’d have more free time, but instead I got all wrapped up in back to school preparations for both home and work. I had no idea getting Lu though the first two weeks of kindergarten would be so exhausting for me!
My lone August project is The Laneway Dress from Jennifer Lauren Handmade. Back at the end of July, Jennifer put out a call for pattern reviewers. I don’t usually volunteer for such things, but I love her clean and classic vintage vibe. I also sympathized with her problem. Pattern testers are great for making sure your pattern is well drafted and error free, but test versions are not always great for promotional purposes. When looking to purchase a newly released pattern I always look for examples, but I don’t want to see tester versions. Test versions are not using the final product, the one I’m paying good money to purchase. It seems I’m not alone in my desire to see final versions of the pattern before making a purchase. A quick glance in Facebook groups, blogs, and Instagram will give you a sense of how well a pattern works in the hands of other home sewers, but that only works if those patterns get sew up right away.
I volunteered for a selfish reason too. Jennifer recently started including cup sizes up to D in her patterns and updated her drafting. I definitely wanted to see if the drafting changes would work in my favor! When The Laneway Dress came up for review I frantically emailed Jennifer from the terminal in LAX hoping I would be selected as a reviewer. Success!!!
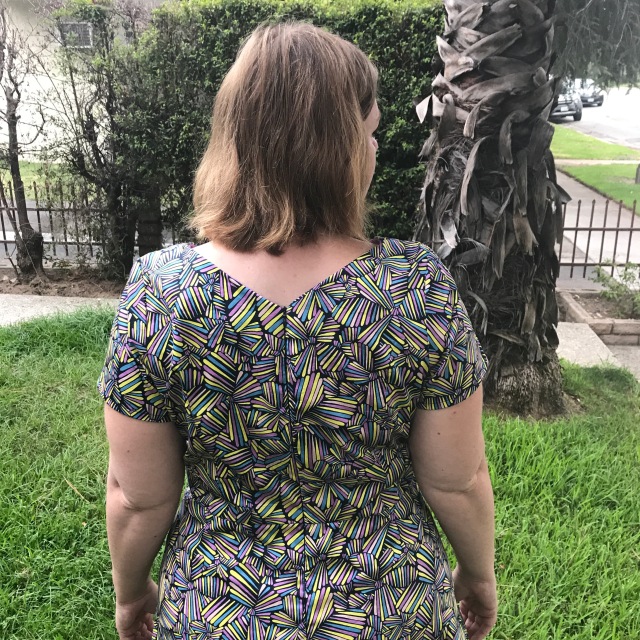
Oh the finished dress is so lovely, but it took a little work to get here. I started with a muslin in size 16D at the bust and 18 for the waist and hip. A couple problems were apparent from the beginning. 1) The shoulders were too wide. 2) I needed more room in the front waist and less room in the back waist. Both of these fit issues are really common for me.
Last time I did a really detailed muslin process I was just making it up using common sense, logic, and internet tutorials. This time I purchased a copy of the popular sewing book, “Fit for Real People“. What I learned is that a lot of my instincts were good.
To address the too wide shoulders I put on the muslin bodice and drew in a line where I wanted the shoulders to hit. Turns out they were 1 inch too wide. With a new armscye the whole bodice sat much better.
The sleeves miraculously fit pretty dang well right out of the envelope. I almost always need to do a bicep adjustment, but this time there was enough ease! The only alteration done to the sleeves was to increase the height of the sleeve cap to fit the new armscye. I have never had sleeves sew in so smoothly. Not a single pucker!
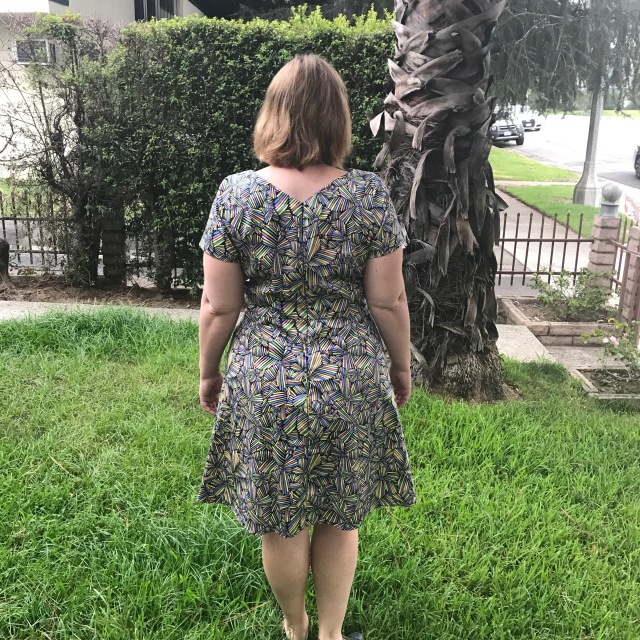
Next I altered the waistline to give me more tummy room. A lot of people make this adjustment at the side seams, but I prefer to alter the darts. I just made the legs of the darts .25 inches wider in the back and .25 inches narrower in the front. The circumference was perfect out of the envelope. I just needed it distributed in a different way. Thankfully I remembered to alter the skirt too by adding .5 inches to the front skirt piece. Technically I should have also removed .5 inches from the back skirt, but I always need extra booty room so I left the back skirt the same width and eased the extra skirt width in at the waist.
After altering the shoulder width and darts there were just a couple tiny fixes to make. 1) I squared the shoulders and 1) I did a slight sway back adjustment.
This probably sounds like a lot of adjustments, but in reality the only major adjustment was the shoulder width. Everything else was just drawing slightly different lines on the pattern pieces.
In full disclosure, Jennifer sent testers the pattern for free, but she asked for complete honesty, so I’m giving it here. Aside from the fit alterations things went really smoothly. The pattern was easy to download and I liked the way it was tiled so I only printed the pages needed for the D cup dress. The biggest gripe I have about taping the pattern pieces is there is no grid of notches to help you match pieces. I found it easy enough to match things on the bodice, but with so much blank space the skirt was a bit more of a challenge. I hope in the future Jennifer will add some sort of feature to ensure better accuracy during the pattern taping process.
The construction was pretty straightforward. I’ve made a lot of dresses so I took a glance at the order and then took off without having to give them another glance. If you’ve made any other basic woven dress, you can make this one too.
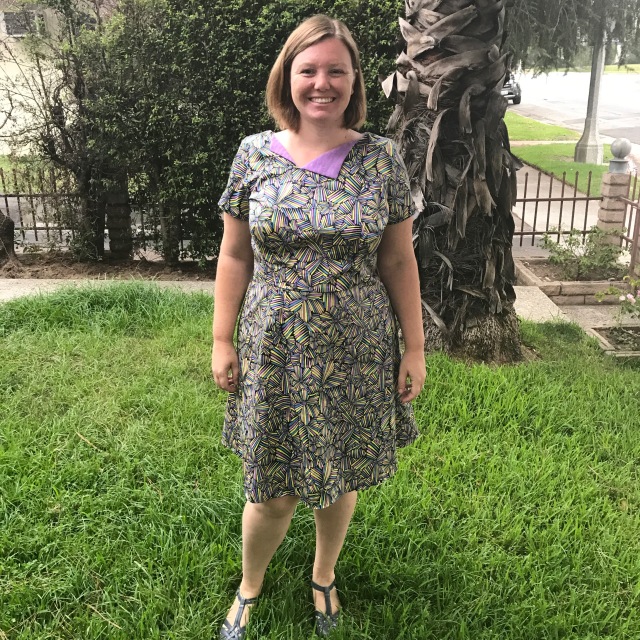
Stylistically I think it is a cute basic dress. I love the three different necklines and it would be easy to adapt another pattern to include this detail or use your sloper. That had been my original plan until Jennifer Lauren’s review announcement. I also really like how the pattern has open ended darts. It is super bust friendly because you don’t have to worry about the darts ending in exactly the correct place.

And oh look at that fabric. I think it might be my favorite part. The print was purchased at The Fabric Store back when Jenny from Cashmerette came to LA for a visit. It is hard to tell in the picture, but the background color is a deep navy, my favorite neutral. I always find myself drawn to darker colors as fall approaches, but it is still rally damn hot here. This fabric is super light though and incredibly similar to a Liberty of London lawn.
My husband thought it was “a lot of print” before I added the contrast facing. The facing fabric also came from The Fabric Store, but was purchase specifically for the Laneway Dress. Lu and I took a side trip to look for fabric on our way to LACMA and after walking the whole store I just could not get this sheer stripe out of my head. The color matched perfectly, but I could not figure out how to interface such a sheer fabric. In the end I flatlined it to a piece of the main print and that method worked really well. Both fabrics are also cotton so laundering should be easy.
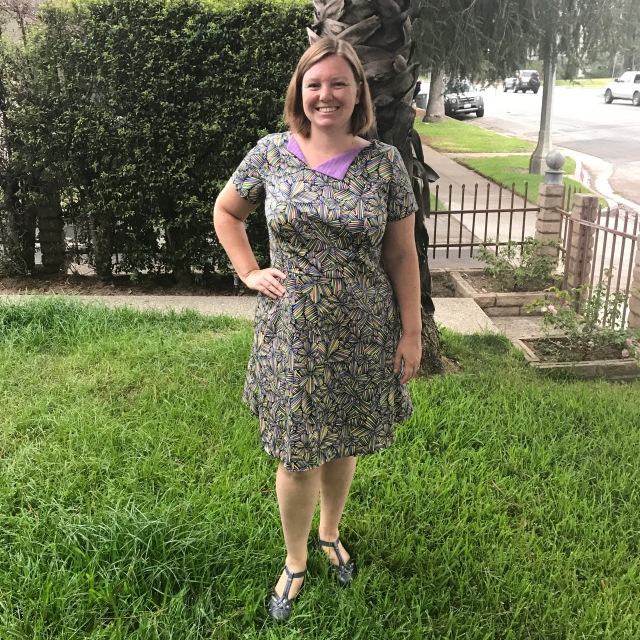
The finished dress fits pretty darn well. Is it perfect? Of course not! But I wore this dress all day to work and the ease and fit suited my lifestyle well. If I’d taken out all the ease and wrinkles the dress would have been too tight for carrying children, buckling car seats, and using a desktop computer all day. I also got multiple compliments on my Laneway and who doesn’t love compliments?!?! Now I’m thinking I should make another. Maybe with a different neck treatment?

This is really cute! I like the turned-back collar, and I think your dress fits really well!
LikeLike
Thank you! The collar is such a nice detail to the pattern.
LikeLike
Very nice! I’ll take a closer look at this pattern when I finish my Washi marathon. 🙂
LikeLike
I liked the Washi too. The Laneway is a little wider though the shoulders in my experience.
LikeLike
Love it Jessica. Looking good.
LikeLike
Thank you Widget!
LikeLike
Your dress looks great! I’ve had my eye on the pattern but hadn’t seen many made up. Thanks for sharing your review.
LikeLike
Thank you for reading Ginger. The pattern is pretty nice if you like the style.
LikeLike
I like it! Good job!
LikeLike
Thank you Mommy!
LikeLike
Pingback: Mourning Dress | alwaysacraftylady